Task 7: User Authentication
Before delving into the technicalities of setting up user authentication, it's crucial to understand the concepts behind it and why it's essential.
What is User Authentication?
User Authentication refers to the process of verifying the identity of a user. It answers the question: "Are you who you say you are?" For web applications, this usually involves a user providing credentials, such as a username and password. Once the system validates these credentials against stored data (e.g., in a database), the user gains access.
For instance, when you log into your email account, you enter your email address and password. The email service checks if these details match the ones they have on file. If they do, you're granted access to your inbox.
What is Authorization?
While authentication verifies identity, Authorization determines what a user can and cannot do. It answers the question: "Do you have permission to perform this action?" Once a user is authenticated, they are granted specific permissions (or roles) which dictate what actions they can take or data they can access.
Taking the email service example further: once logged in (authenticated), you might have the ability to read, send, and delete emails. These are permissions you've been authorized to perform. However, you wouldn't have permission to access someone else's emails, as you're not authorized to do so.
Authentication vs. Authorization: A Simple Analogy
Imagine a secured facility with a security checkpoint at the entrance.
- Authentication: The security guard at the checkpoint verifies your identity by checking your ID card. They want to ensure you are who you claim to be.
- Authorization: Once inside, there are various rooms, some of which are restricted. Whether you can enter a particular room depends on the access badge you've been given. Even though you've been allowed into the facility, you might not have access to every room.
In this analogy, the act of checking the ID card is authentication, while the permissions associated with the access badge represent authorization.
Why is User Authentication Important?
- Security: By ensuring only registered and validated users access an application, you safeguard sensitive data and functionalities.
- Personalization: Authenticated users can receive a personalized experience, as the system recognizes them and can tailor content accordingly.
- Data Integrity: Ensuring only authorized users can modify data helps maintain its accuracy and reliability.
- Regulatory Compliance: Many industries have regulations mandating certain levels of data protection, often requiring robust authentication mechanisms.
In the upcoming steps, we will implement user authentication for our application, ensuring that only registered users can access specific routes and functionalities.
Step 1: Install necessary packages for authentication
In our application, we will be using Passport.js, a popular authentication library that offers various strategies for user authentication. Specifically, we will be using the "local" strategy, which involves using a username and password. Later on, we will also incorporate the JWT strategy, which utilizes JSON Web Tokens.
Installing Passport and its strategies:
Start by installing the necessary packages:
pnpm add @nestjs/passport passport passport-local
Here's a breakdown of what each package does:
@nestjs/passport: A NestJS module that wraps Passport.js, making it easy to integrate into our application.passport: The core Passport.js library.passport-local: A Passport strategy for authenticating with a username and password.
What is Passport.js?
At its core, Passport.js is middleware that integrates with Express.js, the web framework used by Nest.js. It offers a wide range of strategies (over 500) that support authentication using various methods, such as username and password, Facebook, Twitter, and more.
Strategies: Passport uses the concept of strategies to authenticate requests. Strategies range from verifying a username and password, delegated authentication using OAuth (like Facebook Login), or federated authentication using OpenID.
Why use Passport.js?
Passport's sole purpose is to authenticate requests. It does so through a straightforward and modular framework. By decoupling the authentication logic from the application, Passport allows for flexibility in adding as many authentication strategies as required without changing the application logic.
With the necessary packages installed and a foundational understanding of their purpose, we can proceed to set up Passport and implement our authentication strategies.
Please stage and commit changes:
git add .
git commit -m "Install necessary packages for authentication"
Step 2: Set up Passport local strategy for authentication
Introduction to Passport Local Strategy
The local strategy is a way to authenticate users by using a username and password from your application. It's the most common form of authentication where users provide a username (or email) and a password to log in.
1. Create the Local Strategy:
Firstly, we need to set up the local strategy. This strategy requires a verify function which receives the username and password submitted to the application. The function must then verify if the credentials are valid.
To begin, let's create a folder named auth inside the src directory. This will house all our authentication-related files.
Inside the auth folder, create a new file named local.strategy.ts:
mkdir src/auth
touch src/auth/local.strategy.ts
Now, open local.strategy.ts and set up the local strategy:
import { Strategy } from 'passport-local';
import { PassportStrategy } from '@nestjs/passport';
import { Injectable, UnauthorizedException } from '@nestjs/common';
import { AuthService } from './auth.service';

@Injectable()
export class LocalStrategy extends PassportStrategy(Strategy) {
  constructor(private authService: AuthService) {
    super();
  }

  async validate(username: string, password: string): Promise<any> {
    const user = await this.authService.validateUser(username, password);
    if (!user) {
      throw new UnauthorizedException();
    }
    return user;
  }
}
Here's what the code does:
PassportStrategyis a function that returns a new class, which extends from the passport-localStrategy. Then,LocalStrategyextends this dynamically created class.- The
validatemethod is required by all Passport strategies. It attempts to find the user based on theusernameandpassword. If the user exists and the password matches, it returns the user data. Otherwise, it throws anUnauthorizedException.
Note: We reference an AuthService and a method validateUser which we haven't created yet. We'll set that up in the next steps.
Aside: The @Injectable() decorator is used in Nest.js to mark a class as a provider that can be injected into other classes. When a class is decorated with @Injectable(), it can be passed as a dependency to other classes using dependency injection.
💡 Dependency injection is a design pattern that allows for the separation of concerns and promotes code reusability and maintainability. It helps manage the dependencies between different components of an application by allowing them to be provided and injected instead of creating them directly within the component.
2. Create the AuthService:
The AuthService will be responsible for validating the user's credentials. Let's set it up.
Inside the auth folder, create a new file named auth.service.ts:
touch src/auth/auth.service.ts
Add the following code to auth.service.ts:
import { Injectable } from '@nestjs/common';

@Injectable()
export class AuthService {
  async validateUser(username: string, password: string): Promise<any> {
    // For now, let's mock a user. In real scenarios, you'd fetch this from a database.
    const user = {
      id: 1,
      username: 'test',
      password: 'password',
    };

    if (user && user.password === password) {
      delete user.password; // we don't want to send the password to the client!
      return user;
    }
    return null;
  }
}
Here, we're mocking a user with hardcoded credentials. In a real-world application, you'd fetch this data from a database.
3. Update AppModule:
Now, let's import and set up the necessary modules in app.module.ts.
Update app.module.ts:
  import { Module } from '@nestjs/common';
  import { AppController } from './app.controller';
  import { AppService } from './app.service';
  import { ConfigModule, ConfigService } from '@nestjs/config';
  import { validate } from './env.validation';
  import { TypeOrmModule } from '@nestjs/typeorm';
+ import { AuthService } from './auth/auth.service';
+ import { PassportModule } from '@nestjs/passport';
+ import { LocalStrategy } from './auth/local.strategy';

  @Module({
    imports: [
+     PassportModule,
      // ... other imports
    ],
    controllers: [AppController],
-   providers: [AppService],
+   providers: [AppService, AuthService, LocalStrategy],
  })
  export class AppModule {}
We've imported the necessary modules and services and added them to the imports and providers arrays, respectively.
With this, we've set up the local strategy for user authentication using Passport. The next steps will involve creating a User entity and connecting to the database. But for now, this sets up the foundation for our authentication mechanism.
Please stage and commit the changes:
git add .
git commit -m "Set up Passport local strategy for authentication"
Step 3: Create User entity and User service
When building a system that requires user authentication, we typically have a representation of the user in our database. This representation usually includes information like the username, password, email, and other user-specific data.
In TypeORM, this representation is done through entities. An entity represents a table in the database with a set of columns. We'll start by creating a User entity.
1. Create the User Entity:
Inside the src folder, create a new folder named user and inside it, create a file named user.entity.ts:
mkdir src/user
touch src/user/user.entity.ts
Open the user.entity.ts file and define the User entity:
import { Entity, PrimaryGeneratedColumn, Column } from 'typeorm';

@Entity()
export class User {
  @PrimaryGeneratedColumn()
  id: number;

  @Column({ unique: true })
  username: string;

  @Column()
  password: string;

  // You can add more columns as required
}
This defines a basic user with an id, username, and password. The username has a unique constraint to ensure that no two users can have the same username.
Aside: The id attribute in the User entity serves as the primary key for the user table in the database. In a relational database, a primary key is a unique identifier for each row in a table. It ensures that each record in the table can be uniquely identified and serves as a reference point for relationships with other tables. By designating the id attribute as the primary key using the PrimaryGeneratedColumn() decorator, TypeORM automatically generates a unique value for the id column whenever a new user is created. This allows for efficient data retrieval, updates, and deletion operations based on the primary key. Having a primary key is essential for maintaining data integrity, ensuring data uniqueness, and facilitating efficient database operations.
Aside: We could have used username as the primary key for the user table. While username is unique and could technically serve as a primary key, an auto-generated ID provides advantages in terms of performance, maintainability, and flexibility that make it a better choice for the primary key in most cases. An auto-generated ID is a surrogate key, which means it is not derived from application data. Surrogate keys are preferred as primary keys because they are not subject to change. Usernames, although unique, might need to be changeable if the user decides to update their login credentials. This is problematic for primary keys, which should be immutable to maintain referential integrity. An auto-generated ID also offers better performance due to smaller, faster-to-index integer fields and maintains data integrity more effectively across relational databases. This approach enhances confidentiality by limiting the exposure of potentially sensitive information and provides consistency and flexibility in database schema design, making it the preferred method for primary key selection.
2. Create the User Service:
The User Service will handle the logic related to user operations, like creating a new user or finding a user by their username.
Inside the user folder, create a new file named user.service.ts:
touch src/user/user.service.ts
Open the user.service.ts file and copy the following code to it:
import { Injectable } from '@nestjs/common';
import { InjectRepository } from '@nestjs/typeorm';
import { Repository } from 'typeorm';
import { User } from './user.entity';

@Injectable()
export class UserService {
  constructor(
    @InjectRepository(User)
    private userRepository: Repository<User>,
  ) {}

  async findOne(username: string): Promise<User | undefined> {
    return this.userRepository.findOneBy({ username });
  }

  // You can add more methods as required, like createUser, updateUser, etc.
}
This service has a findOne method that fetches a user based on their username.
Notice the following elements in the code:
Repository<User>: This is a TypeORM repository for theUserentity. It provides various methods to interact with the database using the entity, such asfindOneBy, etc.@InjectRepository(User): This decorator allows you to inject a repository for theUserentity. It's a special function provided by Nest.js which wraps the originalgetRepositoryfunction from TypeORM. It abstracts the process of creating a repository for an entity and makes it injectable as a provider.
TypeORM's Repository Pattern
In software design, the Repository Pattern is a way to abstract the logic for accessing data stored in a database. It provides a clean separation between the application's business logic and the actual data access. This results in a more maintainable and scalable codebase since changes to the database or its structure won't directly impact other parts of the application.
In essence, a repository:
- Acts as an in-memory domain object collection.
- Handles the task of persisting domain objects to the database.
- Queries the database and maps the result to domain objects.
Benefits of the Repository Pattern:
- Decoupling: It decouples the application from persistence frameworks, databases, or database schema.
- Testability: By abstracting the data access behind a repository interface, you can easily mock this interface and test your business logic without having to involve the database.
- Centralization: All data access code for a particular entity is located in a single place (its repository). This centralization promotes code reuse and makes the data access layers easier to manage and maintain.
- Flexibility: If you need to change the database or ORM, you only need to update the repository implementation, not the business logic or application layer that uses it.
TypeORM's Take on the Repository Pattern
In TypeORM, the Repository is a crucial part of the ORM. It provides methods that assist you with creating, reading, updating, and deleting records in your database. By working with Repositories, you're working at a higher level of abstraction, focusing on your entities and business logic instead of the specifics of database access.
3. Update AppModule:
To make use of our new entity and service, we need to update app.module.ts.
First, import the necessary modules and services:
import { User } from './user/user.entity';
import { UserService } from './user/user.service';
Then, update the imports and providers arrays in AppModule:
  @Module({
    imports: [
      // ... other imports
+     TypeOrmModule.forFeature([User]),
    ],
    controllers: [AppController],
-   providers: [AppService, AuthService, LocalStrategy],
+   providers: [AppService, AuthService, LocalStrategy, UserService],
  })
  export class AppModule {}
With the TypeOrmModule.forFeature([User]), we're telling Nest.js to create a repository for the User entity, which can be injected into our service.
Now that we have set up the User entity and the User service, we are equipped to handle user-related operations in our application. In the next step, we will add a function to the User service to create users.
Please stage and commit the changes:
git add .
git commit -m "Create User entity and User service"
Step 4: User Creation, DTOs, and Password Hashing
In any application that involves user authentication, a fundamental feature is the ability to register or create users. As we proceed to set up this functionality, we'll encounter some best practices and critical concerns. Let's dive in:
Creating Users:
Our primary goal is to allow users to register. To achieve this, we can have a method in our UserService that accepts a user object and stores it in the database.
Let's start with a naive approach:
async createUser(user: User): Promise<User> {
  return this.userRepository.save(user);
}
While this approach works, it has a few problems:
- We are directly saving whatever we receive. This lacks validation.
- We are directly storing the password, which is a security risk.
Introduction to DTOs:
The first issue can be resolved using Data Transfer Objects (DTOs).
In Nest.js, a DTO is an object that defines how the data will be sent over the network. DTOs can help in two major ways:
- Validation: By defining the shape of the data we expect, we can ensure that only valid data is processed by our application.
- Documentation: DTOs serve as a form of documentation. They make it clear what kind of data is expected, making the API easier to use for other developers.
Let's define a DTO for user creation. Inside the user folder, create a file named create-user.dto.ts:
import { IsString, MinLength, MaxLength } from 'class-validator';

export class CreateUserDTO {
  @IsString()
  @MinLength(4, { message: 'Username is too short' })
  @MaxLength(20, { message: 'Username is too long' })
  username: string;

  @IsString()
  @MinLength(8, { message: 'Password is too short' })
  password: string;
}
Note that we have used the class-validator library, along with class-transformer and the Nest.js ConfigModule, to validate the environment variable. This library provides various annotations that can be used to validate the properties of a class. Here is a brief explanation of some of the annotations used in the code:
@IsString(): Validates that the value is a string.@MinLength(): Validates that the string has a minimum length specified in the parameter.@MaxLength(): Validates that the string has a maximum length specified in the parameter.
These annotations help ensure that the username and password properties of the CreateUserDTO class meet the specified validation requirements.
We can now refactor our createUser method to use this DTO.
async createUser(userDto: CreateUserDTO): Promise<User> {
  const user = new User();
  user.username = userDto.username;
  user.password = userDto.password;
  return this.userRepository.save(user);
}
Make sure to import CreateUserDTO in user.service.ts:
import { CreateUserDTO } from './create-user.dto';
Password Hashing:
Storing passwords directly is a significant security concern. If an attacker ever gains access to our database, they can see and misuse these passwords. Hence, it's standard practice to store a hashed version of the password.
In the context of user authentication, hashing is a process of converting a password into a fixed-length string of characters using a mathematical algorithm. The result of the hashing process is called a password hash.
Hashing is used for security reasons. When a user registers or sets up a password, the password is hashed and stored in the database instead of storing the actual password. This way, if the database is ever compromised, the attacker cannot retrieve the original password from the hash.
When a user attempts to log in, the entered password is hashed using the same algorithm and compared to the stored hash. If the hashes match, the password is considered valid. However, it is important to note that the original password cannot be derived from the hash, making it a one-way process.
By using password hashing, even if someone gains access to the hashed passwords, they cannot reverse-engineer the original passwords. This adds an additional layer of security to protect user credentials.
For this purpose, we'll use the bcrypt library:
-
Install bcrypt:
pnpm add bcryptAdd its type definitions as well:
pnpm i --save-dev @types/bcryptThe
bcryptlibrary is commonly used for password hashing in applications. It provides an easy and secure way to hash passwords. -
Import the library at the top of the
user.service.tsimport * as bcrypt from 'bcrypt'; -
Hash the Password before Storing:
Modify the
createUsermethod in theUserServiceto hash the password before storing:async createUser(userDto: CreateUserDTO): Promise<User> { const user = new User(); user.username = userDto.username; user.password = await bcrypt.hash(userDto.password, 10); return this.userRepository.save(user); }When using
bcrypt.hash(userDto.password, 10), the second argument (10) represents the cost factor or work factor. This value determines the amount of time and resources required to compute the hash. A higher cost factor results in a more secure hash but also increases the time required to generate the hash. The recommended value is typically between 10 and 12, striking a balance between security and performance.By using a higher cost factor, it becomes computationally expensive for attackers to brute-force or guess the original password from the hashed value. This helps protect user passwords even if the hashed values are compromised.
Please stage and commit the changes:
git add .
git commit -m "User Creation, DTOs, and Password Hashing"
Step 5: Refining the AuthService
Our AuthService should be capable of validating a user based on their username and password. To achieve this, we need to integrate the UserService with the AuthService and utilize the bcrypt library to compare the hashed password.
-
Inject the
UserService:Start by injecting the
UserServiceinto theAuthService.constructor(private readonly userService: UserService) {}Make sure to import
UserServiceat the top of the file:import { UserService } from 'src/user/user.service'; -
Validate User:
Update the
validateUserfunction to use theUserServiceandbcrypt:async validateUser(username: string, password: string): Promise<any> { const user = await this.userService.findOne(username); if (user) { const isMatch = await bcrypt.compare(password, user.password); if (isMatch) { delete user.password; // Not even the hash password should be exposed! return user; } } return null; }Here's what's happening in the
validateUsermethod:- We fetch the user based on the username using the
findOnemethod fromUserService. - We then use
bcrypt.compareto check if the given password, once hashed, matches the stored hash for that user. - If both conditions are satisfied, we return the user object (excluding the password). Otherwise, we return
null.
Don't forget to import
bcryptat the top of the file:import * as bcrypt from 'bcrypt'; - We fetch the user based on the username using the
Here is the completed code:
import { Injectable } from '@nestjs/common';
import { UserService } from 'src/user/user.service';
import * as bcrypt from 'bcrypt';
@Injectable()
export class AuthService {
constructor(private readonly userService: UserService) {}
async validateUser(username: string, password: string): Promise<any> {
  const user = await this.userService.findOne(username);
  if (user) {
    const isMatch = await bcrypt.compare(password, user.password);
    if (isMatch) {
      delete user.password; // Not even the hash password should be exposed!
      return user;
    }
  }
  return null;
}
}
Now, our AuthService is equipped to validate a user based on their credentials. This functionality will be crucial when we create the User Controller, especially for the login route.
Remember, this validation method is the heart of our local authentication strategy. When a user tries to log in, this method will be used to determine if the provided credentials are valid.
Please stage and commit the changes:
git add .
git commit -m "Refining the AuthService"
Step 6: Create the User Controller
Introduction to Controllers in Nest.js:
Controllers in Nest.js are fundamental components that handle incoming HTTP requests and return responses to the client. They can be thought of as the gateways to your application, directing traffic and ensuring that requests are processed correctly.
Setting up the User Controller:
-
Create the User Controller:
Create a new file named
user.controller.tsinside theuserdirectory:touch src/user/user.controller.ts -
Implement Registration Endpoint:
Now, let's define our controller within the
user.controller.ts:import { Controller, Post, Body } from '@nestjs/common'; import { UserService } from './user.service'; import { CreateUserDTO } from './create-user.dto'; @Controller('users') export class UserController { constructor(private readonly userService: UserService) {} @Post('register') async register(@Body() userDto: CreateUserDTO): Promise<UserResponseDTO> { const user = await this.userService.createUser(userDto); delete user.password; return user; } }Explanation:
@Controller('users'): This decorator marks the class as a controller and associates it with the specified route, in this case,users. This means that any route defined within this controller will be prefixed with/users.@Post('register'): This decorator marks theregistermethod to handle POST requests made to the/users/registerendpoint.@Body() userDto: CreateUserDTO: The@Body()decorator extracts the entire request body. The typeCreateUserDTOensures that the incoming request body matches our DTO's shape, and Nest.js will validate this before the controller method is even invoked.- The returned user data from the
createUsermethod contains the hashed password. To avoid sending it back in the response, we delete that property. - The
registeroperation returnsPromise<UserResponseDTO>. We haven’t defineUserResponseDTOyet!
Let's define the
UserResponseDTO:-
Creating the
UserResponseDTO:Inside the
userdirectory, create a new file nameduser-response.dto.ts:touch src/user/user-response.dto.tsIn this file, define the DTO:
export class UserResponseDTO {
  id: number;
  username: string;
}
This DTO will return the user's
idandusernamebut will exclude the password.
By using DTOs, not only do we ensure that we send back a consistent and expected response shape, but we also avoid accidentally leaking sensitive data.
-
Implement Login Endpoint:
Continuing in the same
user.controller.ts:import { Controller, Post, Body, UnauthorizedException } from '@nestjs/common'; import { UserService } from './user.service'; import { CreateUserDTO } from './create-user.dto'; import { AuthService } from 'src/auth/auth.service'; import { UserResponseDTO } from './user-response.dto'; @Controller('users') export class UserController { constructor( private readonly userService: UserService, private readonly authService: AuthService, ) {} @Post('login') async login(@Body() userDto: CreateUserDTO): Promise<UserResponseDTO> { const user = await this.authService.validateUser( userDto.username, userDto.password, ); if (!user) { throw new UnauthorizedException('Invalid credentials'); } return user; } // register method is same as before }Here, we've added a new endpoint to handle user login. We attempt to validate the user using the provided credentials. If the validation fails, we throw an
UnauthorizedException. Otherwise, we return the user data.
Aside: The /users/register and /users/login endpoints are both POST requests. When registering a user, a new resource (i.e., a user) is created, so a POST request is appropriate. For the login, we still use a POST request even though a new resource is not created. This is because the user provides sensitive login credentials, such as their username and password, which are more secure in the request body compared to being in the URL or query parameters. If you use HTTPS, the secure and encrypted network protocol for data exchange over the internet, the request body will be encrypted, providing an additional layer of security. Additionally, in some cases, a "user session" may be created on the server to track user activity upon login. In such a scenario, a POST request to /users/login would create the user session resource.
Now, our user controller provides endpoints for user registration and login. In the next steps, we'll test our endpoints using Postman.
Please stage and commit the changes:
git add .
git commit -m "Create the User Controller"
Step 7: Test authentication using Postman
1. Add UserController to AppModule
Before testing, let's ensure our application recognizes the UserController. In the app.module.ts file, import the UserController and add it to the controllers array.
// ...other imports
import { UserController } from './user/user.controller';

@Module({
  // ...no changes to the imports array
  controllers: [AppController, UserController],
  // ...no changes to the providers array
})
export class AppModule {}
2. Start the Application
Ensure your application is running:
pnpm run start:dev
3. Set Up Postman
Postman is a popular tool for testing APIs. If you haven't already, download and install Postman.
Try to access the backend (local) server via Postman:
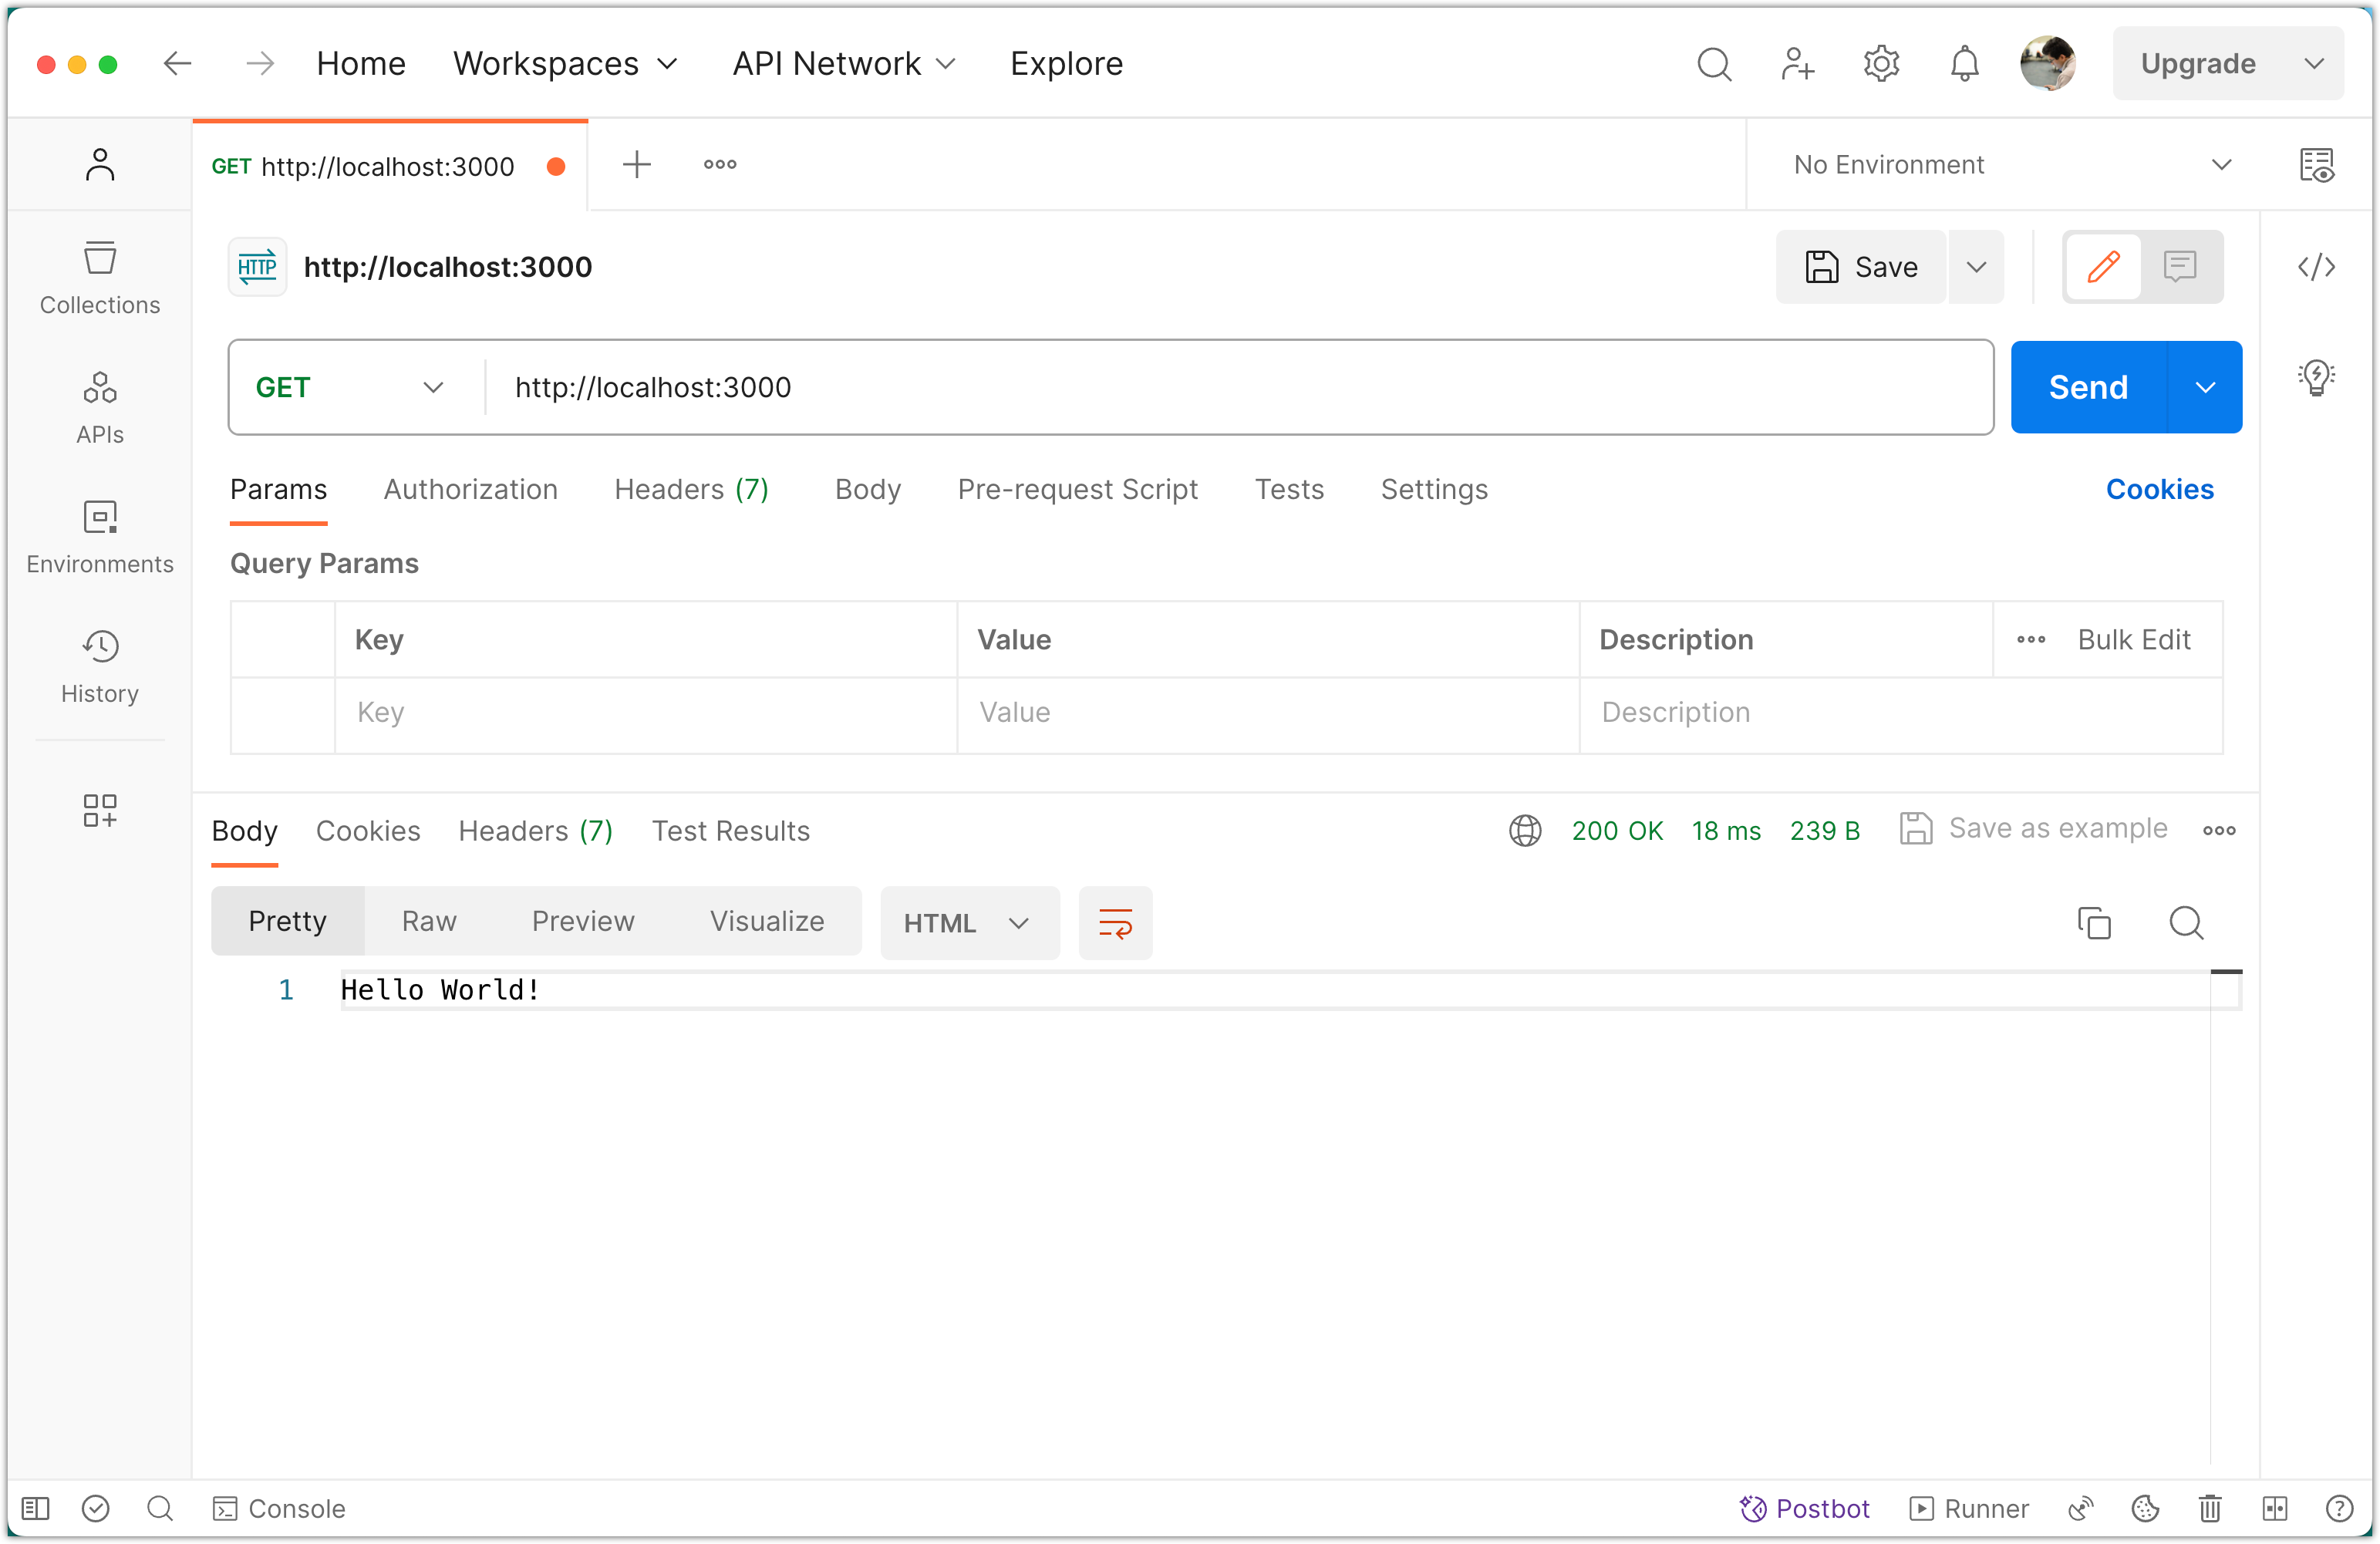
4. Test User Registration
-
Create a new request in Postman
-
Set the request type to
POST. -
Enter the endpoint URL:
http://localhost:3000/users/register. -
Go to the Body tab, choose
rawand selectJSON (application/json)from the dropdown and enter the following JSON:{ "username": "testuser", "password": "testpassword" } -
Click Send.
You should receive a response with the user's id and username. Note that the password is not returned, as expected.
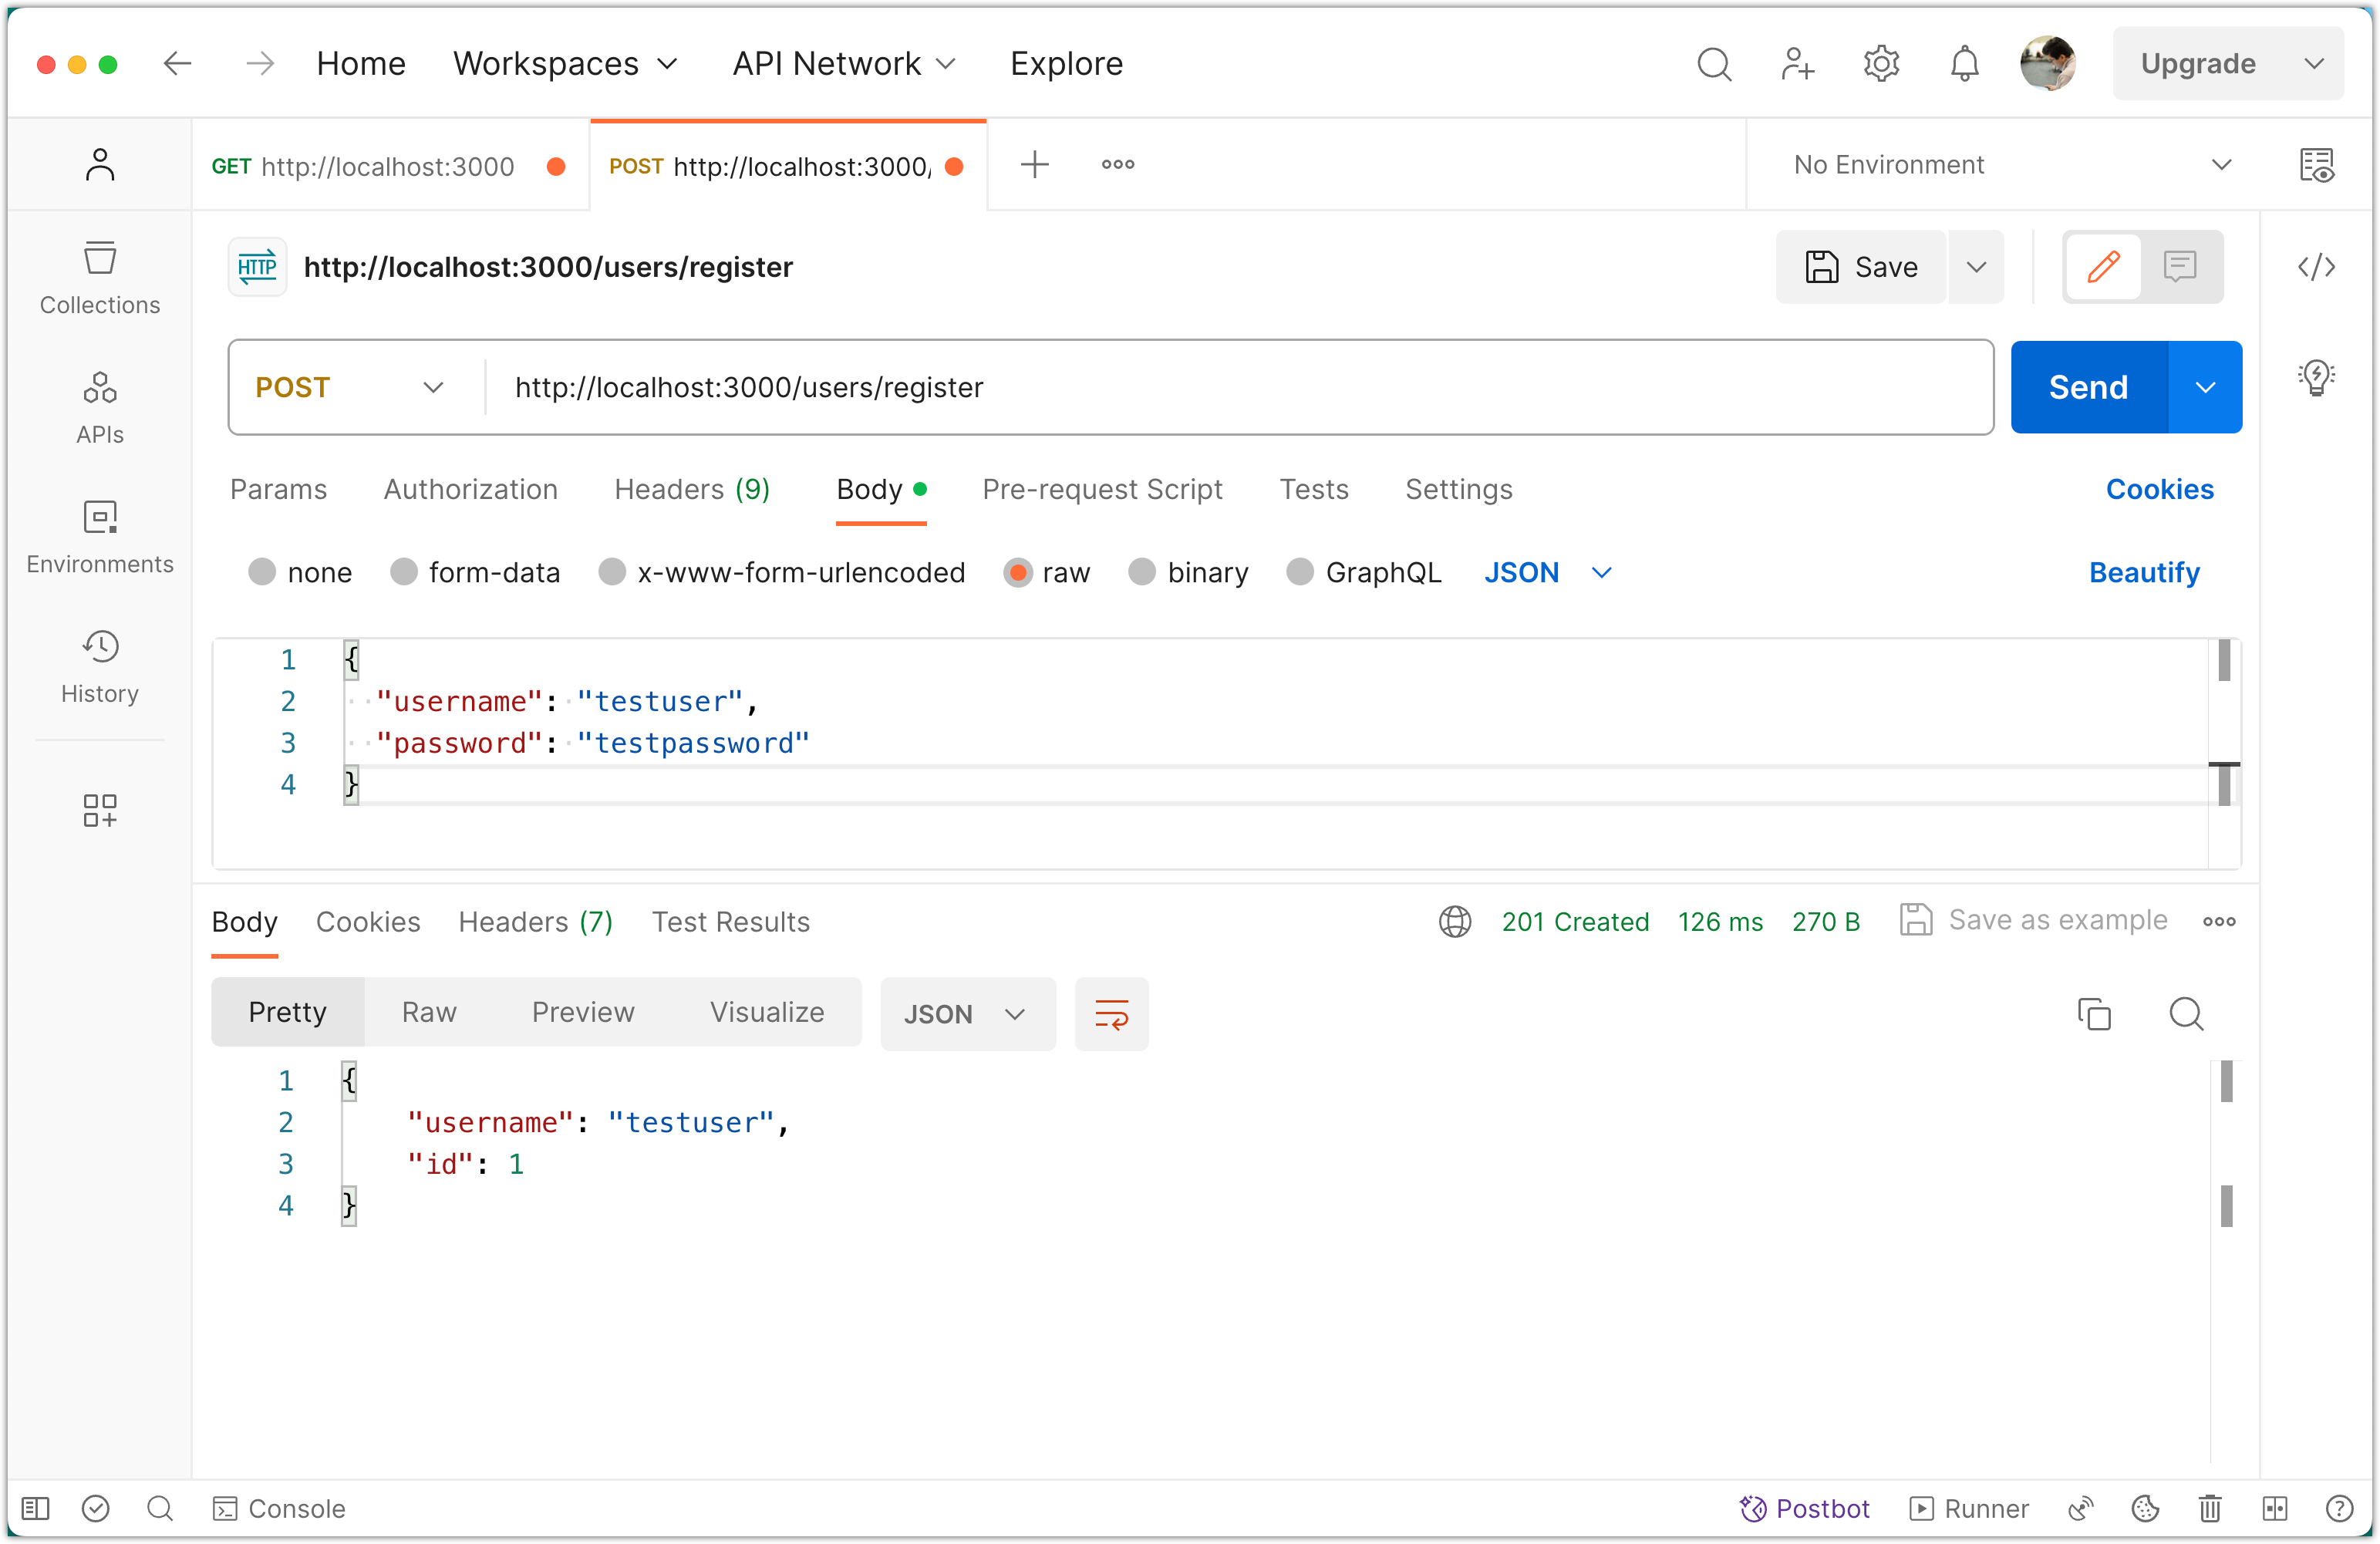
A new user with given username and hashed password is created and stored in the database:

5. Test User Login
-
Create a new request in Postman.
-
Set the request type to
POST. -
Enter the endpoint URL:
http://localhost:3000/users/login. -
Go to the Body tab, choose
raw, and selectJSON (application/json)from the dropdown and enter the following JSON:{ "username": "testuser", "password": "testpassword" } -
Click Send.
Again, you should receive a response with the user's id and username.

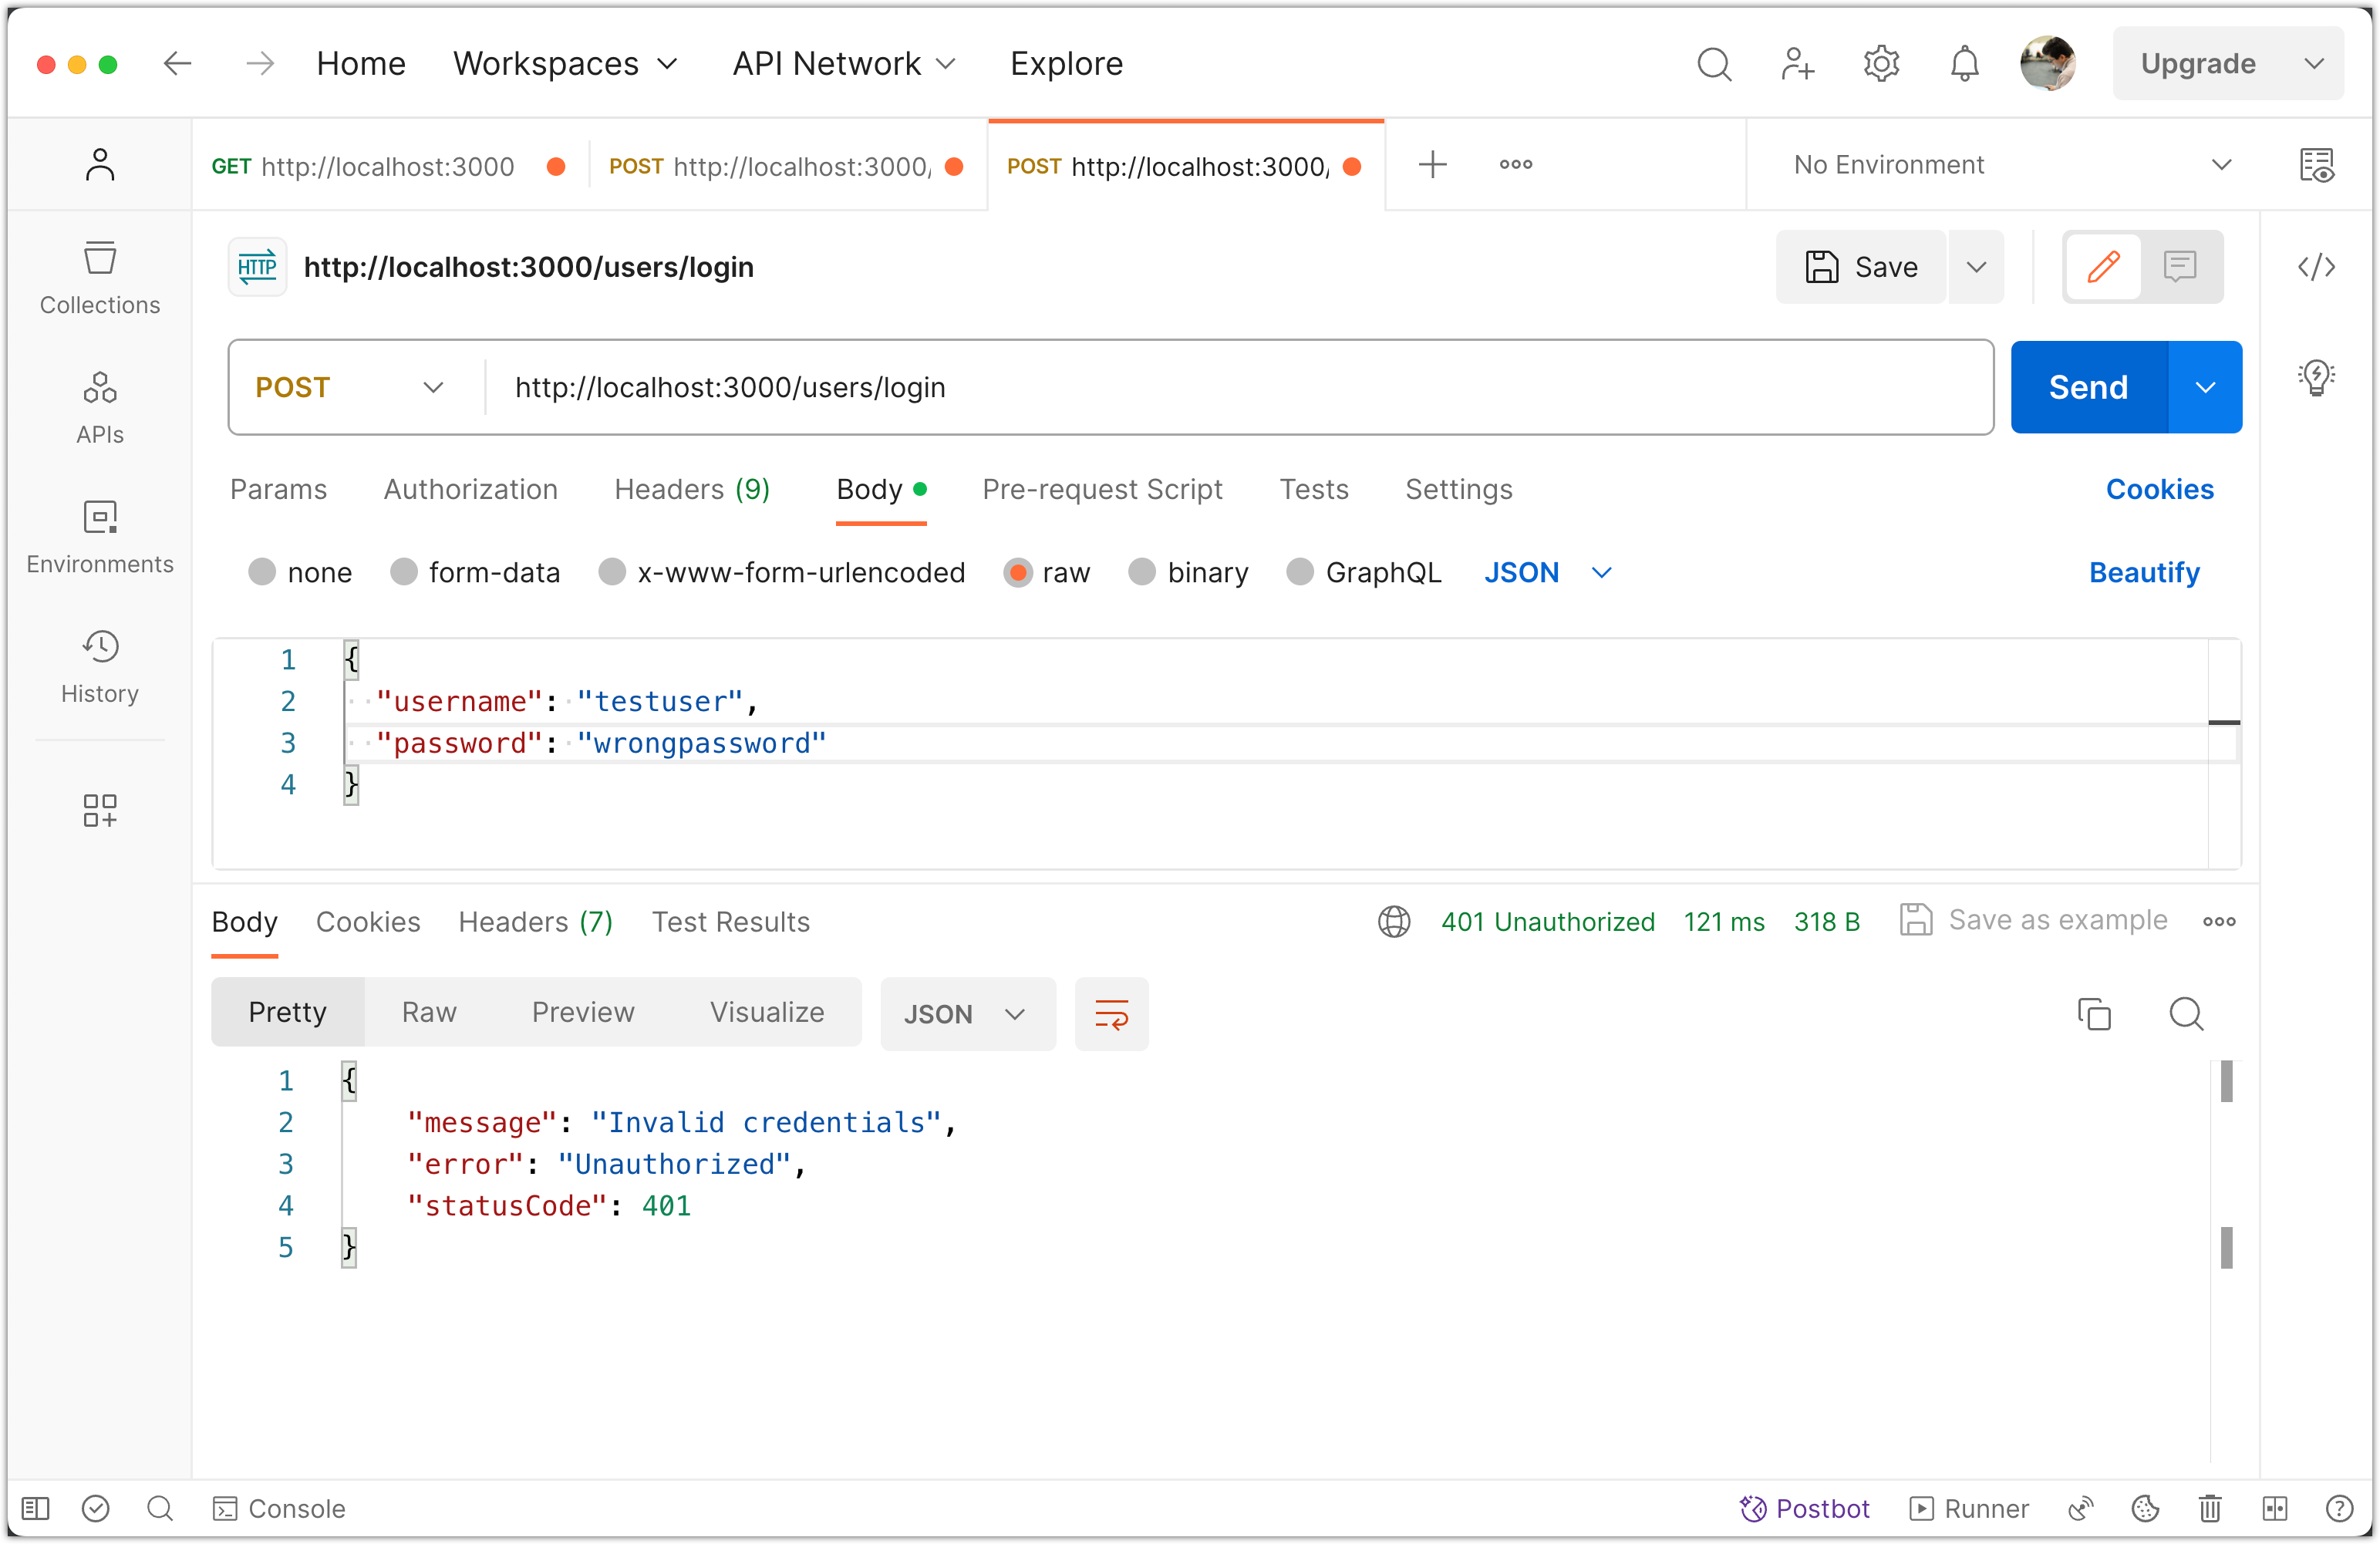
6. Test Error Scenarios
Incorrect Password:
- For the same login request, change the password to something incorrect.
- Click Send.
You should receive an "Invalid credentials" error.
Non-Existent User:
- Change the username to a non-existent one.
- Click Send.
Again, you should receive an "Invalid credentials" error.

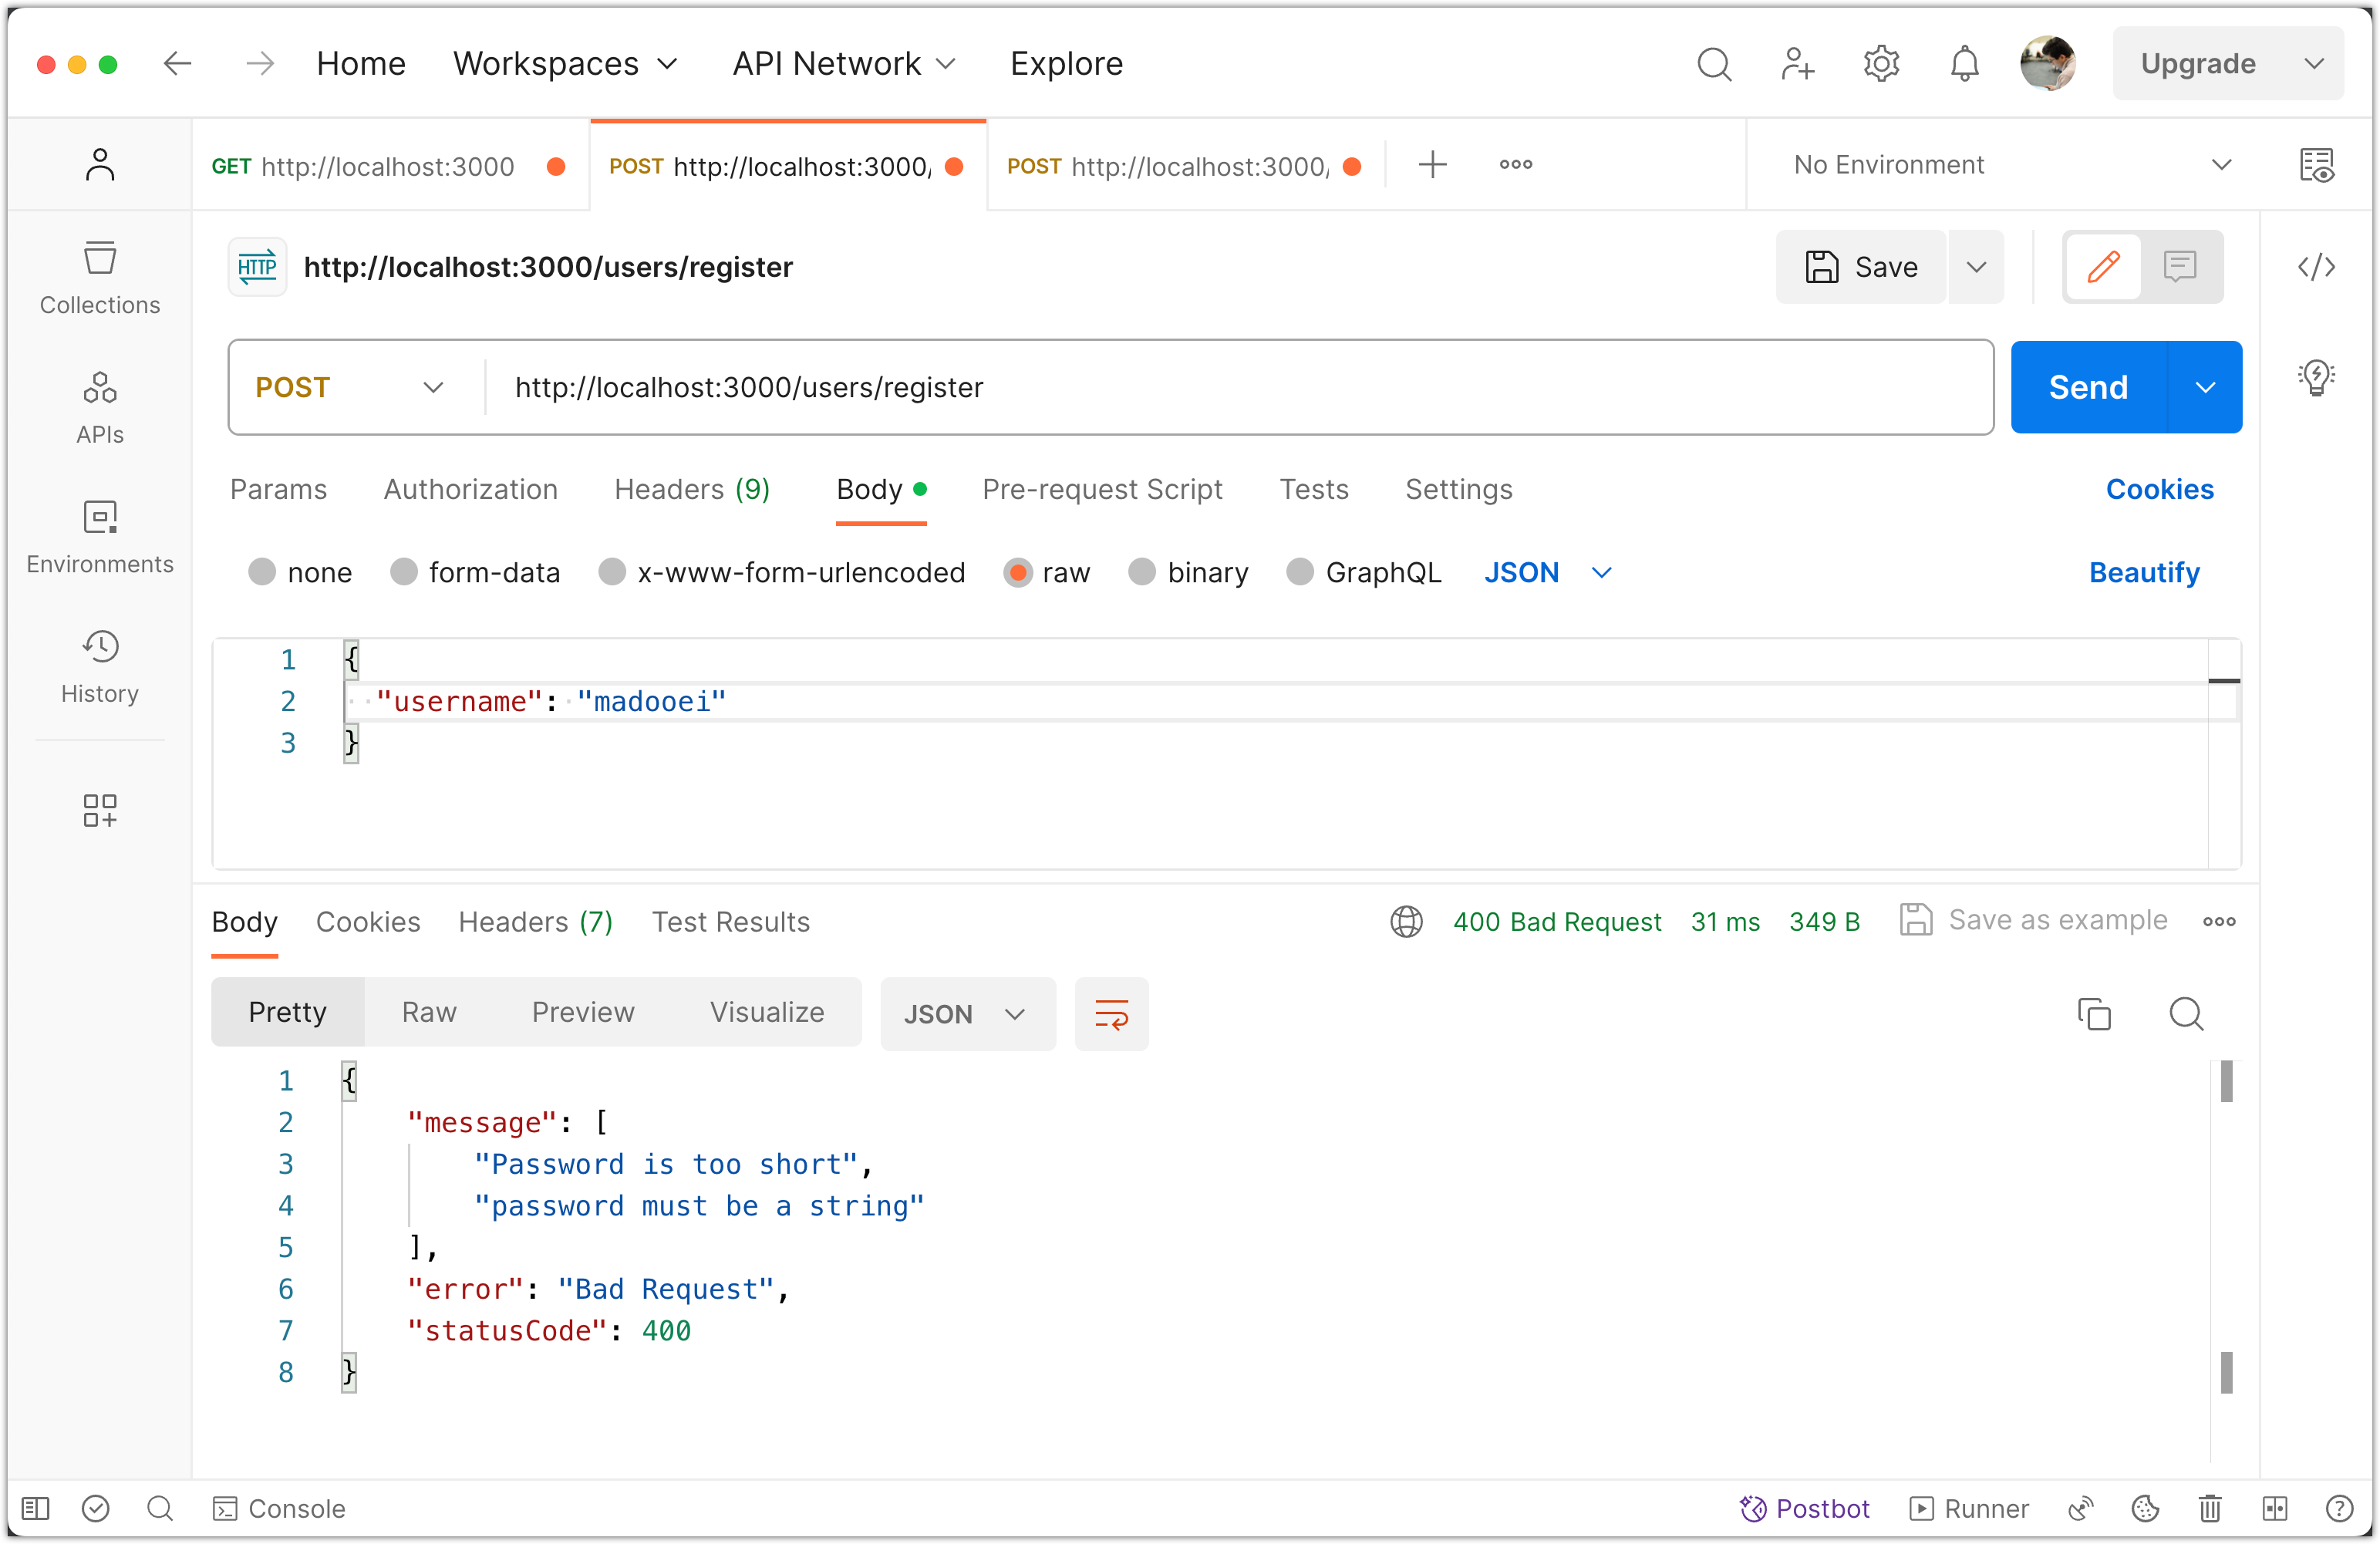
Incomplete Registration Data:
- Switch to the registration endpoint (
http://localhost:3000/users/register). - Remove the
passwordfield from the JSON body. - Click Send.
You should receive a validation error indicating the missing field but you will get an internal server error instead!
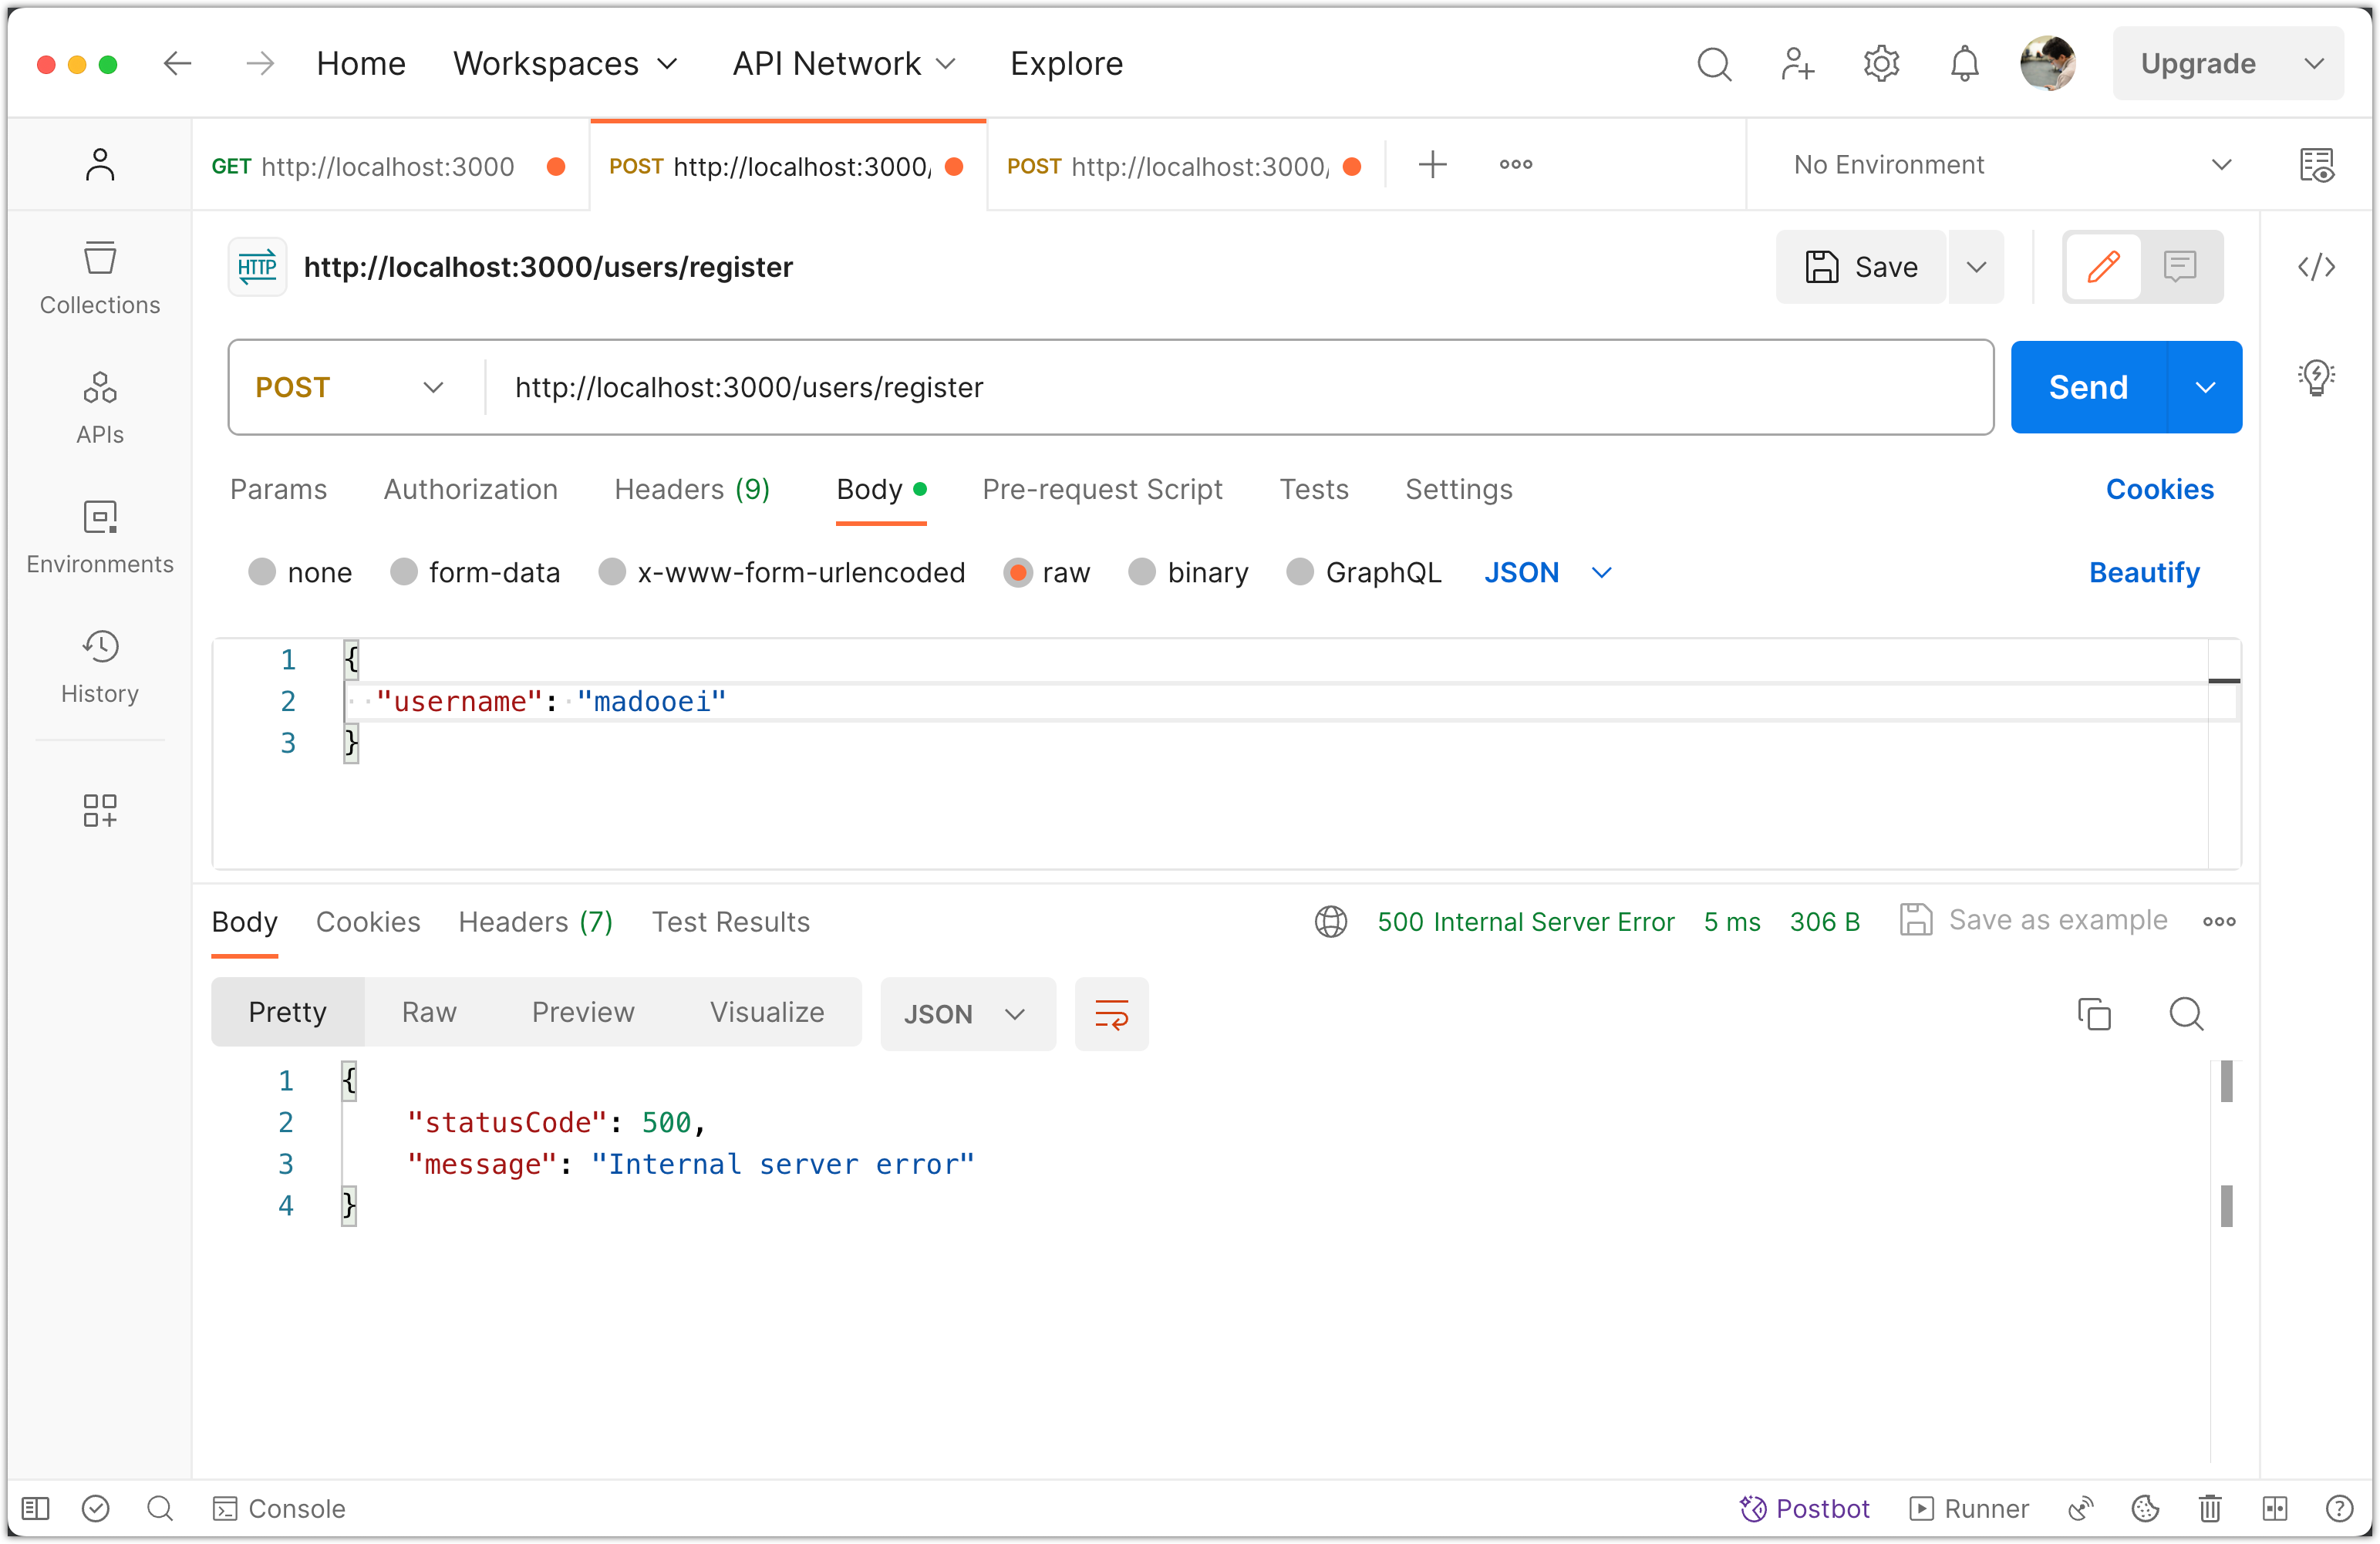
If you look at the console logs, you will notice the bcrypt.hash was called without a password!
The issue stems from the fact that while we've applied validation decorators to the DTO, the validation itself isn't actively running on the DTO when it's being processed by NestJS.
To make NestJS validate the incoming request data against your DTOs, you need to use the ValidationPipe. Here's how you can enable it: In your main.ts, you should set up a global pipe:
import { NestFactory } from '@nestjs/core';
import { AppModule } from './app.module';
import { ValidationPipe } from '@nestjs/common'; // <-- Add this line

async function bootstrap() {
  const app = await NestFactory.create(AppModule);
  app.useGlobalPipes(new ValidationPipe()); // <-- Add this line
  await app.listen(3000);
}
bootstrap();
By using app.useGlobalPipes(new ValidationPipe());, you're telling Nest to globally validate the data being passed into your route handlers against any attached DTOs.
With the above setup, if validation fails, Nest will automatically throw an exception, which will be transformed into an appropriate HTTP response. In this case, you should get a 400 Bad Request response with a detailed validation error message when a field fails validation, rather than the server error you're currently seeing.
After making these changes, try sending the incomplete registration data again with Postman. You should receive a 400 Bad Request response indicating which field failed validation.
Remember, adding the validation pipe ensures that the route handler (in this case, the createUser method in UserService) will only be called if the validation is successful. If the data doesn't match the DTO, the method won't execute, which will prevent the error you saw from occurring.
Please stage and commit the changes:
git add .
git commit -m "Test authentication using Postman"
Step 8: Implement JWT authentication
In this step, we will update our authentication strategy to incorporate the JWT strategy, which utilizes JSON Web Tokens.
What is JSON Web Tokens (JWT)?
JWT is a compact, URL-safe token format used for compactly transmitting information between parties as a JSON object. This information can be verified and trusted because it is digitally signed. JWTs can be signed using a secret (with the HMAC algorithm) or a public/private key pair using RSA or ECDSA. In the context of authentication, once the user logs in, the server can return a JWT to the client, which then sends this JWT with its requests to prove its identity.
How is JWT used in authentication?
Here's how JWT is used in authentication:
- User Authentication: When a user logs in with their credentials, the server verifies the credentials and generates a JWT.
- JWT Generation: The server generates a JWT containing user-specific information, such as the user's ID or username, along with a secret key known only to the server.
- JWT Transmission: The server sends the JWT to the client, typically as a response to a successful login request.
- Client Storage: The client stores the JWT, usually in local storage or a cookie, to maintain the user's authentication state.
- Authentication: For subsequent requests to perform an action on a protected resource, the client includes the JWT in the request header, typically as a bearer token.
- JWT Verification: The server receives the request and verifies the authenticity of the JWT, ensuring that it has not been tampered with and was issued by a trusted source.
- User Authorization: If the JWT is valid, the server extracts the user-specific information from the JWT and uses it to authorize the user to access the requested resource.
- Response: The server processes the request and sends the appropriate response back to the client.
By using JWT for authentication, the server can securely authenticate and authorize users without the need for session management or storing user credentials on the server. JWTs are self-contained and can carry user-specific information, reducing the need to query the database on every request.
Please note that this is a simplified explanation of how JWT is used in authentication, and there are variations and additional security considerations depending on the specific implementation and requirements of the application.
Why use JWT for authentication?
JWT provides:
- Statelessness: The server does not need to keep user authentication data between requests. This means our application can scale without depending on a single centralized authentication server.
- Decoupling: The server that generates the JWT does not need to be the one that authenticates requests. This is useful for microservice architectures or for separating authentication from the application.
- Performance: JWT avoids querying the database more than once after a user is logged in.
Installing Passport and its strategies:
Start by installing the necessary packages:
pnpm add @nestjs/jwt passport-jwt jsonwebtoken
Here's a breakdown of what each package does:
@nestjs/jwt: A NestJS module for working with JSON Web Tokens.passport-jwt: A Passport strategy for authenticating using a JSON Web Token.jsonwebtoken: A library to work with JSON Web Tokens (JWT), used for signing and verifying tokens.
Make sure to also install the type definitions for passposrt-jwt
pnpm add -D @types/passport-jwt
With the necessary packages installed and a foundational understanding of their purpose, we can proceed to implement JWT authentication.
Update Environment Variables
Add these variables to the .env file:
JWT_SECRET=your-secret-key-here
JWT_EXPIRATION=60s
Replace the your-secret-key-here with a strong and secure passphrase that is kept confidential, similar to what you would choose for a password.
The JWT secret is a secret key used to sign and verify it. The secret is used to ensure the integrity of the token and to verify that it has not been tampered with.
The JWT expiration is the duration of time for which the token is valid. After the expiration time has passed, the token is considered invalid and cannot be used for authentication. It helps to enhance security by ensuring that tokens have a limited lifespan and need to be periodically refreshed.
Now update the EnvironmentVariables class in the env.validation.ts file by adding these class properties:
@IsString()
@MinLength(8, { message: 'JWT secret is too short' })
JWT_SECRET: string;

@IsString()
JWT_EXPIRATION: string;
Set Up JWT Module
You need to import and configure the JwtModule in your AppModule. You will also have to set a secret key and token expiration time.
import { JwtModule } from '@nestjs/jwt';

@Module({
  imports: [
    // ... other imports
    JwtModule.registerAsync({
      imports: [ConfigModule],
      useFactory: async (configService: ConfigService) => ({
        secret: configService.get<string>('JWT_SECRET'),
        signOptions: {
          expiresIn: configService.get<string>('JWT_EXPIRATION'),
        },
      }),
      inject: [ConfigService],
    }),
  ],
  // ... controllers, providers
})
export class AppModule {}
Create JWT Strategy
Create a new file named jwt.strategy.ts within your auth directory. This strategy will handle the logic for validating the JWT.
import { Injectable } from '@nestjs/common';
import { ConfigService } from '@nestjs/config';
import { PassportStrategy } from '@nestjs/passport';
import { ExtractJwt, Strategy } from 'passport-jwt';

@Injectable()
export class JwtStrategy extends PassportStrategy(Strategy) {
  constructor(private configService: ConfigService) {
    super({
      jwtFromRequest: ExtractJwt.fromAuthHeaderAsBearerToken(),
      ignoreExpiration: false,
      secretOrKey: configService.get<string>('JWT_SECRET'),
    });
  }

  async validate(payload: any) {
    return { userId: payload.sub, username: payload.username };
  }
}
The JwtStrategy class is responsible for validating JWT during the authentication process. It extends the PassportStrategy class from the @nestjs/passport package and uses the Strategy class from the passport-jwt package.
In the constructor, the JwtStrategy class receives an instance of the ConfigService class, which allows access to the application's configuration values. It also configures the options for the Strategy class, including the extraction of the JWT from the request's Authorization header using the fromAuthHeaderAsBearerToken() method. We will talk about this at some length in the future tasks.
The validate method is called by Passport once the JWT has been successfully validated. It receives the payload contained within the JWT and returns an object with the user ID and username extracted from the payload.
By implementing the JwtStrategy, we can use it as a middleware in our authentication process to validate and verify JWT tokens.
Implement Token Creation in AuthService
Modify your AuthService to generate a JWT when the user logs in. You'll need to inject JwtService and use it to sign the payload.
import { Injectable } from '@nestjs/common';
import { UserService } from 'src/user/user.service';
import * as bcrypt from 'bcrypt';
import { JwtService } from '@nestjs/jwt';
import { UserResponseDTO } from 'src/user/user-response.dto';

@Injectable()
export class AuthService {
  constructor(
    private readonly userService: UserService,
    private readonly jwtService: JwtService,
  ) {}

  async validateUser(
    username: string,
    password: string,
  ): Promise<UserResponseDTO | null> {
    const user = await this.userService.findOne(username);
    if (user) {
      const isMatch = await bcrypt.compare(password, user.password);
      if (isMatch) {
        delete user.password; // Not even the hash password should be exposed!
        return user;
      }
    }
    return null;
  }

  async login(user: UserResponseDTO) {
    const payload = { username: user.username, sub: user.id };
    return {
      access_token: this.jwtService.sign(payload),
    };
  }
}
The login operation in the AuthService is responsible for generating a JSON Web Token (JWT) when a user successfully logs in.
- The
loginmethod receives aUserResponseDTOobject as a parameter, representing the logged-in user. - Inside the method, a payload object is created with the user's
usernameandidas properties. - The JWT is generated using the
jwtService.signmethod from theJwtServiceclass, passing in the payload object. - The generated JWT is returned as part of the response, typically as an
access_tokenproperty.
The JWT can then be used by the client for subsequent authenticated requests by including it in the request header, typically as a bearer token.
Update Login Endpoint
In your UserController, update the login method to return a JWT when the login is successful.
@Post('login')
async login(@Body() userDto: CreateUserDTO): Promise<{
  access_token: string;
}> {
  const user = await this.authService.validateUser(
    userDto.username,
    userDto.password,
  );
  if (!user) {
    throw new UnauthorizedException('Invalid credentials');
  }
  return this.authService.login(user);
}
Testing with Postman
You'll need to test your JWT implementation to make sure it's working correctly. This will involve logging in with a valid user to get a token.
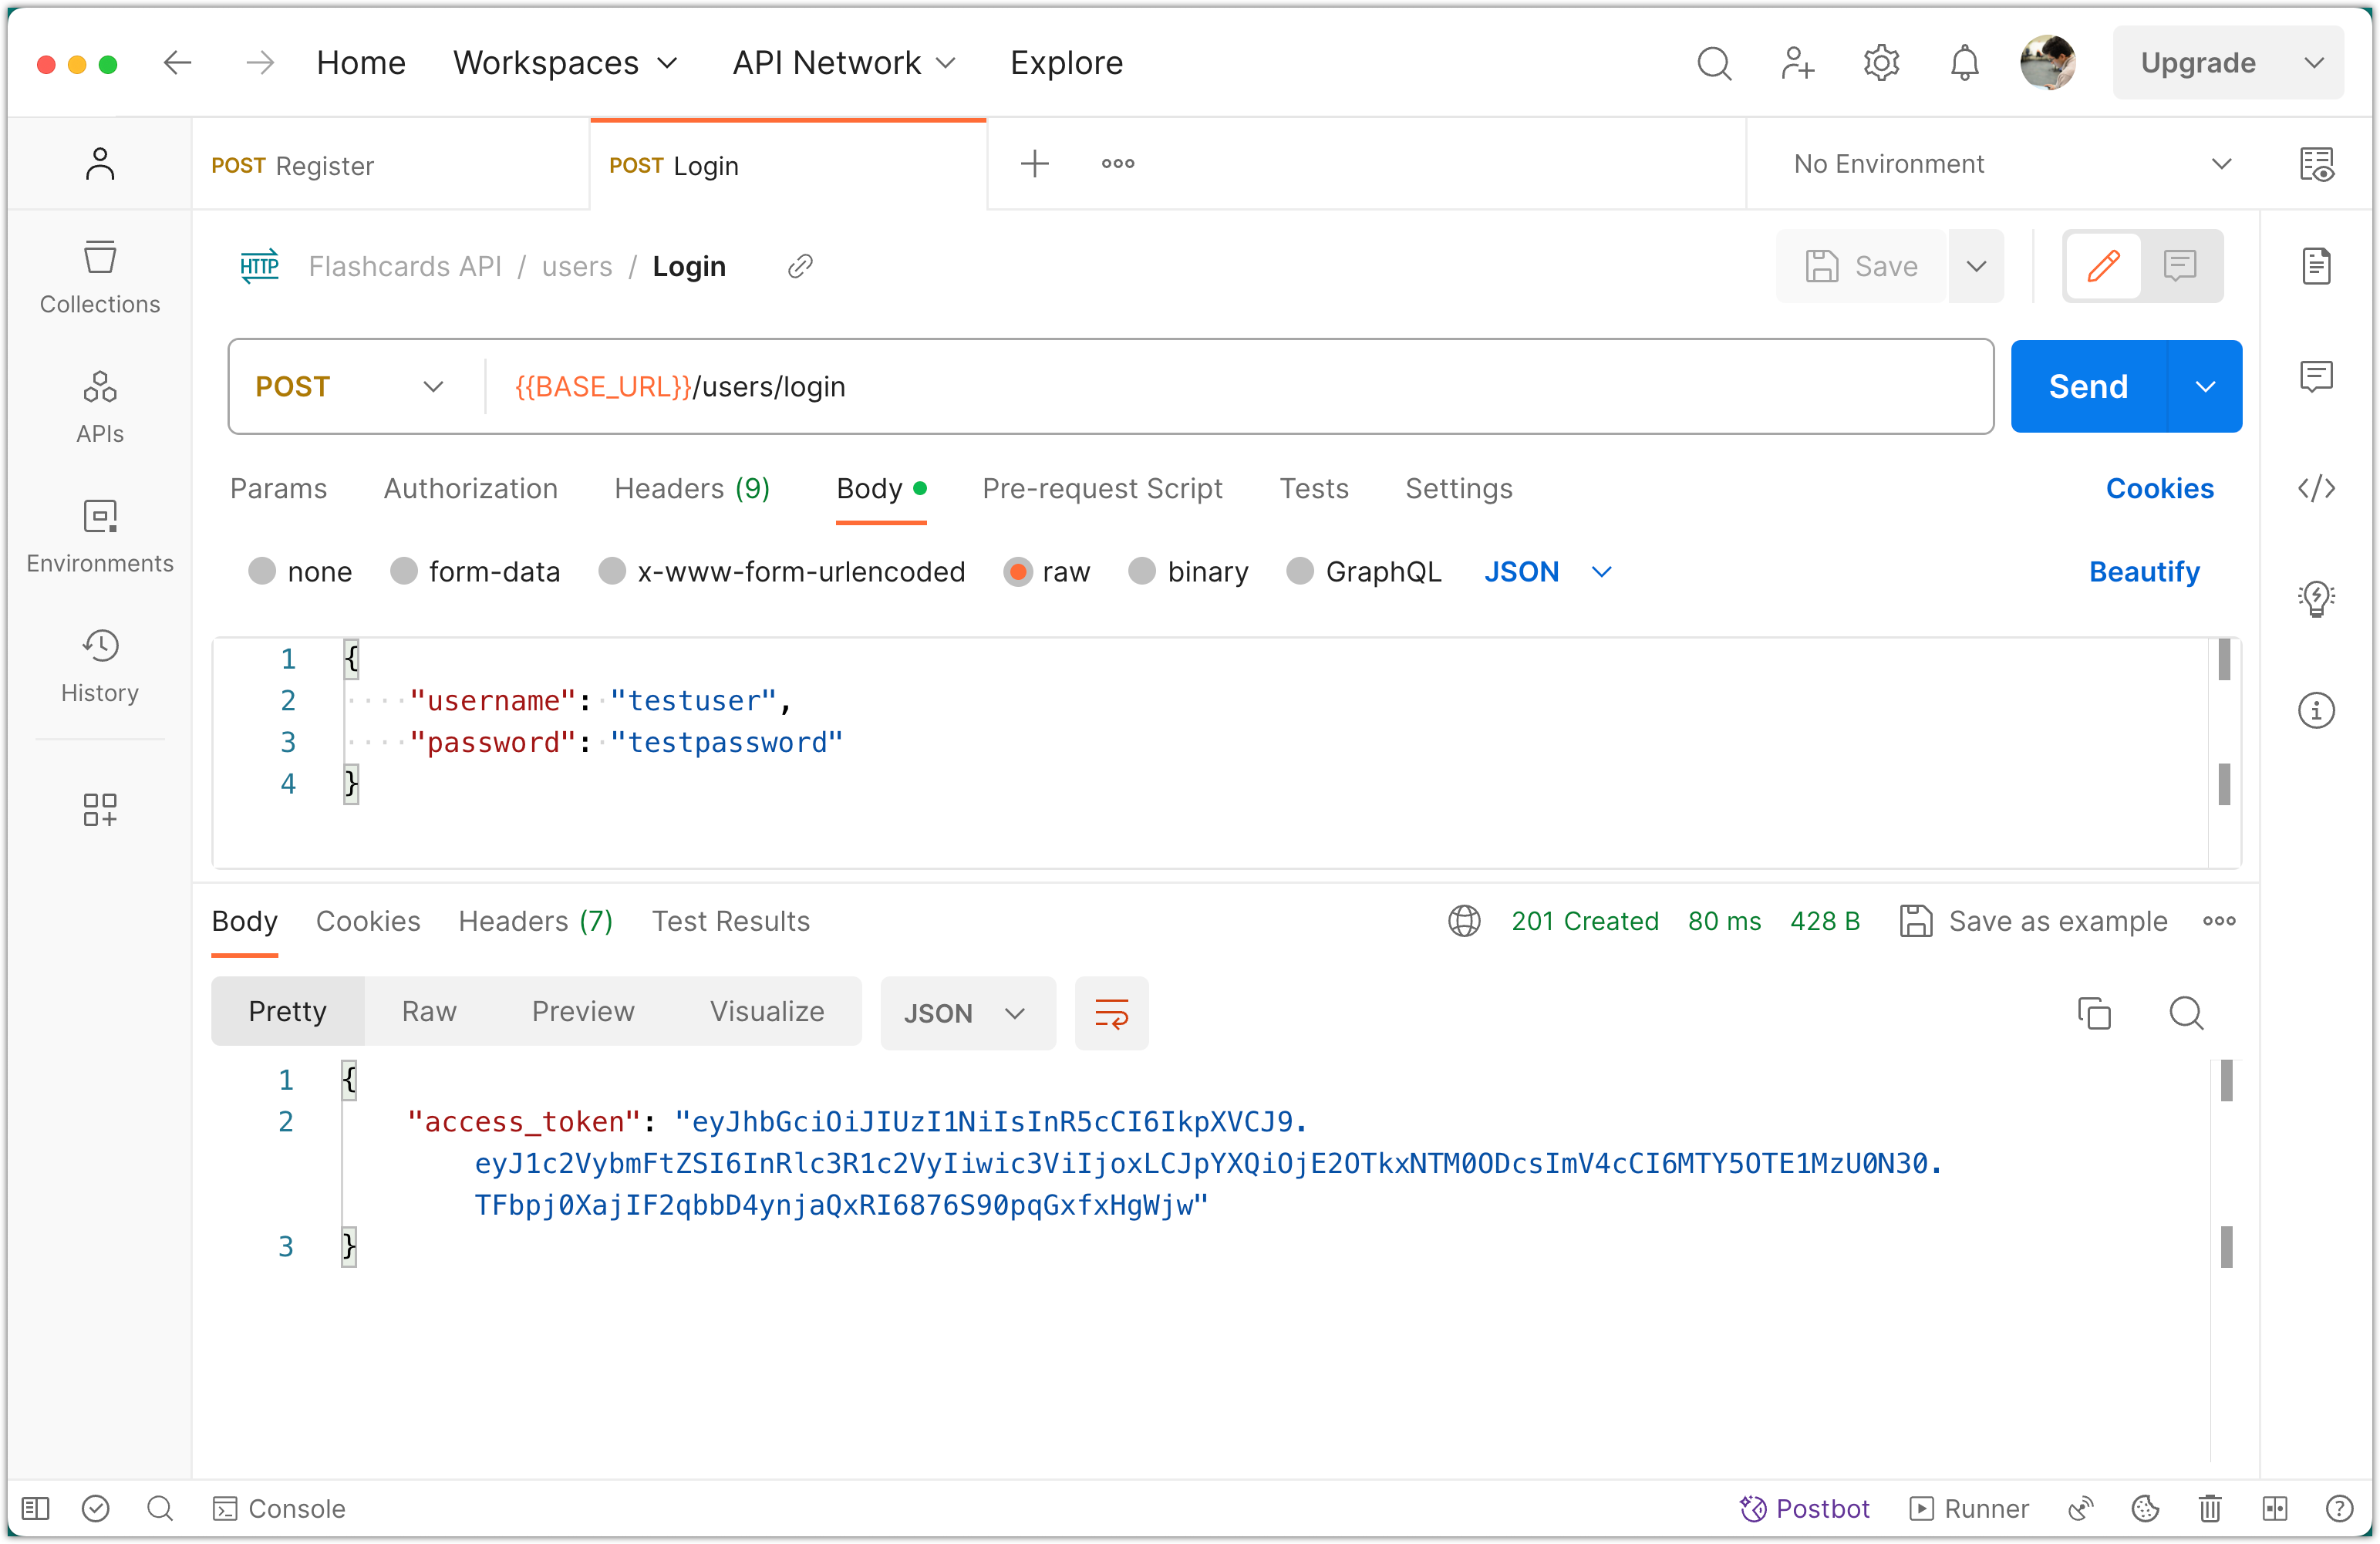
That sums up the JWT implementation. Each step is crucial to ensure that your JWT-based authentication is secure and functional.
Please stage and commit the changes:
git add .
git commit -m "Implement JWT authentication"