Task 12: Integrating Frontend and Backend
Step 1: Data Model in the Frontend vs. Backend
As we begin integrating the frontend and backend, let's review the data model on both sides and ensure that they are consistent.
Let’s review the app/src/lib/types.ts file:
export type User = {
  id: string;
  userName: string;
  displayName: string;
  avatar?: string;
};

export type Post = {
  id: string;
  userId: string;
  content: string;
  timestamp: string;
  image?: string;
  likeCount: number;
  commentCount: number;
};

export type Like = {
  id: string;
  postId: string;
  userId: string;
};

export type Comment = {
  id: string;
  postId: string;
  userId: string;
  content: string;
  timestamp: string;
};

export type PostWithUserData = Post & { user?: User };
Comparing this file against the entities on our backend, we notice Post entity matches the Post type whereas User entity misses displayName and avatar. The Like and Comment types don’t exist on the backend yet. We’ll focus on User and Post for now.
Step 2: Update the User Entity
In this step, we will update the User entity on the backend to include the displayName and avatar fields. This update is necessary to maintain consistency between the frontend and backend data models. Additionally, we need to update the corresponding DTOs and operations.
-
Open
api/src/user/user.entity.tsfile and update it as follows:import { Post } from "src/posts/post.entity"; import { Entity, PrimaryGeneratedColumn, Column, OneToMany } from "typeorm"; @Entity() export class User { @PrimaryGeneratedColumn() id: number; @Column({ unique: true }) username: string; @Column() password: string; @Column() displayName: string; @Column({ nullable: true }) avatar: string; @OneToMany(() => Post, (post) => post.user) posts: Post[]; }Here, we have added the
displayNameandavatarproperties to theUserentity. It's important to note that theavatarproperty is optional, which is why we decorated it with@Column({ nullable: true }). -
Update
api/src/user/user-response.dto.tsas follows:export class UserResponseDTO { id: number; username: string; displayName: string; avatar?: string; }Here, we have added the
displayNameandavatarproperties. Please note that theavatarproperty is optional. -
Now that we are returning
displayNameandavatar, we need to adjust the information that gets encoded in the JWT when a user logs in. Update theloginfunction in theapi/src/auth/auth.service.tsfile as shown below:async login(user: UserResponseDTO) { const payload = { username: user.username, sub: user.id, displayName: user.displayName, avatar: user.avatar, }; return { access_token: this.jwtService.sign(payload), }; }Here, we have added
displayNameandavatarto thepayload. -
Update
api/src/user/create-user.dto.tsas follows:import { IsString, MinLength, MaxLength, IsOptional } from "class-validator"; export class CreateUserDTO { @IsString() @MinLength(4, { message: "Username is too short" }) @MaxLength(20, { message: "Username is too long" }) username: string; @IsString() @MinLength(8, { message: "Password is too short" }) password: string; @IsString() @MinLength(3, { message: "Display name is too short" }) @MaxLength(30, { message: "Display name is too long" }) displayName: string; @IsOptional() @IsString() avatar: string; }Here, we have added the
displayNameandavatarproperties with the appropriateclass-validatordecorators. -
We cannot use the updated
CreateUserDTOfor the login operation anymore. We need to create a new DTO specifically for it. Create a new fileapi/src/user/user-login.dto.tsand add the following content:import { IsString, IsNotEmpty } from "class-validator"; export class UserLoginDTO { @IsString() @IsNotEmpty() username: string; @IsString() @IsNotEmpty() password: string; }Indeed, to log in, a user only needs to provide a username and password. However, to register, they will also need to provide a display name and, optionally, an avatar URL.
-
Update the
loginoperation inapi/src/user/user.controller.tsfile:@Post("login") async login(@Body() userDto: UserLoginDTO): Promise<{ access_token: string; }> { const user = await this.authService.validateUser( userDto.username, userDto.password, ); if (!user) { throw new UnauthorizedException("Invalid credentials"); } return this.authService.login(user); }Note that the only change here is the data type of the
userDto, which has been changed fromCreateUserDTOtoUserLoginDTO. Please make sure to import it:import { UserLoginDTO } from "./user-login.dto"; -
Finally, update the
createUseroperation inapi/src/user/user.service.tsfile:async createUser(userDto: CreateUserDTO): Promise<User> { const { password, ...userInfo } = userDto; const user = await this.userRepository.create({ ...userInfo, password: await bcrypt.hash(password, 10), }); return this.userRepository.save(user); }
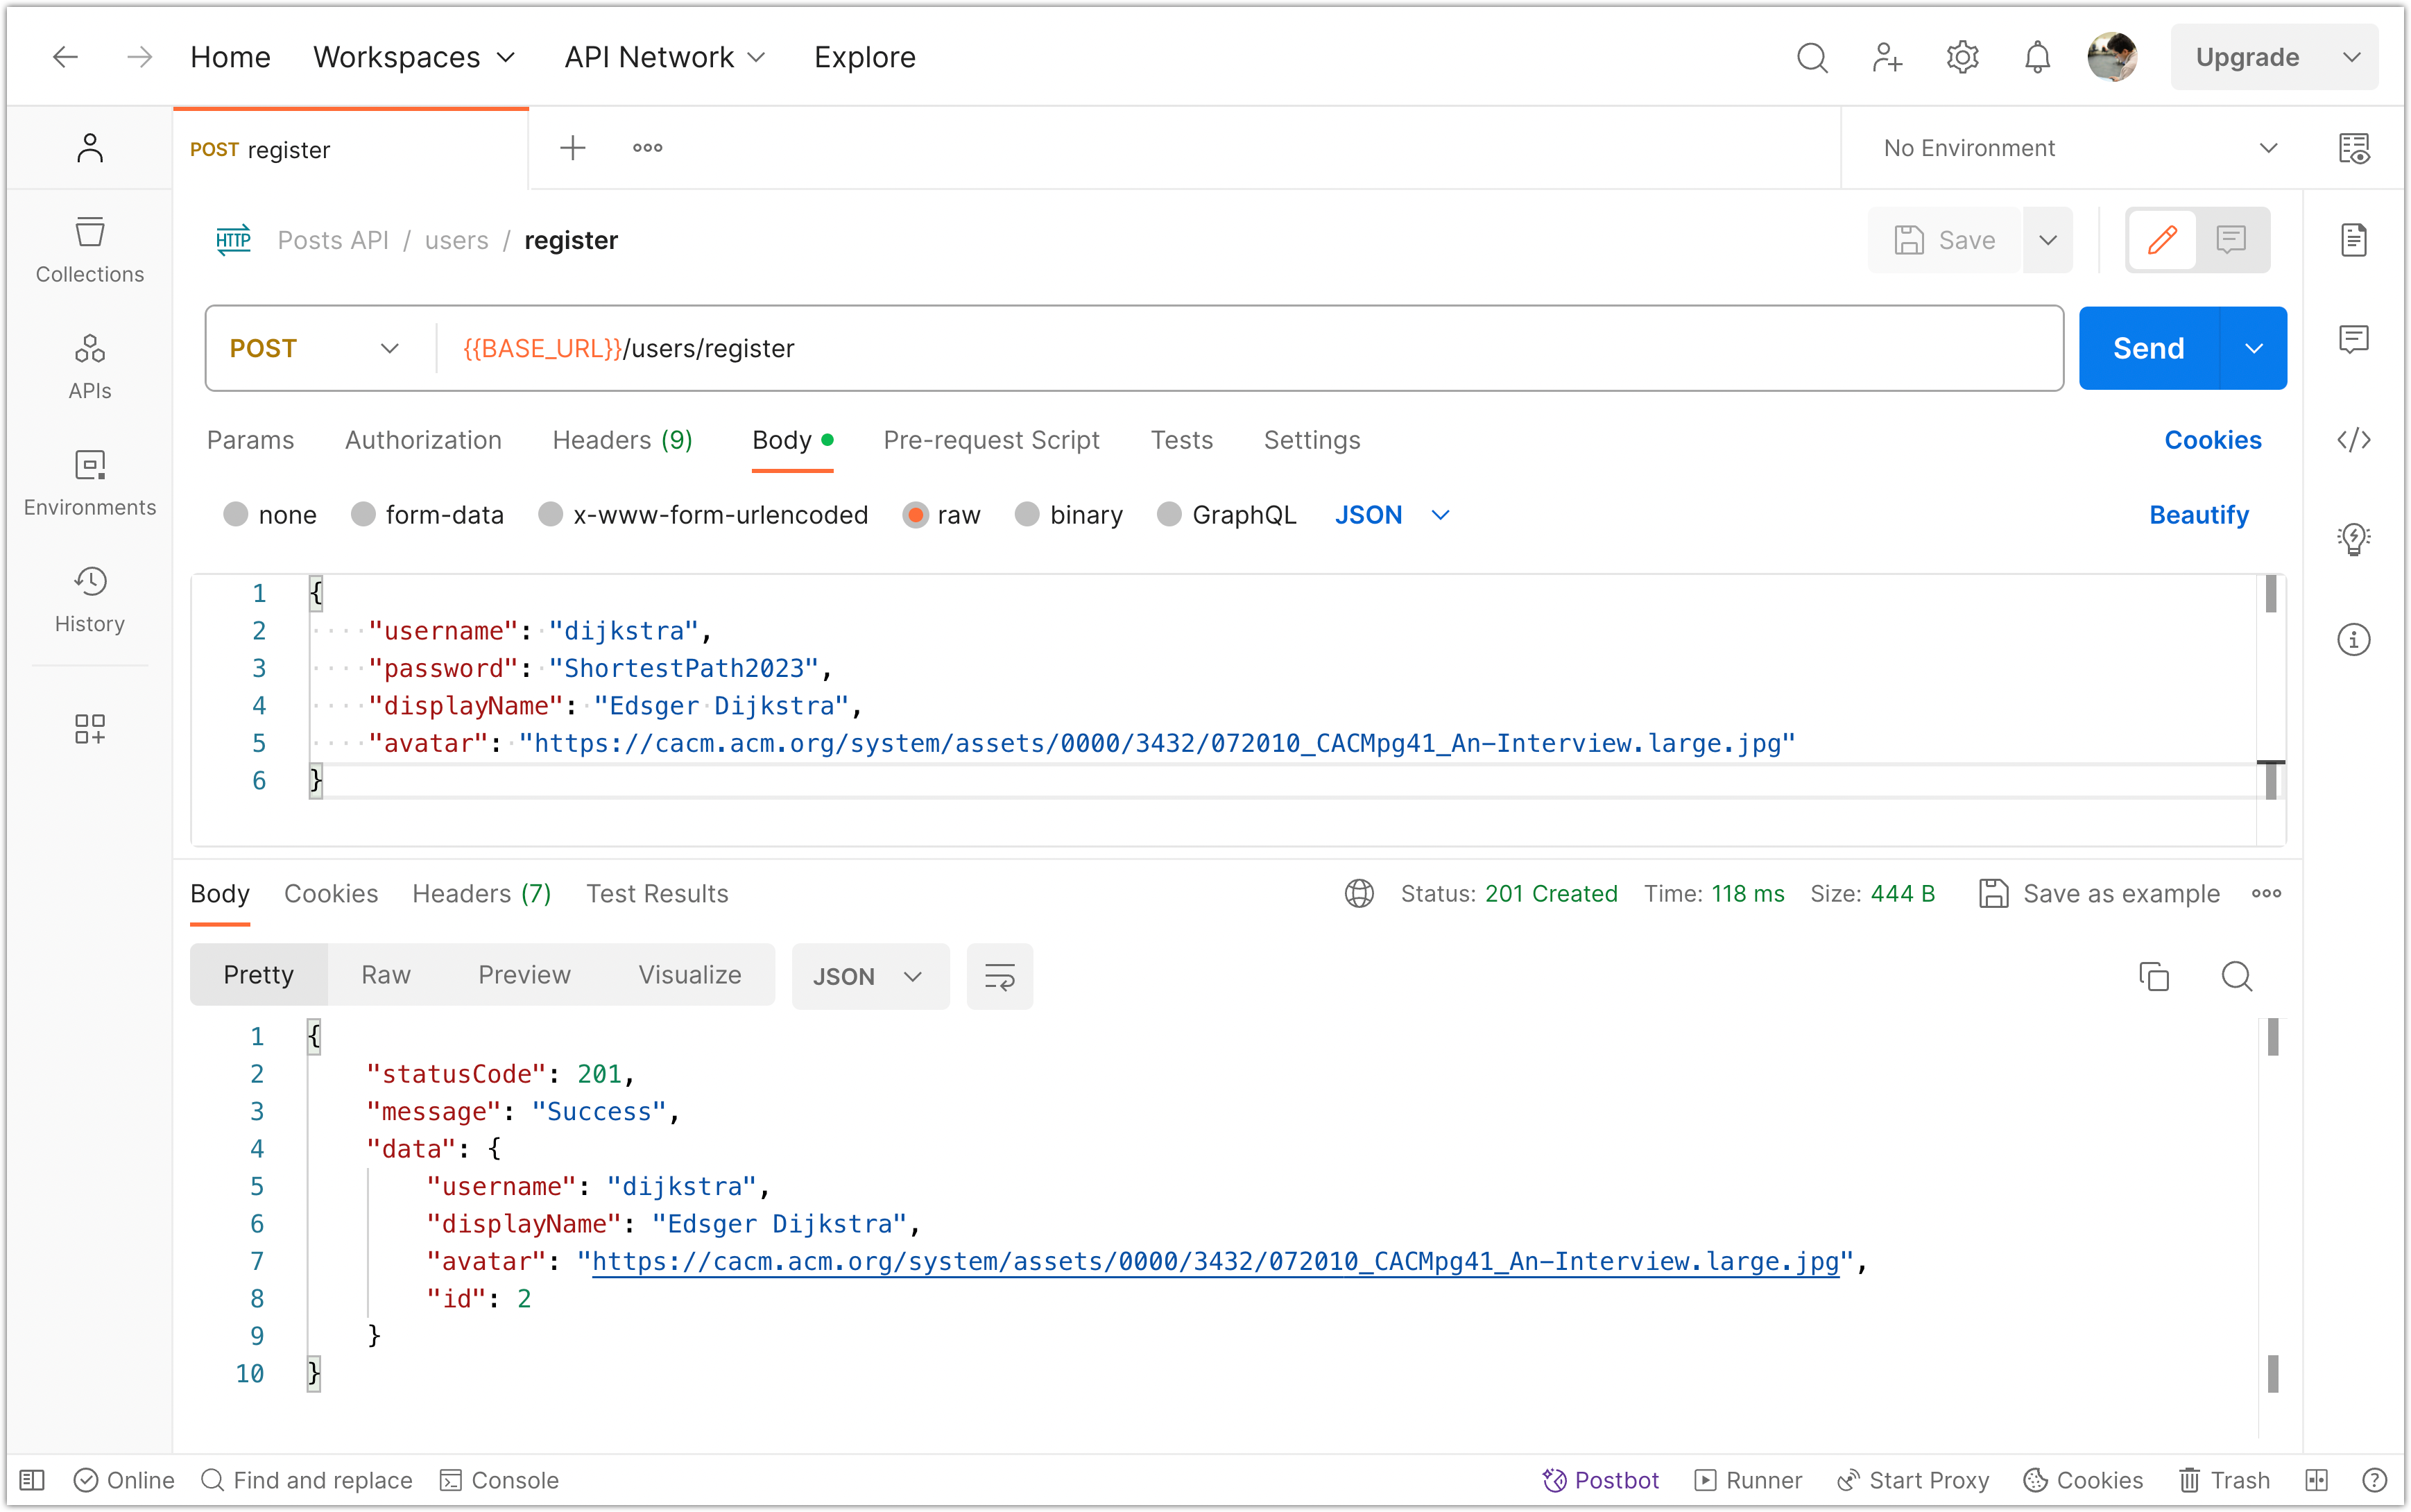
To ensure that you can register a user and login on their behalf, use Postman for testing.
Before wrapping up this step, let's make a small change to the frontend source code. The user type on the frontend has an attribute called userName (written in camelcase), whereas on the backend, the user entity has username (all lowercase). Please update the frontend version to username so that it is consistent with the backend. Make sure to update this attribute everywhere in the frontend where it is used. Additionally, you need to change the data type of the user's ID to a number, as that is how the ID (primary key) of the User entity is set up on the backend.
export type User = {
  id: number;
  username: string;
  displayName: string;
  avatar?: string;
};
Please commit your changes to version control:
git add .
git commit -m "Update the `User` entity  to include the `displayName` and `avatar` fields."
Step 3: Include User Data in Posts
Let’s make a note of how the frontend consumes the posts data:
import PostAvatar from "./post-avatar";
import PostHeader from "./post-header";
import PostFooter from "./post-footer";
import type { PostWithUserData } from "@/lib/types";

const Post = ({ post }: { post: PostWithUserData }) => {
  const { id, content, user, timestamp } = post;

  // The code below uses Optional Chaining (?.) and Nullish Coalescing (??)
  const displayName = user?.displayName ?? "Unknown";
  const userName = user?.userName ?? "Unknown";
  const avatar = user?.avatar;

  return (
    <div className="flex border-b border-slate-400">
      <div className="p-4">
        <PostAvatar imageUrl={avatar} displayName={displayName} />
      </div>
      <div className="w-full pt-4 pr-4">
        <PostHeader
          name={displayName}
          username={userName}
          timestamp={timestamp}
        />
        <div className="my-4">{content}</div>
        <PostFooter postId={id} />
      </div>
    </div>
  );
};

export default Post;
As can be seen from this component, the frontend expects the post data to include user information. This is evident in the design of the mock API function too:
// Helper function to find a user by ID
export const findUser = async (id: string): Promise<User | undefined> => {
  return new Promise((resolve) => {
    setTimeout(() => {
      const user = db.users.find((user) => user.id === id);
      resolve(user);
    }, 200); // Simulate an API delay
  });
};

// Fetch all posts with user data
export const fetchPosts = async (): Promise<PostWithUserData[]> => {
  return new Promise((resolve) => {
    setTimeout(async () => {
      const sortedPosts = db.posts.sort(
        (a, b) =>
          new Date(b.timestamp).getTime() - new Date(a.timestamp).getTime(),
      );
      const postsWithUserData = await Promise.all(
        sortedPosts.map(async (post) => ({
          ...post,
          user: await findUser(post.userId),
        })),
      );
      resolve(postsWithUserData);
    }, 200); // Simulate an API delay
  });
};
To align the backend with the frontend's expectations, we can take one of these two approaches:
- We can include the
userIdforeign key in theUserResponseDTOand expose an endpoint for the frontend to fetch user information by providing the user ID. - We can optionally include the user information in the post data, so when the frontend fetches posts, it already has the user information.
The second approach will require the backend server to handle the majority of the workload, reducing the number of HTTP requests made to it. This trade-off is desirable because backend servers usually have more computing power than clients' computers.
To implement this strategy, follow these steps:
-
Update the
api/src/posts/post-response.dto.tsfile as follows:import { UserResponseDTO } from "src/user/user-response.dto"; // <-- Add this line export class PostResponseDto { id: string; content: string; timestamp: Date; image?: string; likeCount: number; commentCount: number; user?: UserResponseDTO; // <-- Add this line } -
Next, update the
findAllmethod inapi/src/posts/posts.service.tsas follows:async findAll( limit: number, offset: number, search?: string, userId?: number, withUserData?: boolean, // <-- Add this argument ): Promise<Post[]> { const queryBuilder = this.postRepository.createQueryBuilder("posts"); // Add condition to join user data if (withUserData) { queryBuilder.leftJoinAndSelect("posts.user", "user"); } let hasWhereCondition = false; if (search !== undefined) { queryBuilder.where("posts.content ILIKE :search", { search: `%${search}%`, }); hasWhereCondition = true; } if (userId !== undefined) { if (hasWhereCondition) { queryBuilder.andWhere("posts.userId = :userId", { userId }); } else { queryBuilder.where("posts.userId = :userId", { userId }); hasWhereCondition = true; } } queryBuilder.limit(limit); queryBuilder.offset(offset); queryBuilder.orderBy("posts.timestamp", "DESC"); return await queryBuilder.getMany(); }The
leftJoinAndSelect(corresponding to SQLLEFT JOIN) in the code is used to combine rows from two tables based on a related column between them. In this case, it is used to join thepoststable with theusertable.Aside: The term "join" refers to combining rows from different tables based on a related column. It allows us to retrieve data from multiple tables in a single query.
The term "left" in "LEFT JOIN" indicates the type of join operation. There are different types of joins (left, right, inner, self, full, etc.) that you will learn about in a database course. A left join means that all rows from the left table (
posts) will be returned, even if there is no match in the right table (user). In other words, it ensures that all posts are included in the result, regardless of whether they have a corresponding user or not (although in a typical scenario, each post should have a user). -
Update the
findAlloperation inapi/src/posts/posts.controller.tsas follows:@Get() async findAll( @Query("limit") limit: number = 10, @Query("offset") offset: number = 0, @Query("search") search: string, @Query("username") username?: string, @Query("withUserData") withUserData?: boolean, // <-- Add this line ): Promise<PostResponseWithPagination> { let userId: number | undefined; if (username) { const user = await this.userService.findOne(username); if (!user) { throw new NotFoundException(`User with username ${username} not found`); } userId = user.id; } const posts = await this.postsService.findAll( limit, offset, search, userId, withUserData, // <-- Add this line ); return { filter: username, search, pagination: { limit, offset, }, data: posts.map((post) => { delete post.userId; if (post.user) { // <-- Add this delete post.user.password; } return post; }), }; }
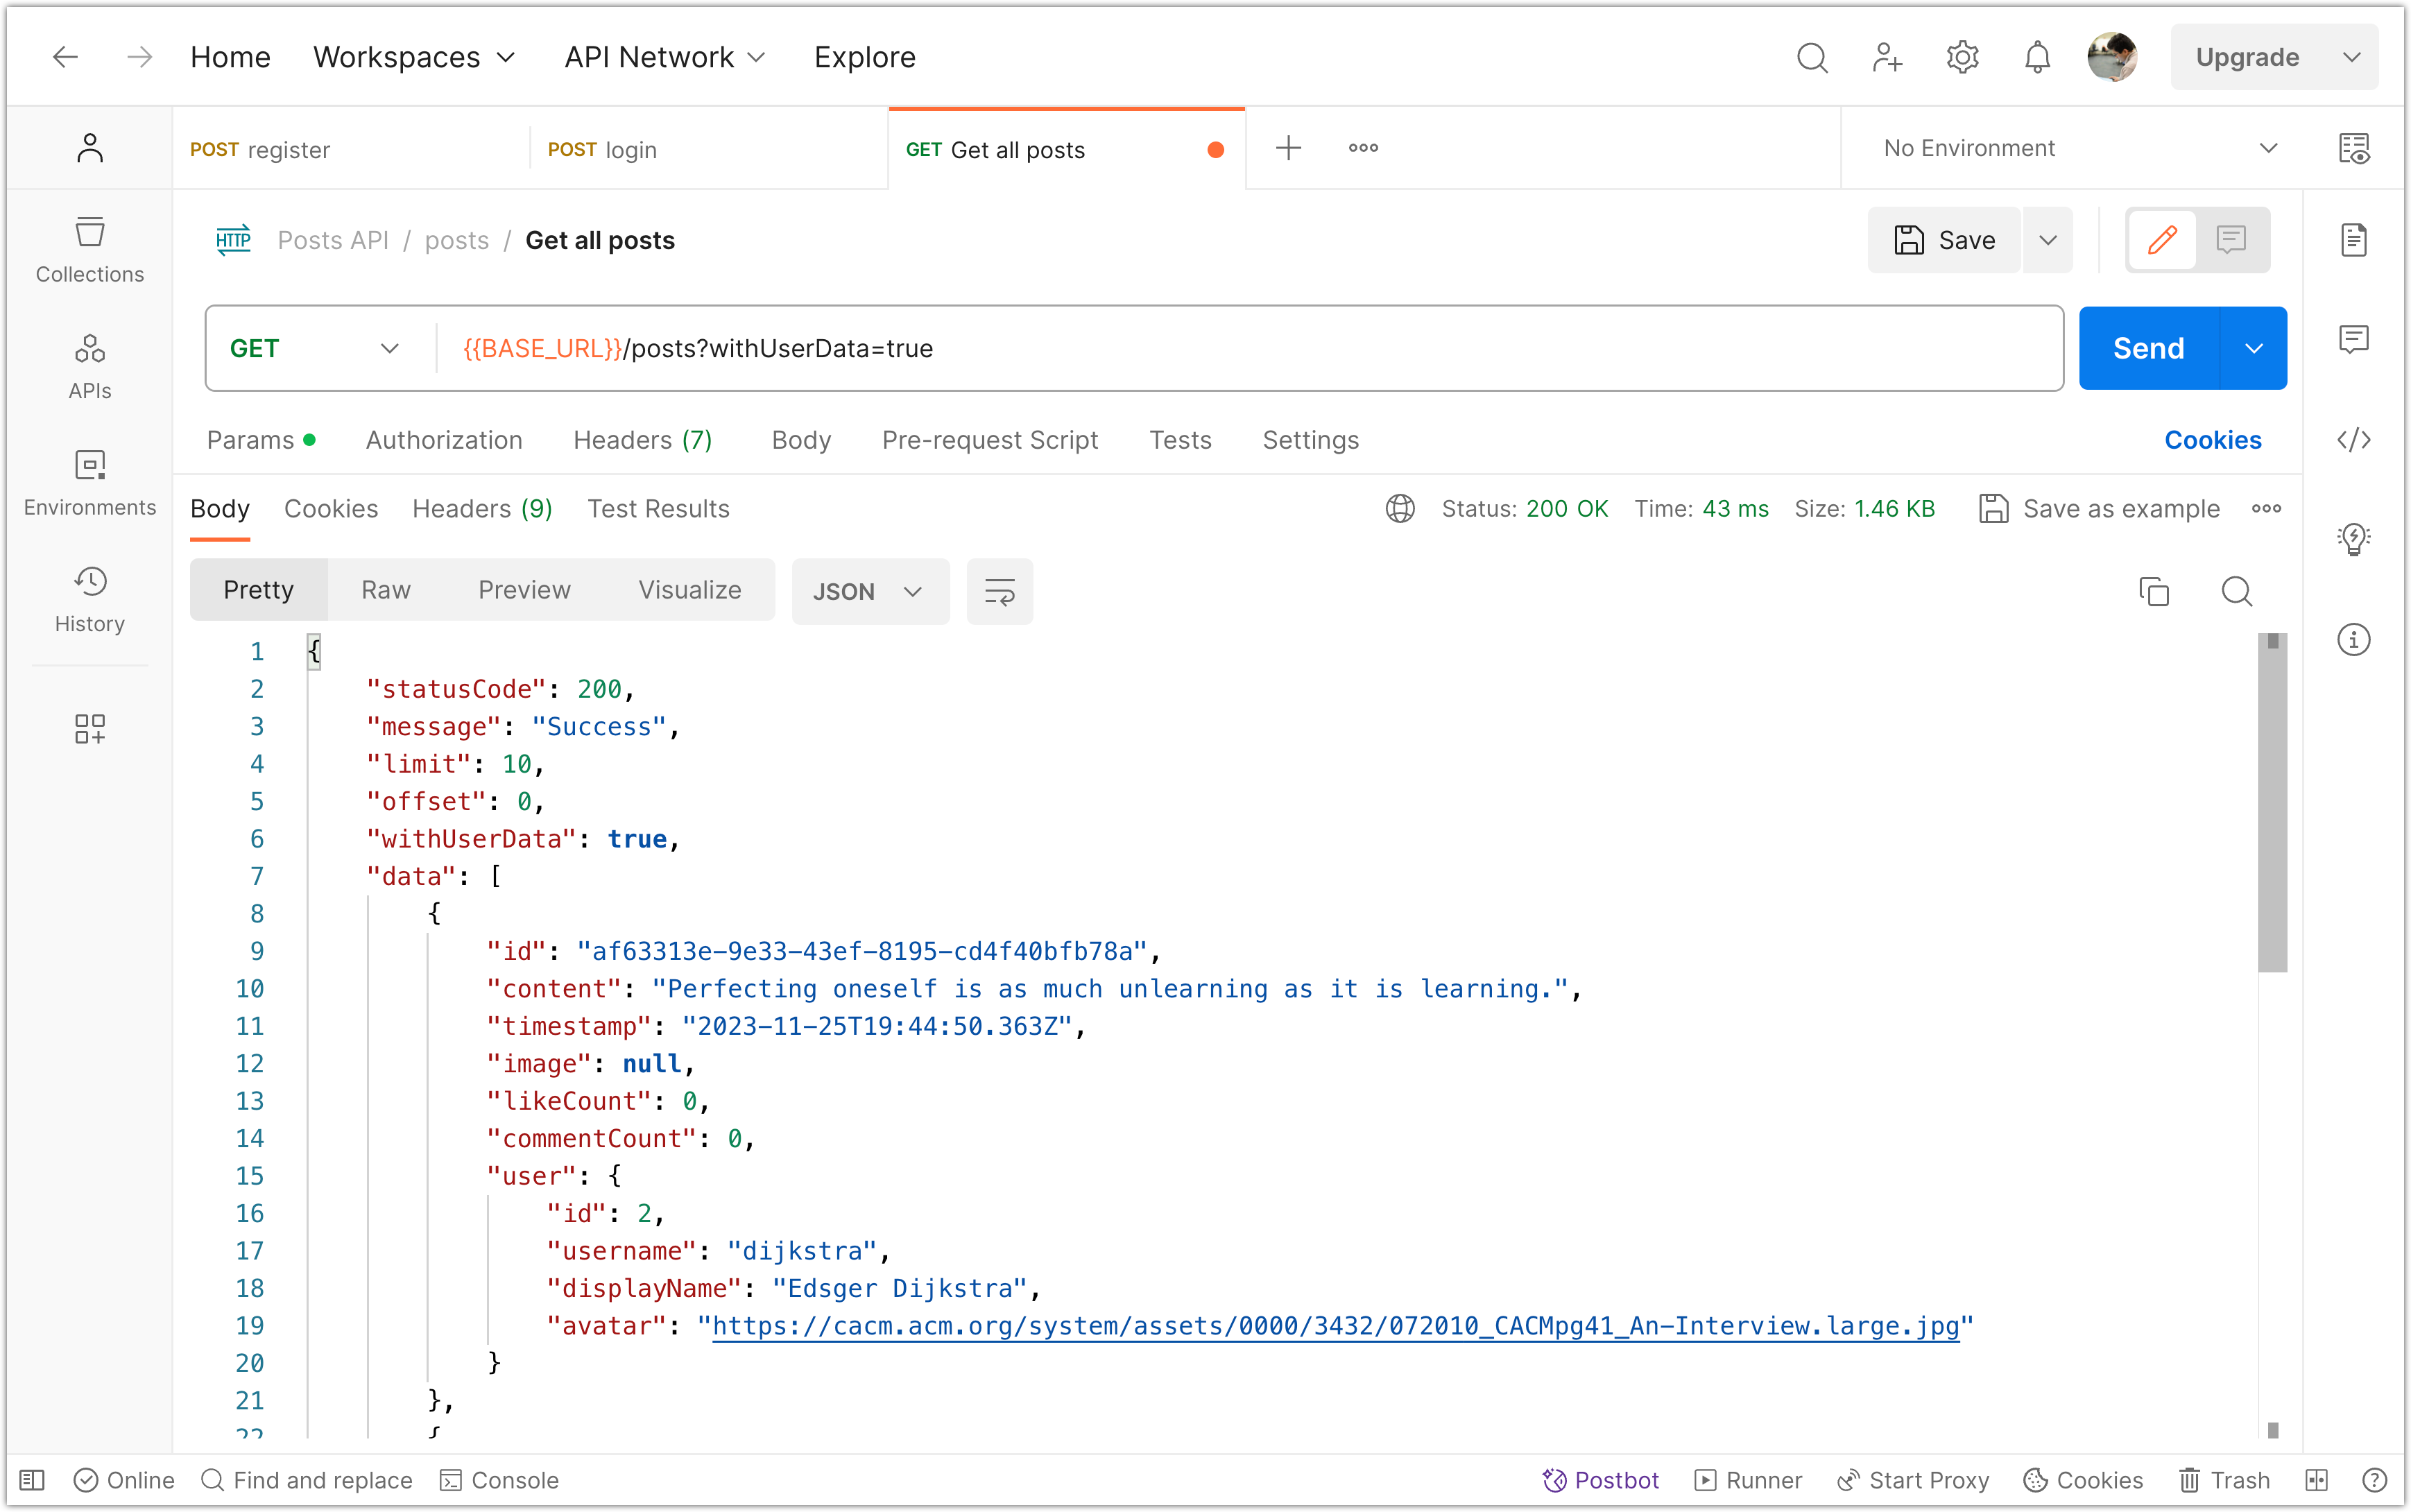
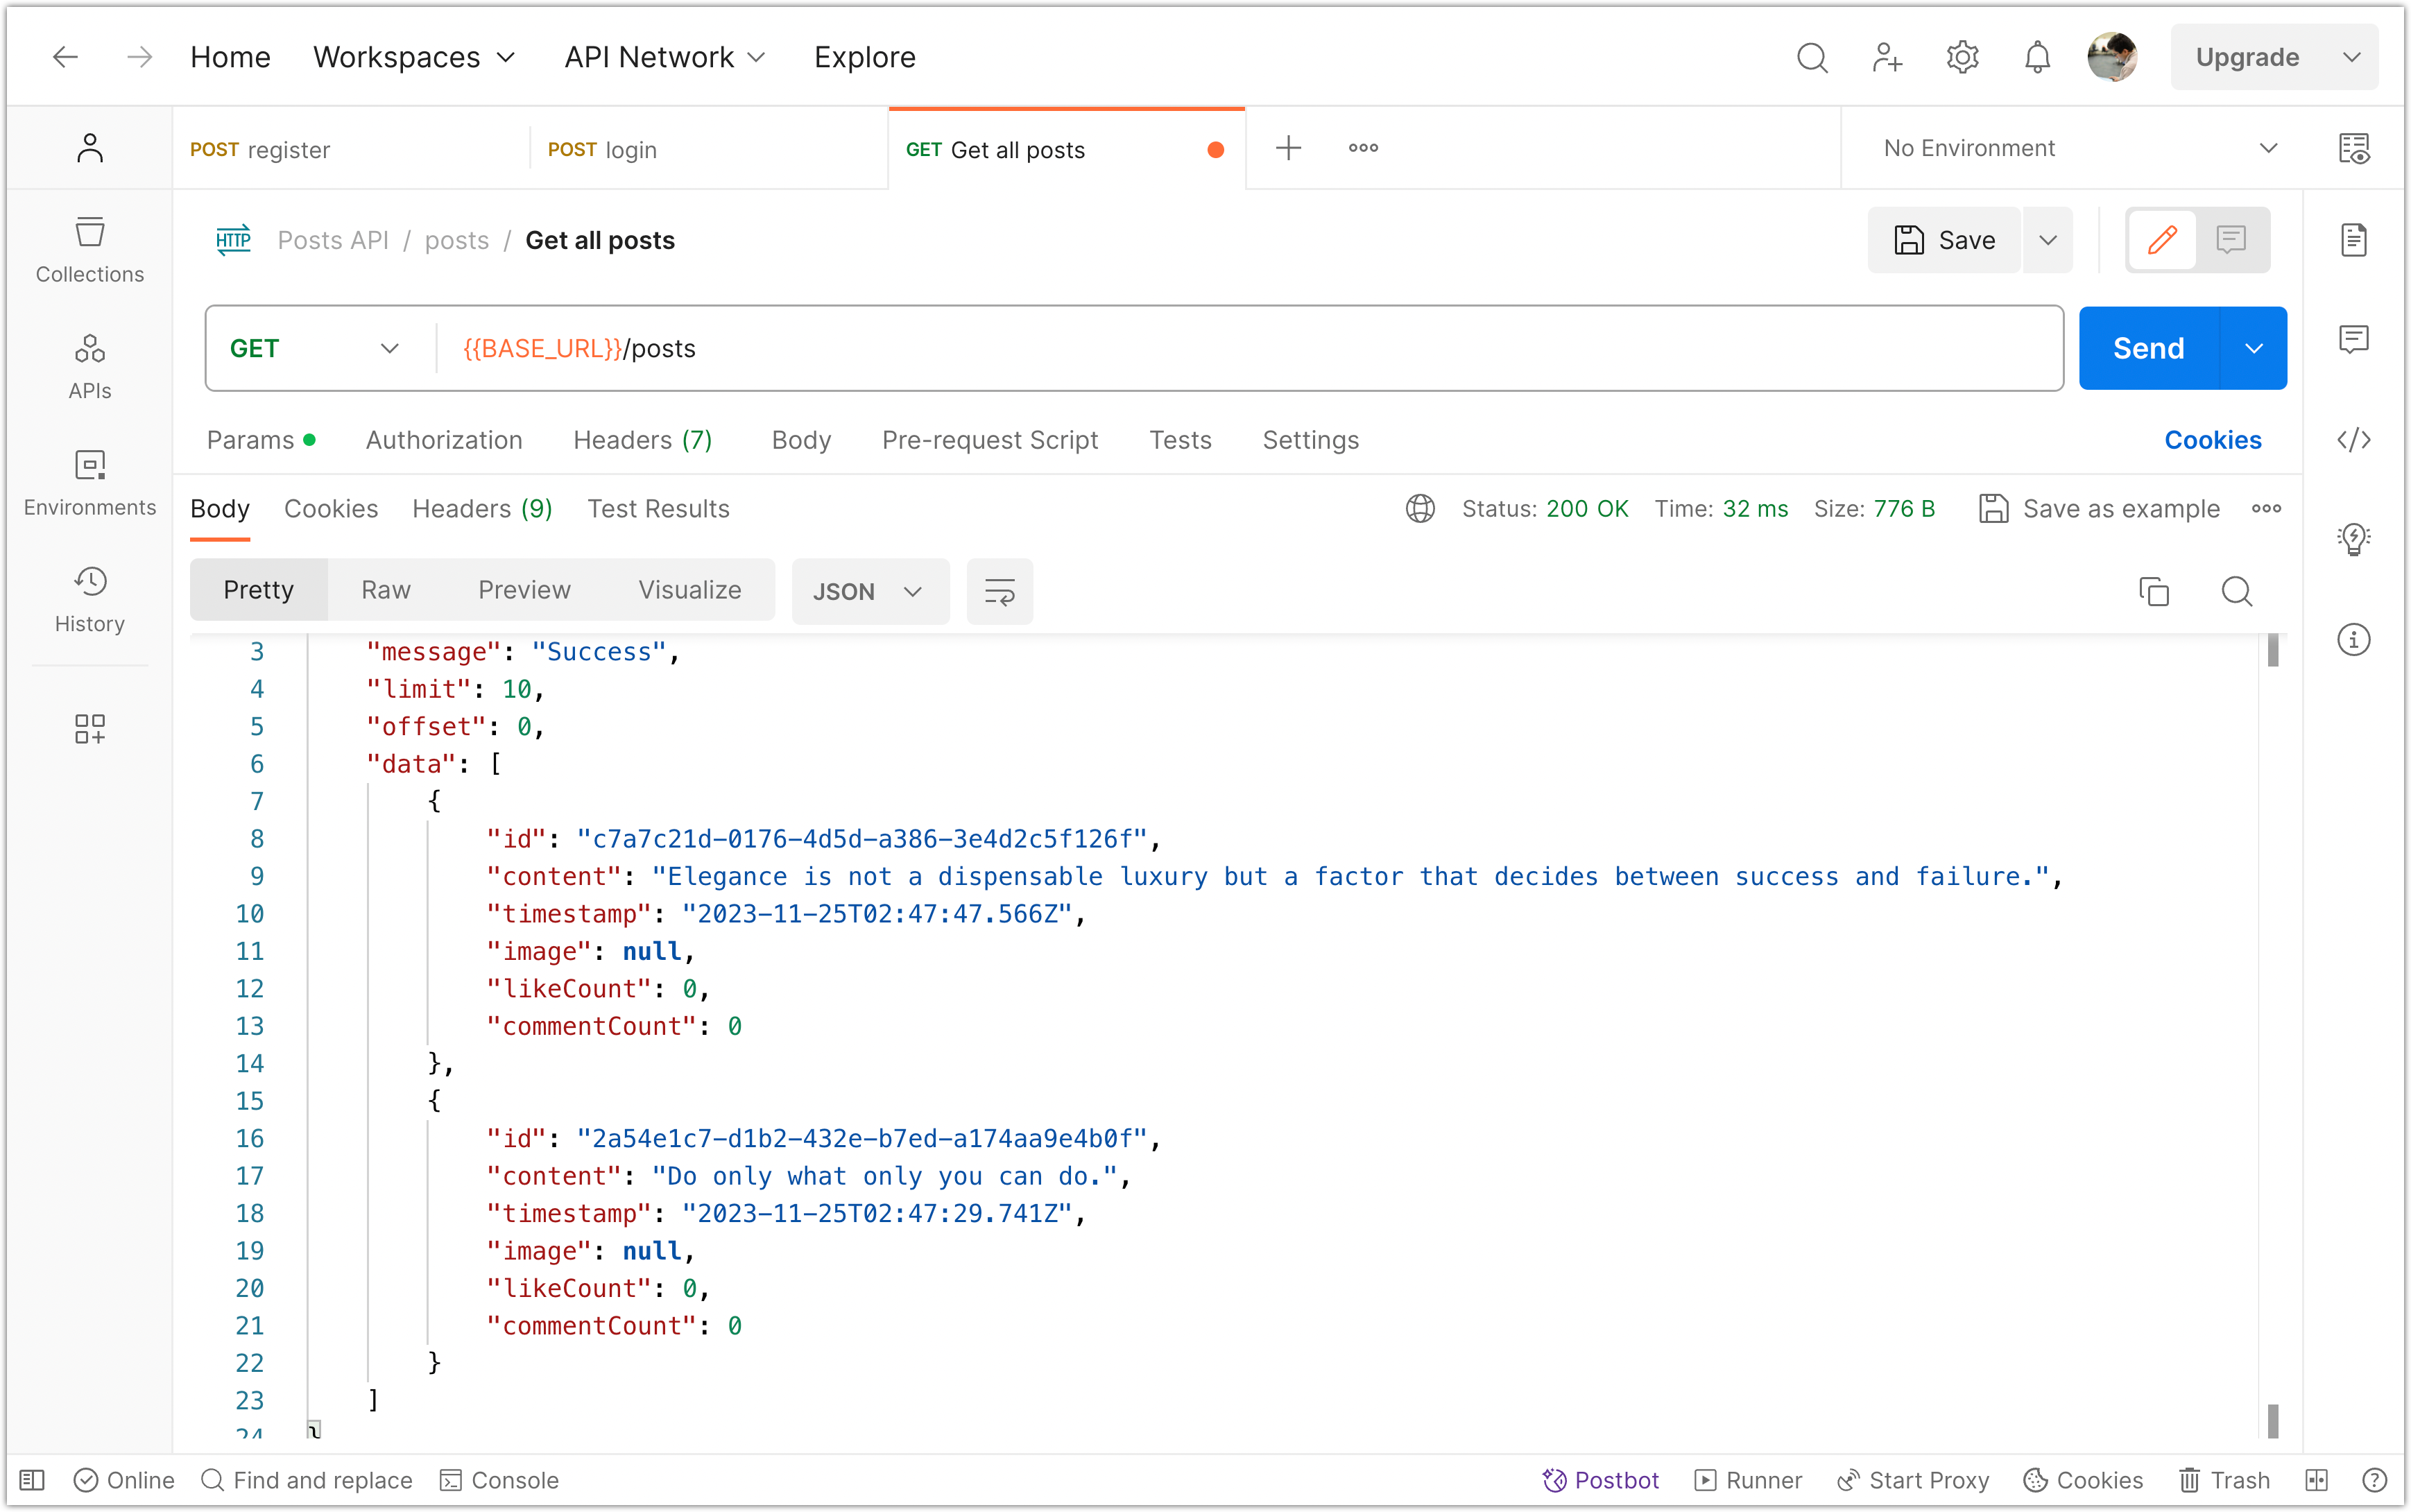
To test if this works, open Postman, create a few posts, and then retrieve all the posts by setting the query parameter withUserData to true!
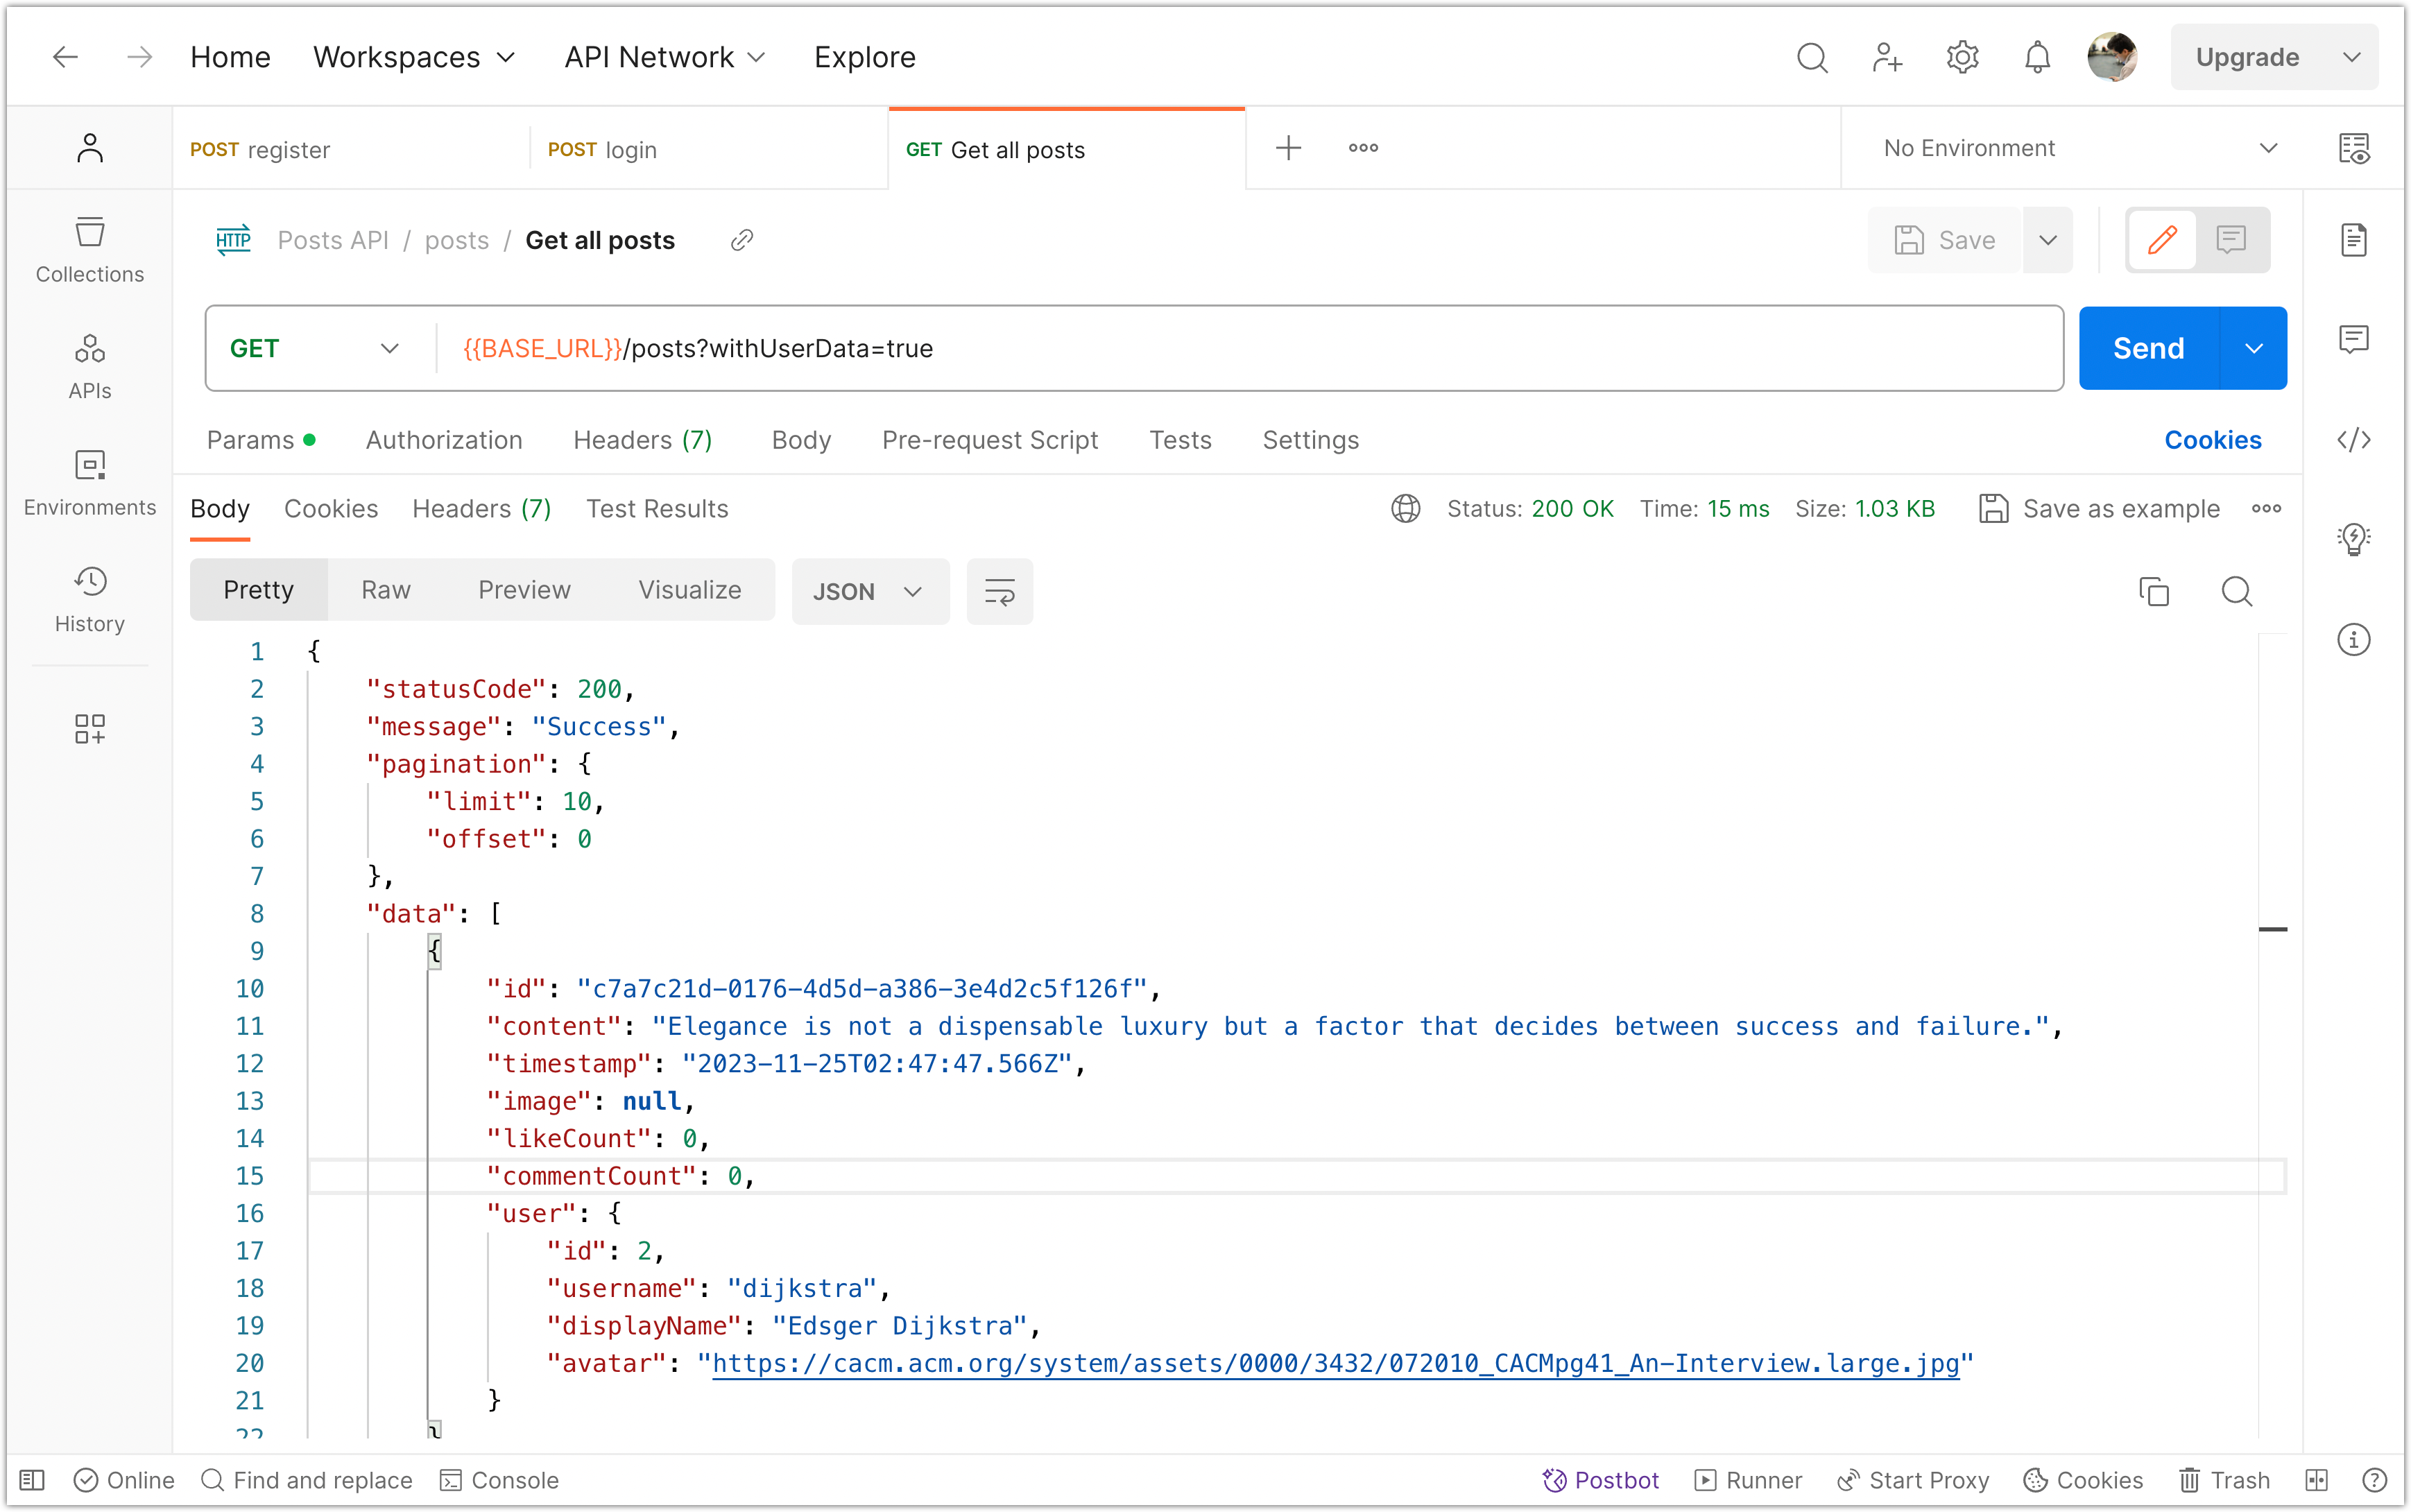
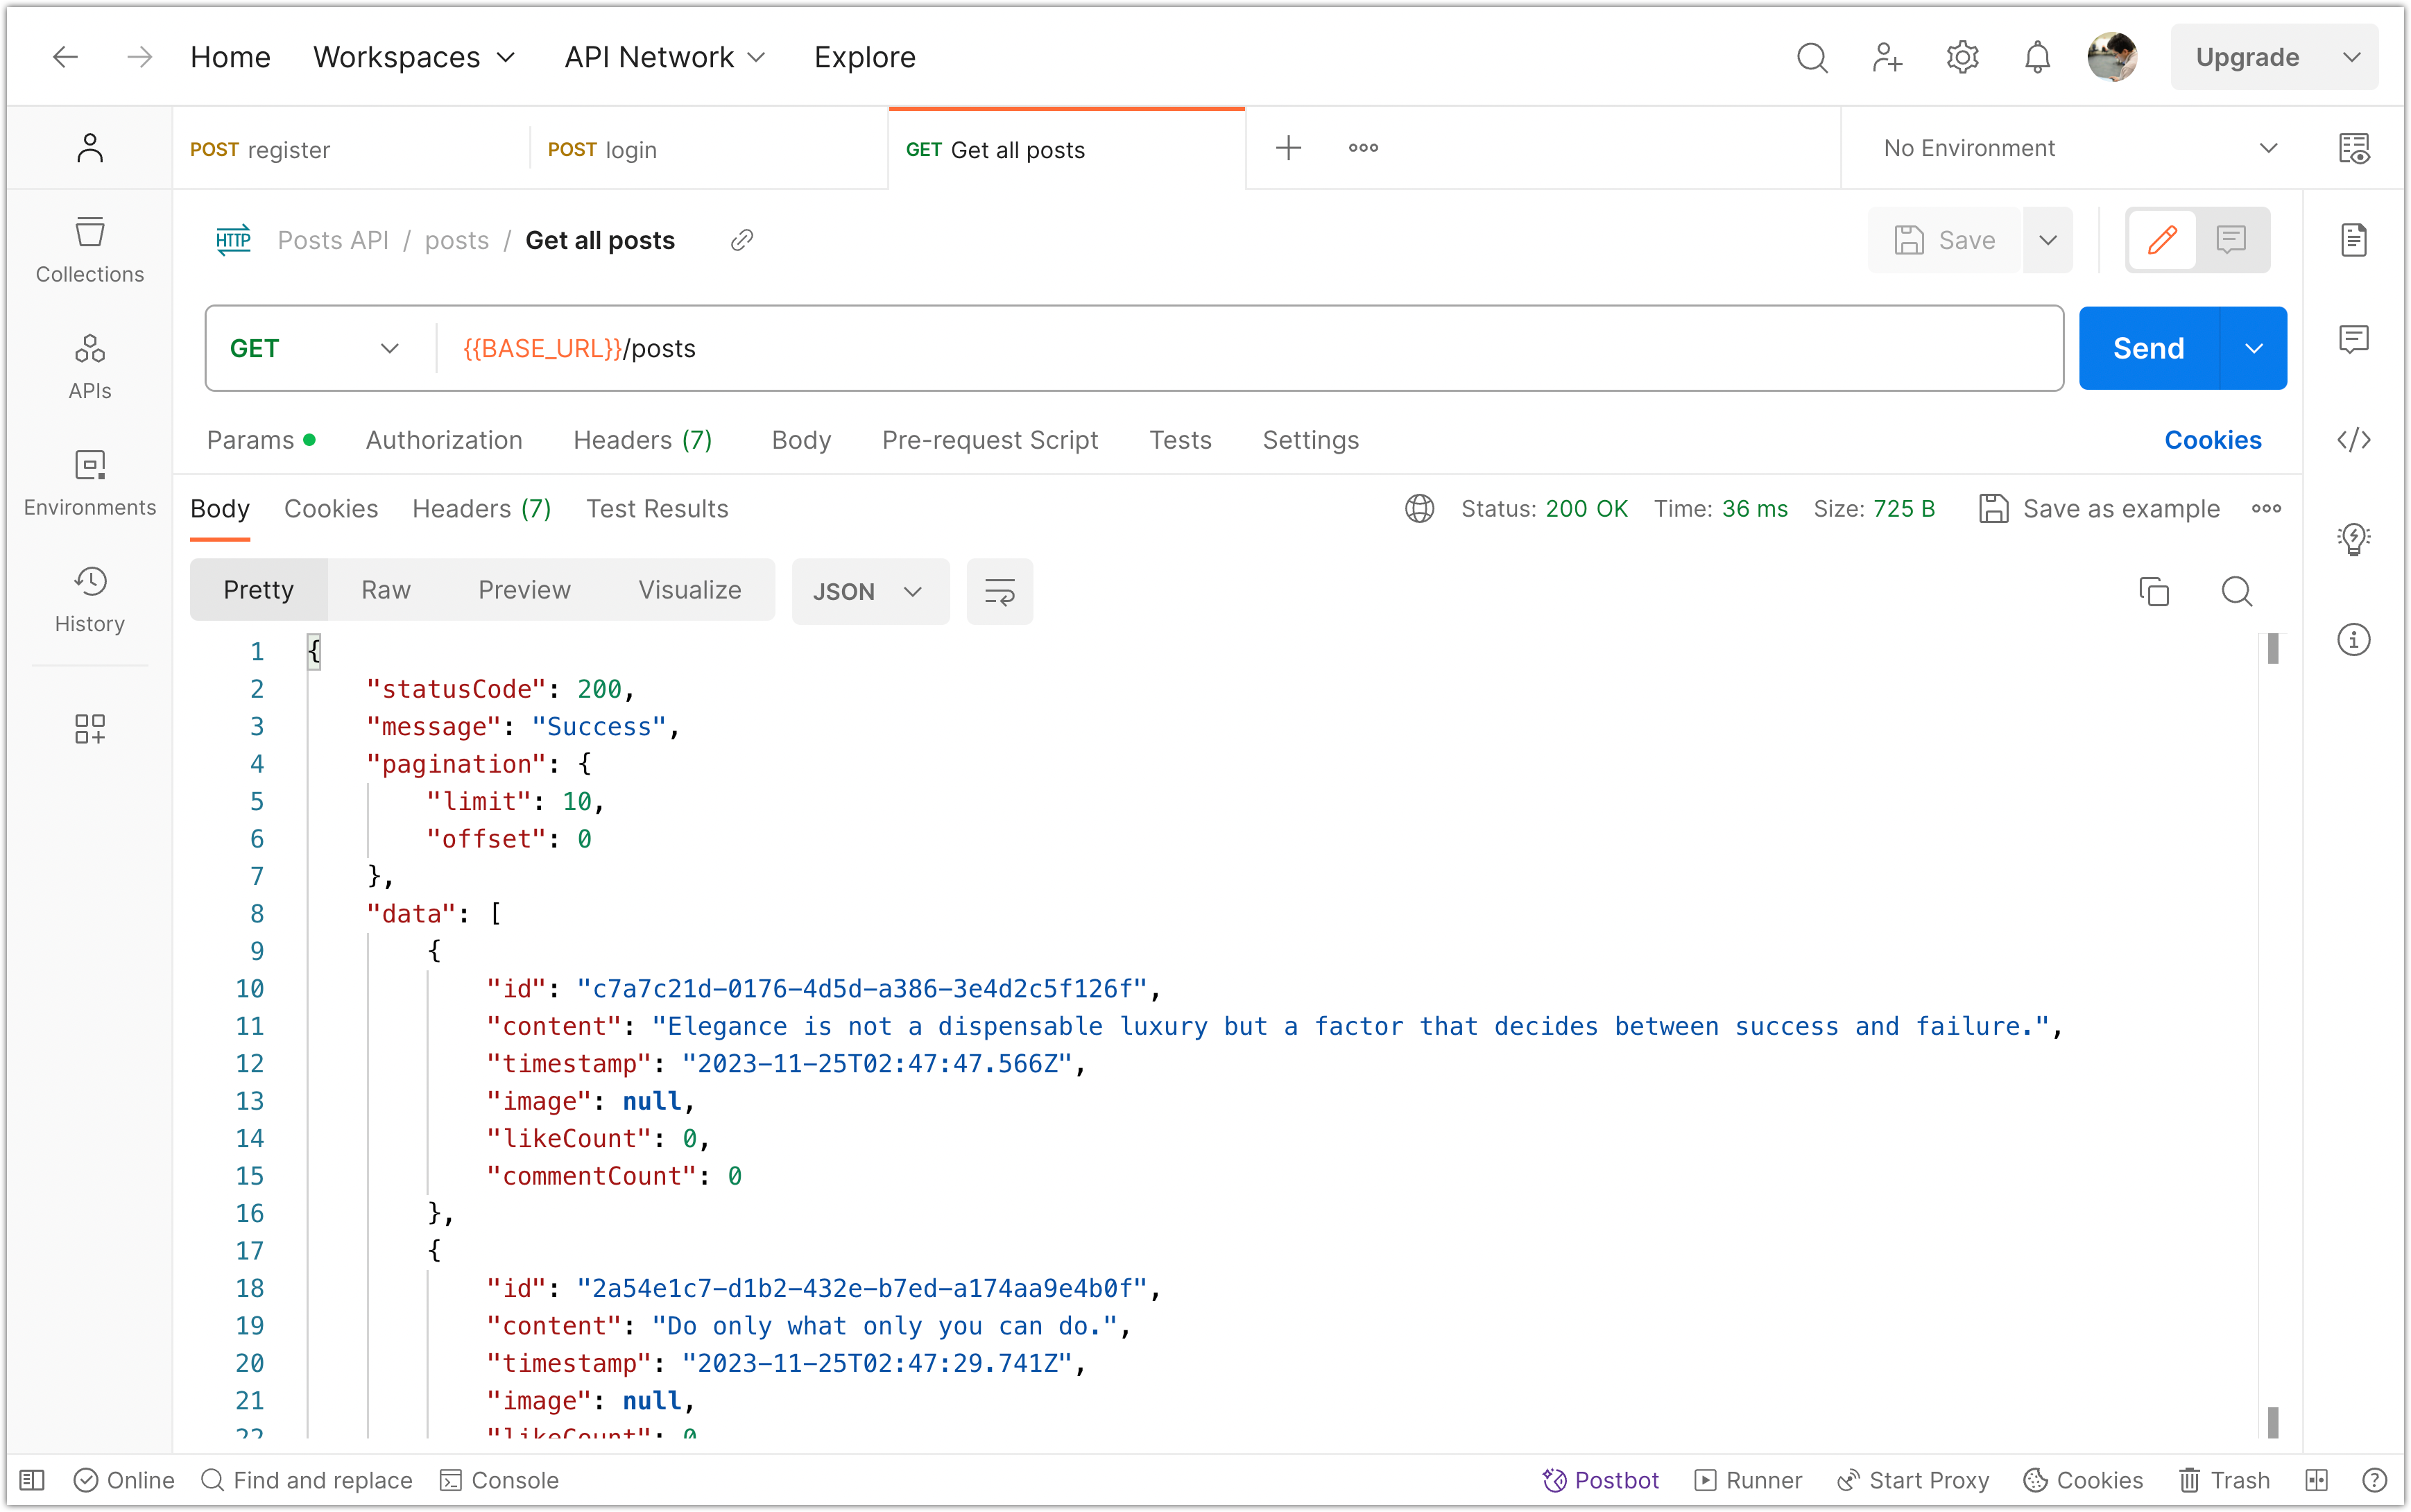
Try it without the withUserData query too and make sure it works as expected!
Please commit your changes to version control:
git add .
git commit -m "Include user information when fetching posts."
Step 4: Create DTOs for findAll Operation
In this step, we perform some housekeeping to keep the backend code clean. Let's start by creating DTOs for the query parameters and return type of the findAll operation.
-
Create a
api/src/posts/find-posts-query.dto.tsfile with the following content:import { IsInt, IsOptional, IsPositive, Min, IsString, IsBoolean, Max, } from "class-validator"; export class FindPostsQueryDTO { @IsInt() @IsPositive() @Min(1) @Max(50) @IsOptional() limit: number = 10; @IsInt() @Min(0) @IsOptional() offset: number = 0; @IsString() @IsOptional() search?: string; @IsString() @IsOptional() username?: string; @IsBoolean() @IsOptional() withUserData?: boolean; } -
Create a
api/src/posts/find-posts-response.dto.tsfile with the following content:import { PostResponseDTO } from "./post-response.dto"; export class FindPostsResponseDTO { limit: number; offset: number; search?: string; username?: string; withUserData?: boolean; data: PostResponseDTO[]; } -
Now update the
findAllmethod inapi/src/posts/posts.controller.tsto use these DTOs:@Get() async findAll( @Query() query: FindPostsQueryDTO, ): Promise<FindPostsResponseDTO> { const { limit, offset, search, username, withUserData } = query; let userId: number | undefined; if (username) { const user = await this.userService.findOne(username); if (!user) { throw new NotFoundException(`User with username ${username} not found`); } userId = user.id; } const posts = await this.postsService.findAll( limit, offset, search, userId, withUserData, ); return { limit, offset, search, username, withUserData, data: posts.map((post) => { delete post.userId; if (post.user) { delete post.user.password; } return post as PostResponseDTO; }), }; } -
Make sure to remove the following type declaration from
api/src/posts/posts.controller.tssince it is no longer needed:type PostResponseWithPagination = { filter?: string; search?: string; data: PostResponseDto[]; pagination: { limit: number; offset: number; }; }; -
Finally, update the setup of the validation pipe to effectively transform the query parameters and apply validation. To do this, make the following changes to the
api/src/main.tsfile:import { NestFactory } from "@nestjs/core"; import { AppModule } from "./app.module"; import { ValidationPipe } from "@nestjs/common"; import { HttpResponseFilter } from "./filters/http-response.filter"; import { HttpResponseInterceptor } from "./interceptors/http-response.interceptor"; async function bootstrap() { const app = await NestFactory.create(AppModule); app.useGlobalPipes( new ValidationPipe({ // <-- Add these options transform: true, // Enable transformation whitelist: true, // Strip properties that do not have any decorators forbidNonWhitelisted: true, // Throw errors if non-whitelisted values are provided transformOptions: { // Enable implicit type conversion enableImplicitConversion: true, }, }), ); app.useGlobalFilters(new HttpResponseFilter()); app.useGlobalInterceptors(new HttpResponseInterceptor()); await app.listen(3000); } bootstrap();Please note that the only change made is the addition of some options to the
ValidationPipe.
Test the app with Postman and make sure it works as expected. Then commit your changes to version control:
git add .
git commit -m "Add new DTOs for query parameters"
Step 5: Fetch Posts on Frontend
Let’s update the frontend to fetch app the posts from the backend. We need to make this update in the mock API app/src/lib/api.ts; change the fetchPosts to this implementation:
// Fetch all posts with user data
export const fetchPosts = async (): Promise<PostWithUserData[]> => {
  const API_URL = import.meta.env.VITE_API_URL;
  const response = await fetch(`${API_URL}/posts?withUserData=true`);
  const responseJson = await response.json();
  return responseJson.data;
};
The fetchPosts function is responsible for retrieving all the posts from the backend API. It sends an asynchronous request to the /posts endpoint of the API, including the withUserData=true query parameter. This parameter indicates that the response should include user data along with the posts.
Upon receiving the response, it is parsed as JSON using the response.json() method. The function then returns the data property of the parsed JSON response, which contains an array of PostWithUserData objects.
With this updated implementation, the frontend can now receive both the posts and the corresponding user data. This enables the UI to display user information alongside each post.
The line const API_URL = import.meta.env.VITE_API_URL; retrieves the value of the VITE_API_URL environment variable using the import.meta.env object.
In the context of our frontend application, import.meta.env provides access to environment variables defined in the .env file located inside the app folder. This mechanism allows Vite to expose environment variables during the build process or at runtime.
Run the app and notice the error message related to CORS policy in the browser console:
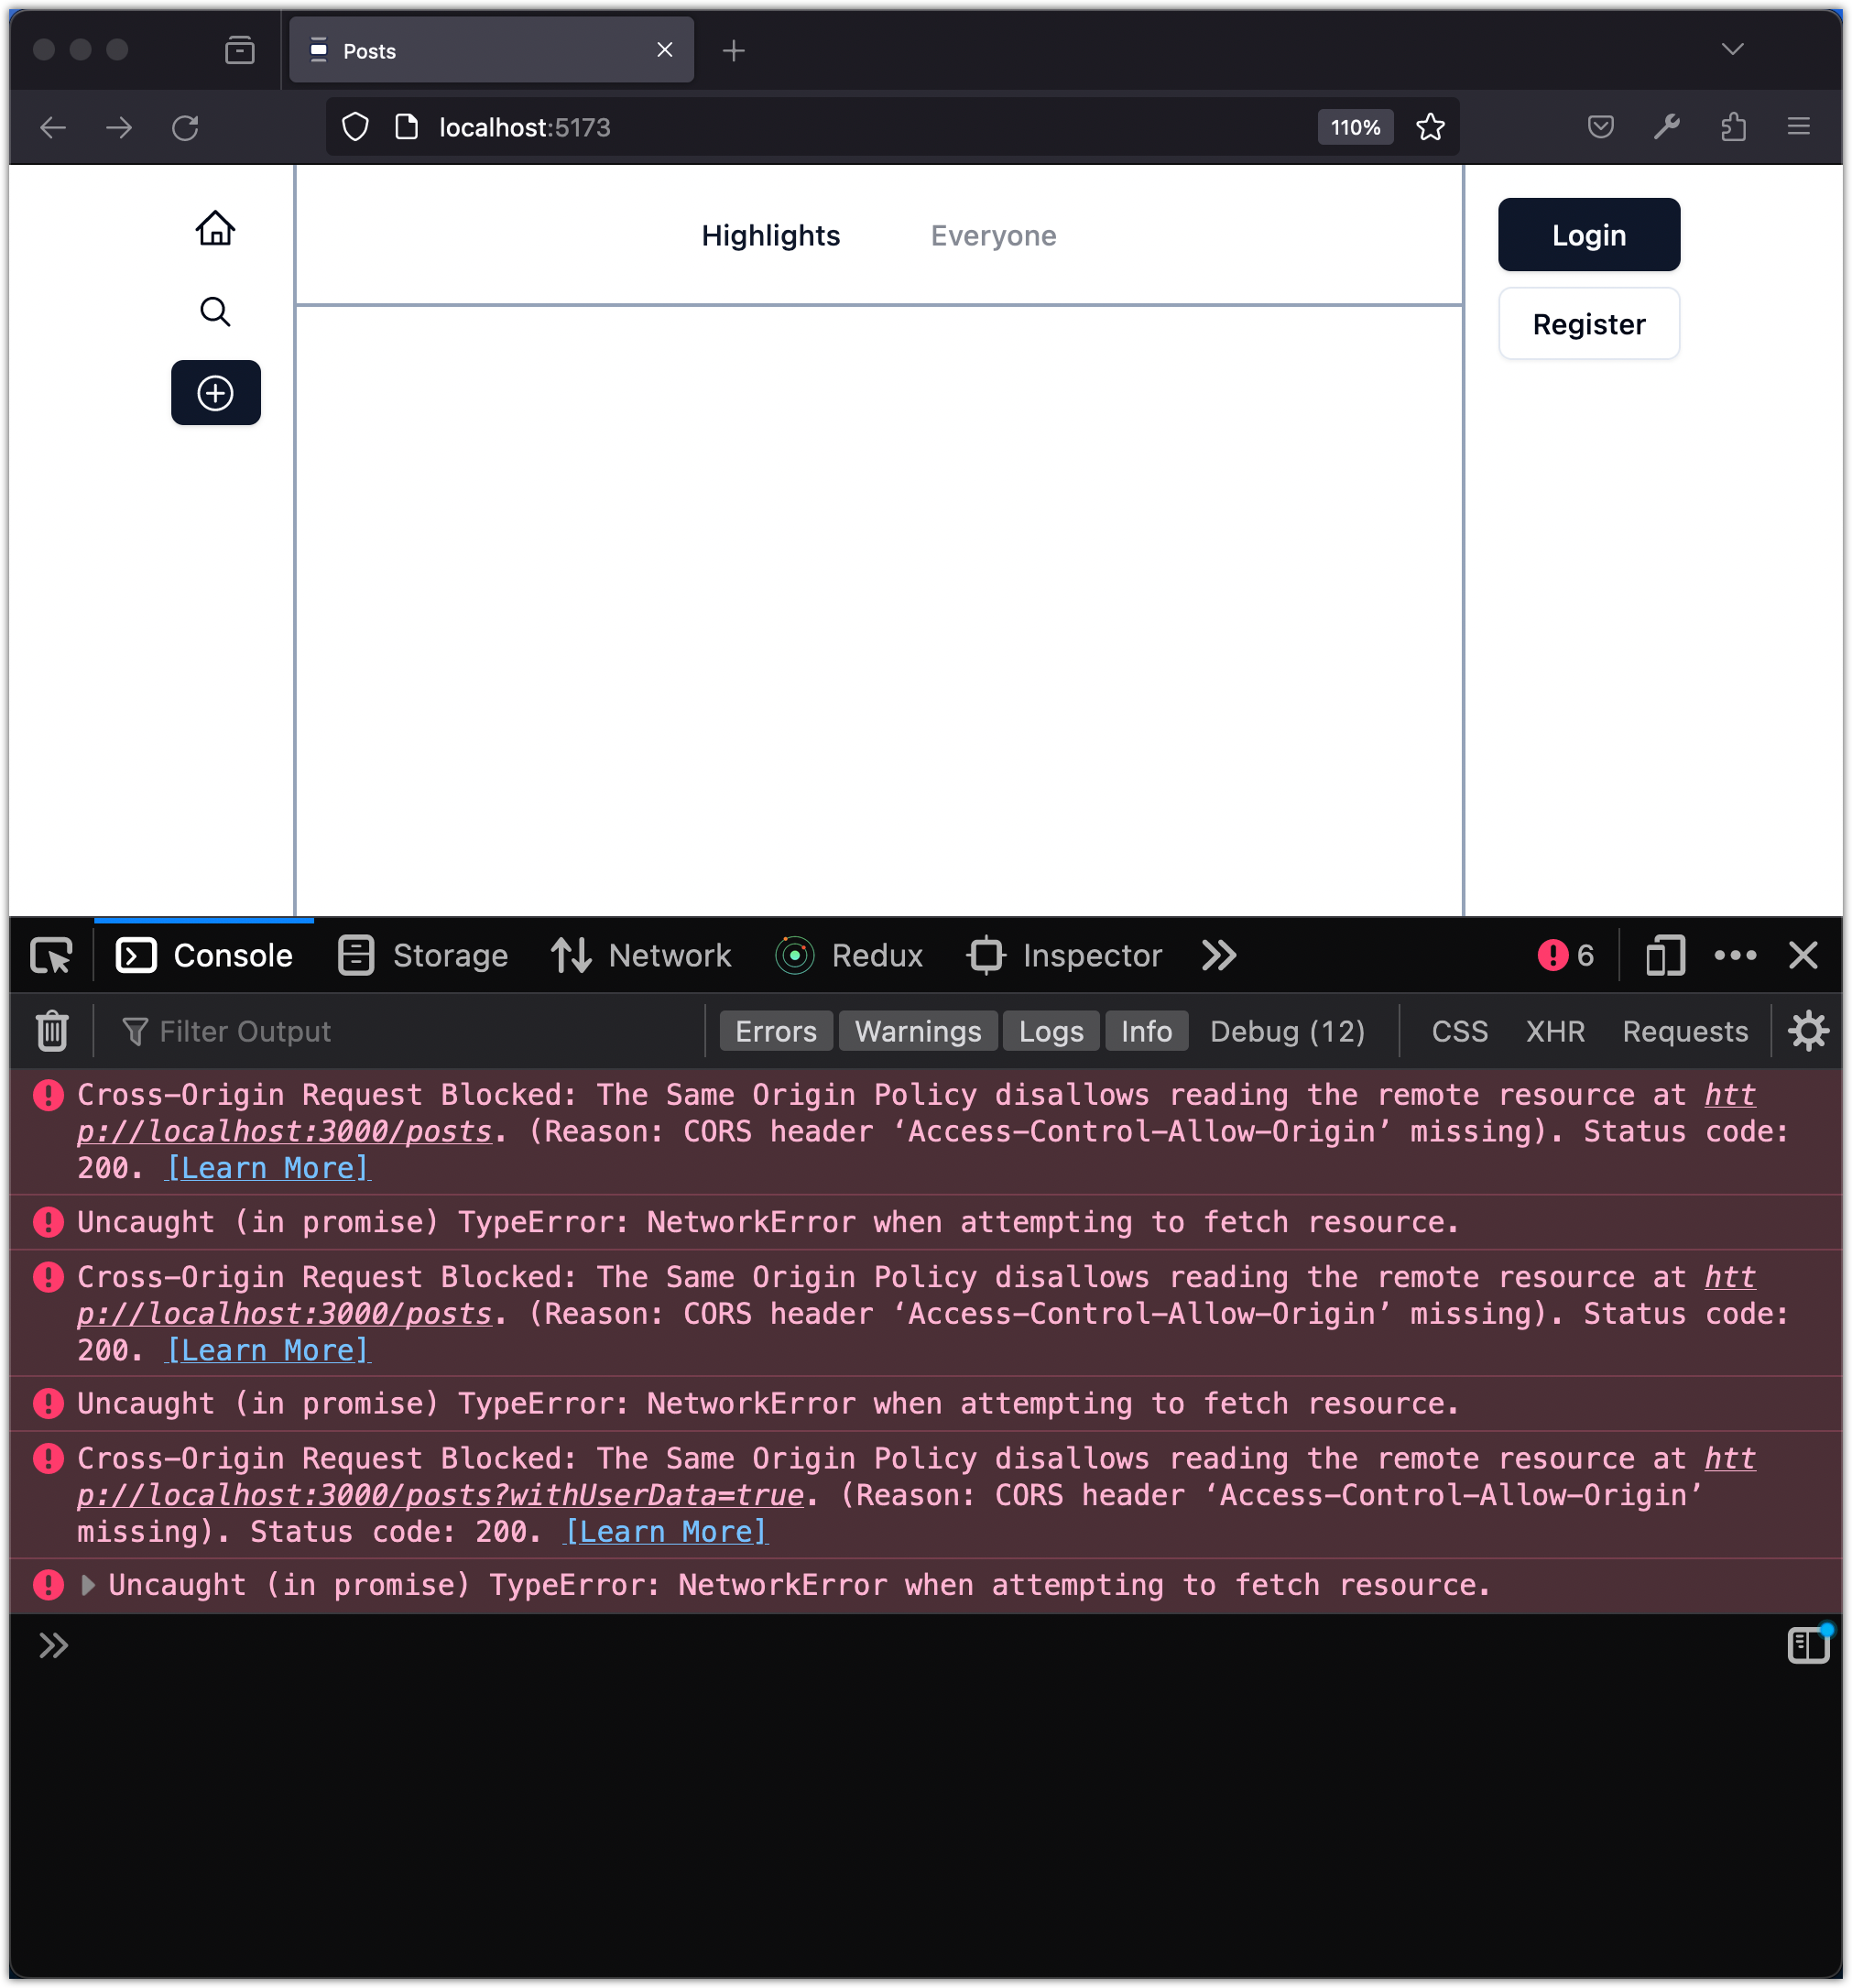
The error message is related to the Cross-Origin Resource Sharing (CORS) policy. The Same Origin Policy is a security feature implemented by web browsers that restricts web pages from making requests to a different origin (domain, protocol, or port) than the one it originated from.
In this case, the error message indicates that the request made from your frontend application to the http://localhost:3000/posts endpoint was blocked because the server hosting the API did not include the necessary CORS headers to allow the request from a different origin.
To resolve this issue, the server needs to include the Access-Control-Allow-Origin header in the response to indicate that it allows requests from your frontend application's origin (e.g., http://localhost:3000). This can be achieved by configuring the server to handle CORS requests properly.
You need to update the api/src/main.ts file:
import { NestFactory } from "@nestjs/core";
import { AppModule } from "./app.module";
import { ValidationPipe } from "@nestjs/common";
import { HttpResponseFilter } from "./filters/http-response.filter";
import { HttpResponseInterceptor } from "./interceptors/http-response.interceptor";

async function bootstrap() {
  const app = await NestFactory.create(AppModule, {
    cors: { // <-- Add this option
      origin: process.env.CLIENT_URL,
    },
  });

  app.useGlobalPipes(
    new ValidationPipe({
      transform: true,
      whitelist: true,
      forbidNonWhitelisted: true,
      transformOptions: {
        enableImplicitConversion: true,
      },
    }),
  );

  app.useGlobalFilters(new HttpResponseFilter());
  app.useGlobalInterceptors(new HttpResponseInterceptor());

  await app.listen(3000);
}

bootstrap();
Notice that the update simply involves adding a configuration option to NestFactory.create function.
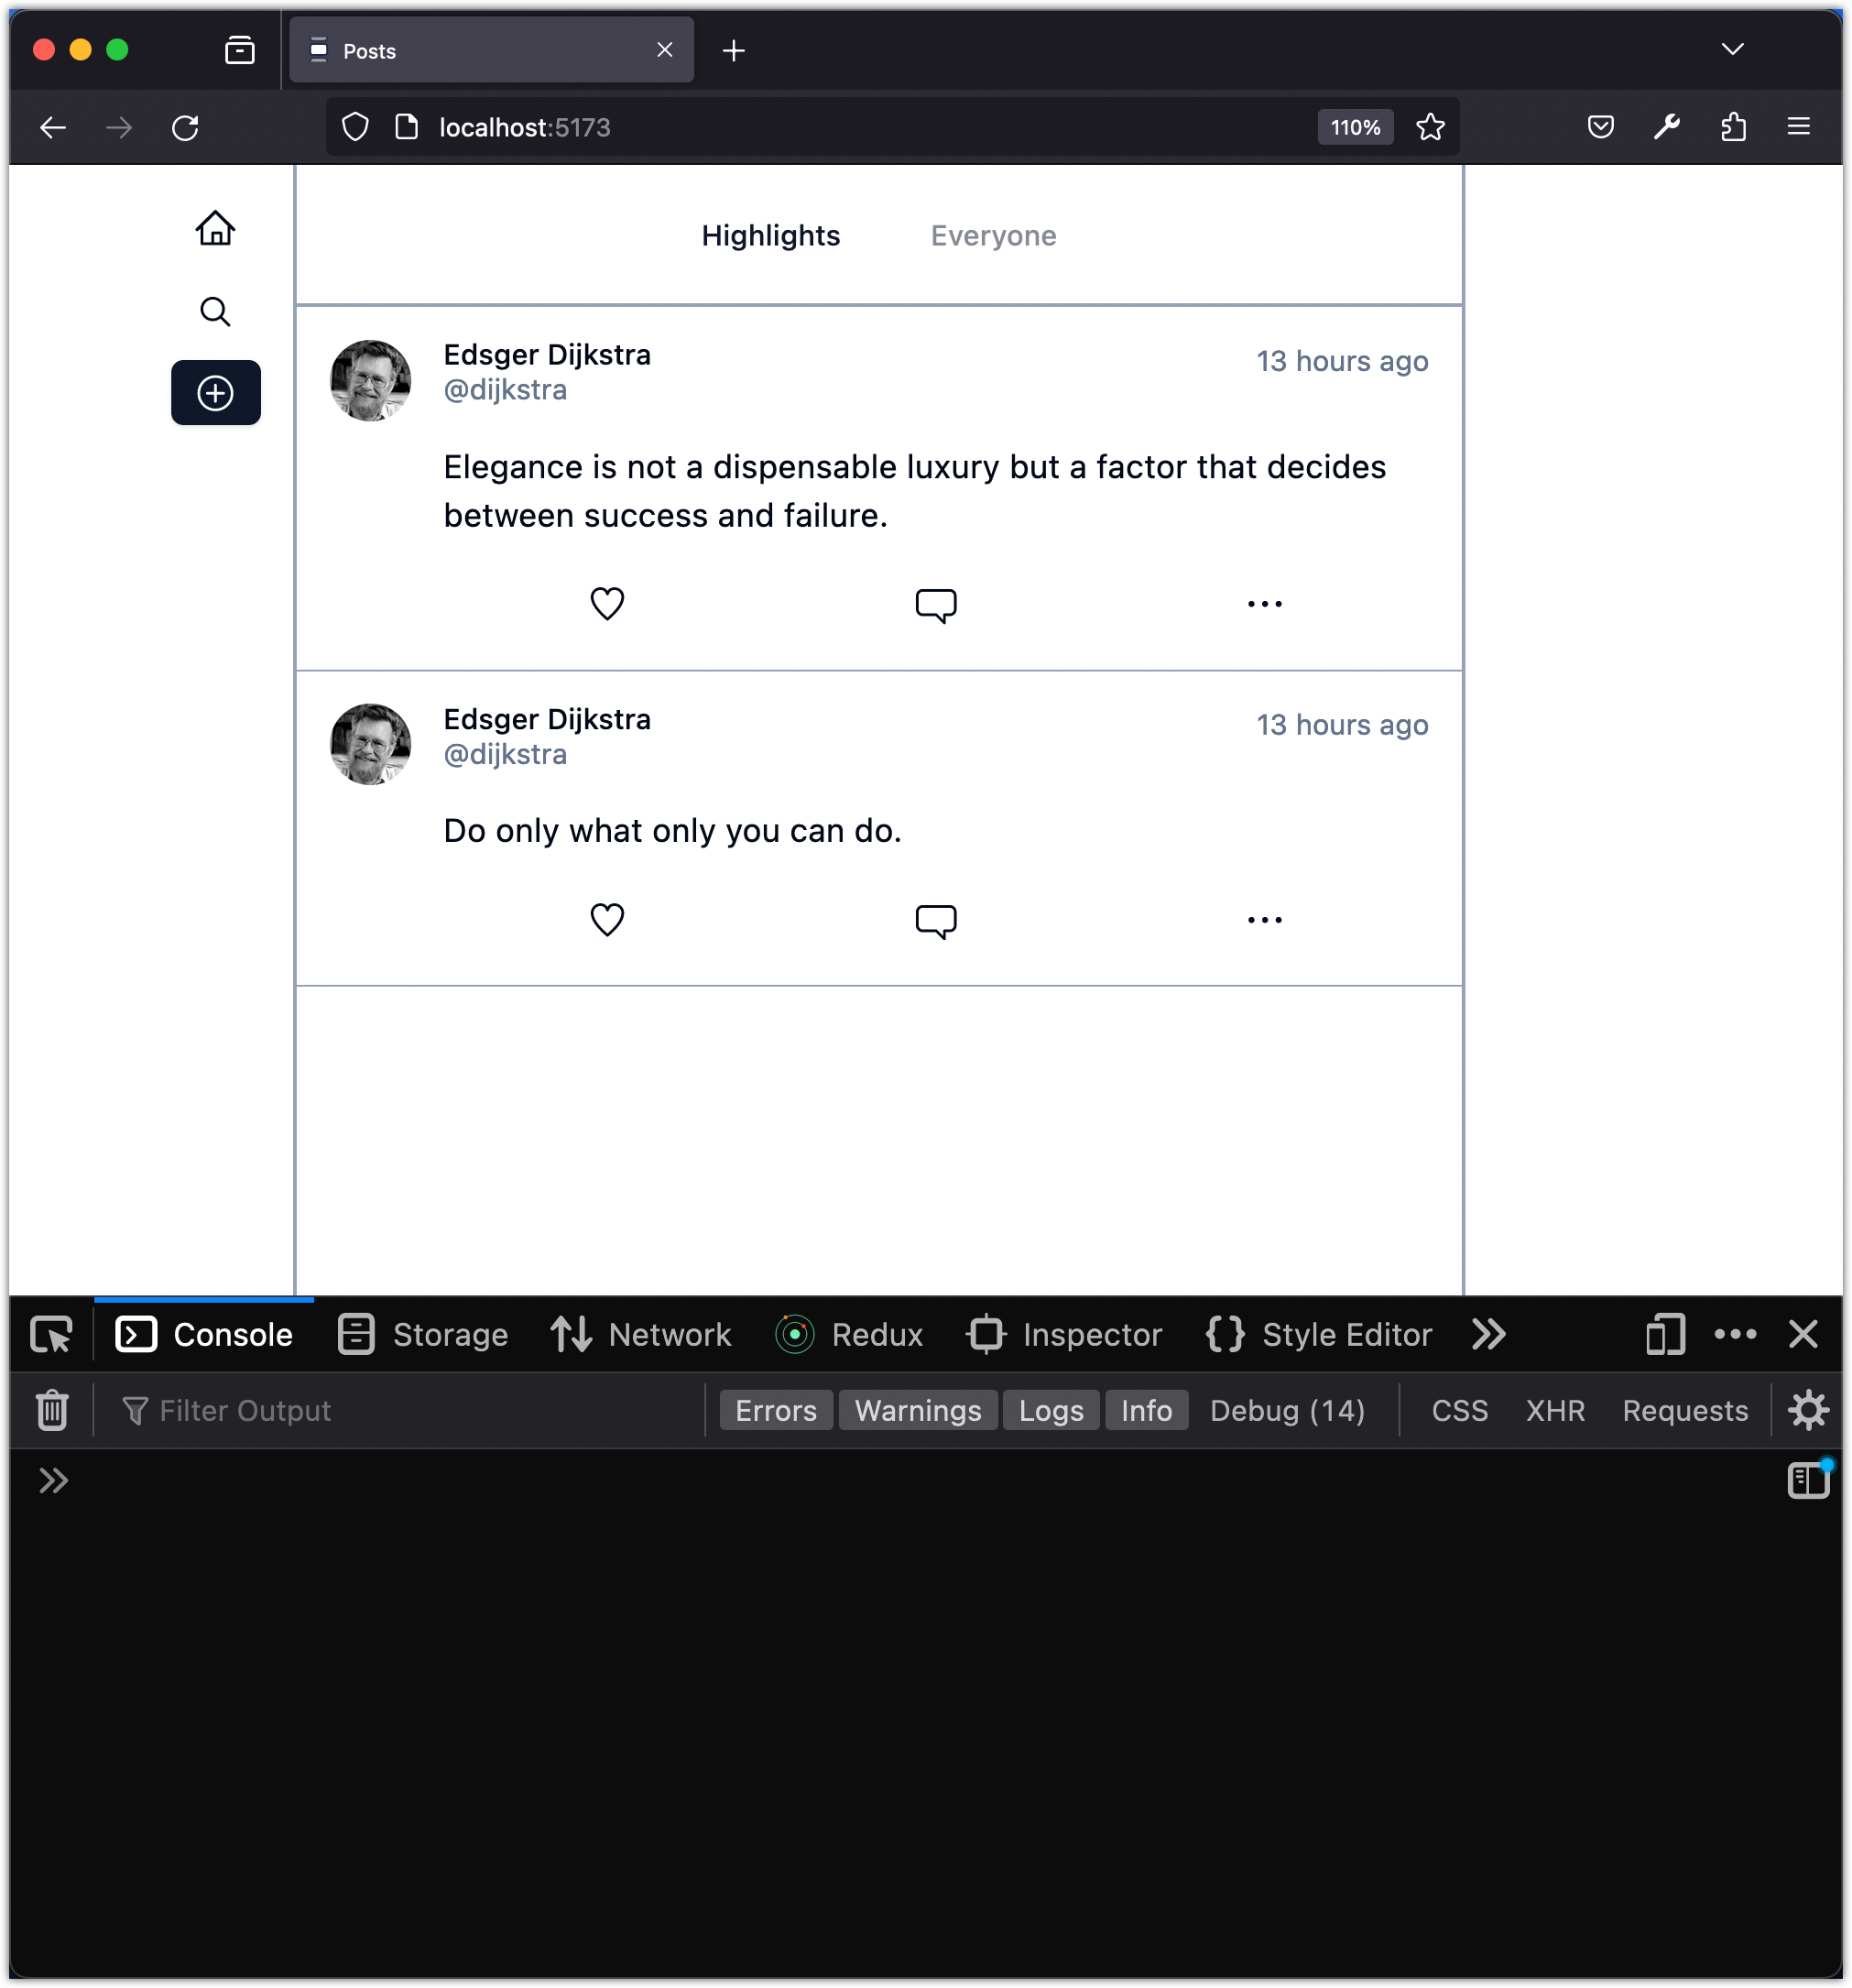
Once the server is configured to allow requests from the origin of your frontend application, the error should no longer occur. As a result, your frontend application will be able to successfully retrieve the posts from the API. To confirm this, simply refresh the browser.
Please commit your changes to version control:
git add .
git commit -m "Refactor API configuration and fetchPosts function"
Step 6: Handle Errors Gracefully
Now that we have an integration in place to read the posts from the backend, let’s prepare for a scenario where something goes wrong, such as network errors, hindering the functionality to fetch the posts.
Let's see what happens if you stop the backend application and then run the frontend app.
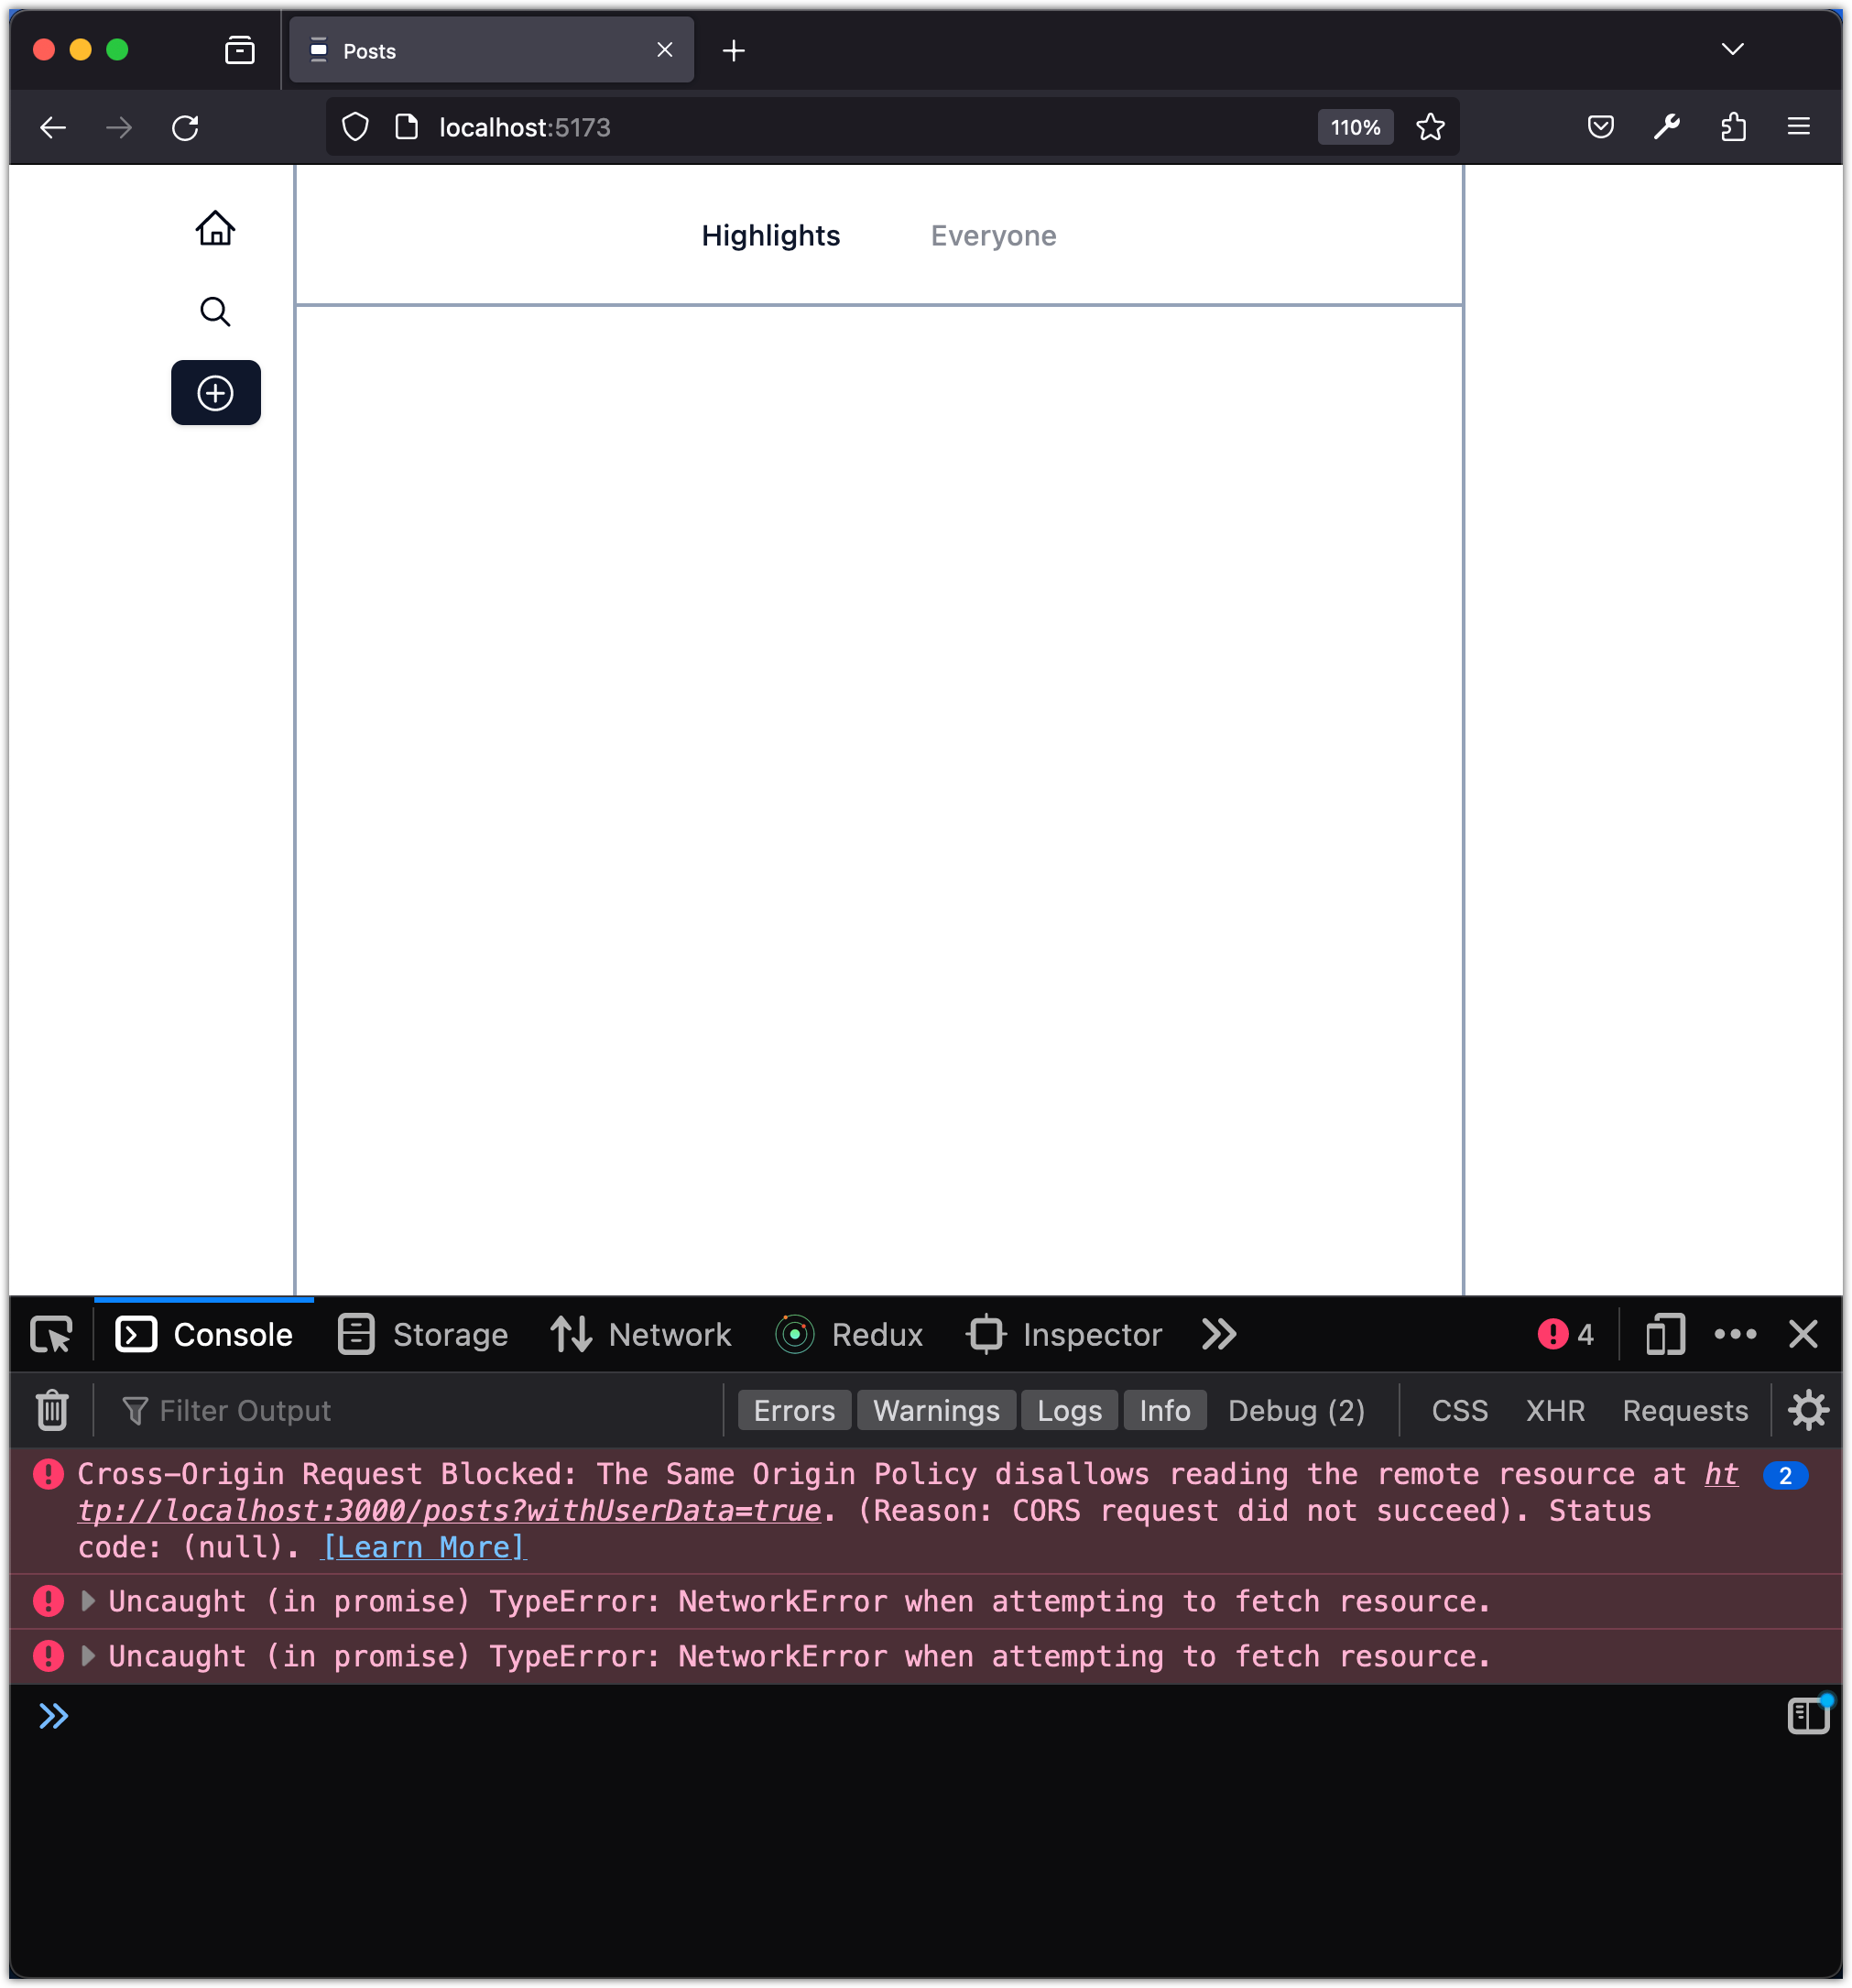
Notice there are errors printed in the console. You can further inspect the networks tab to see the errors:

Okay, let’s make some updates to handle an issue like this more gracefully. First, update the fetchPosts function:
// Fetch all posts with user data
export const fetchPosts = async (): Promise<PostWithUserData[]> => {
  const API_URL = import.meta.env.VITE_API_URL;
  const response = await fetch(`${API_URL}/posts?withUserData=true`);
  const responseJson = await response.json();

  if (!response.ok) {
    throw new Error(
      `Error: ${response.status} - ${
        responseJson.message || response.statusText
      }`,
    );
  }

  return responseJson.data;
};
The fetchPosts function handles error conditions by checking if the response from the API is not successful (response.ok). If the response is not successful, it throws an Error with a message that includes the status code and the error message from the response (response.status and responseJson.message || response.statusText).
This error handling mechanism allows the frontend application to handle network errors or any other errors that may occur during the API request. By throwing an error, it provides an opportunity for the application to display an error message or take appropriate action based on the specific error encountered.
Now update the app/src/hooks/use-query-posts.tsx as follows:
import { useEffect } from "react";
import { fetchPosts } from "@/lib/api";
import { useStore } from "@/lib/store";
import { useToast } from "@/components/ui/use-toast";

function useQueryPosts() {
  const { toast } = useToast();
  const posts = useStore((state) => state.posts);
  const setPosts = useStore((state) => state.setPosts);

	const loadPosts = async () => {
    try {
      const fetchedPosts = await fetchPosts();
      setPosts(fetchedPosts);
    } catch (error) {
      toast({
        variant: "destructive",
        title: "Failed to fetch posts",
        description:
          (error as Error).message ||
          "There was an error loading the posts. Please try again later.",
      });
    }
  };

  useEffect(() => {
    loadPosts();
  }, []);

  return { posts };
}

export default useQueryPosts;
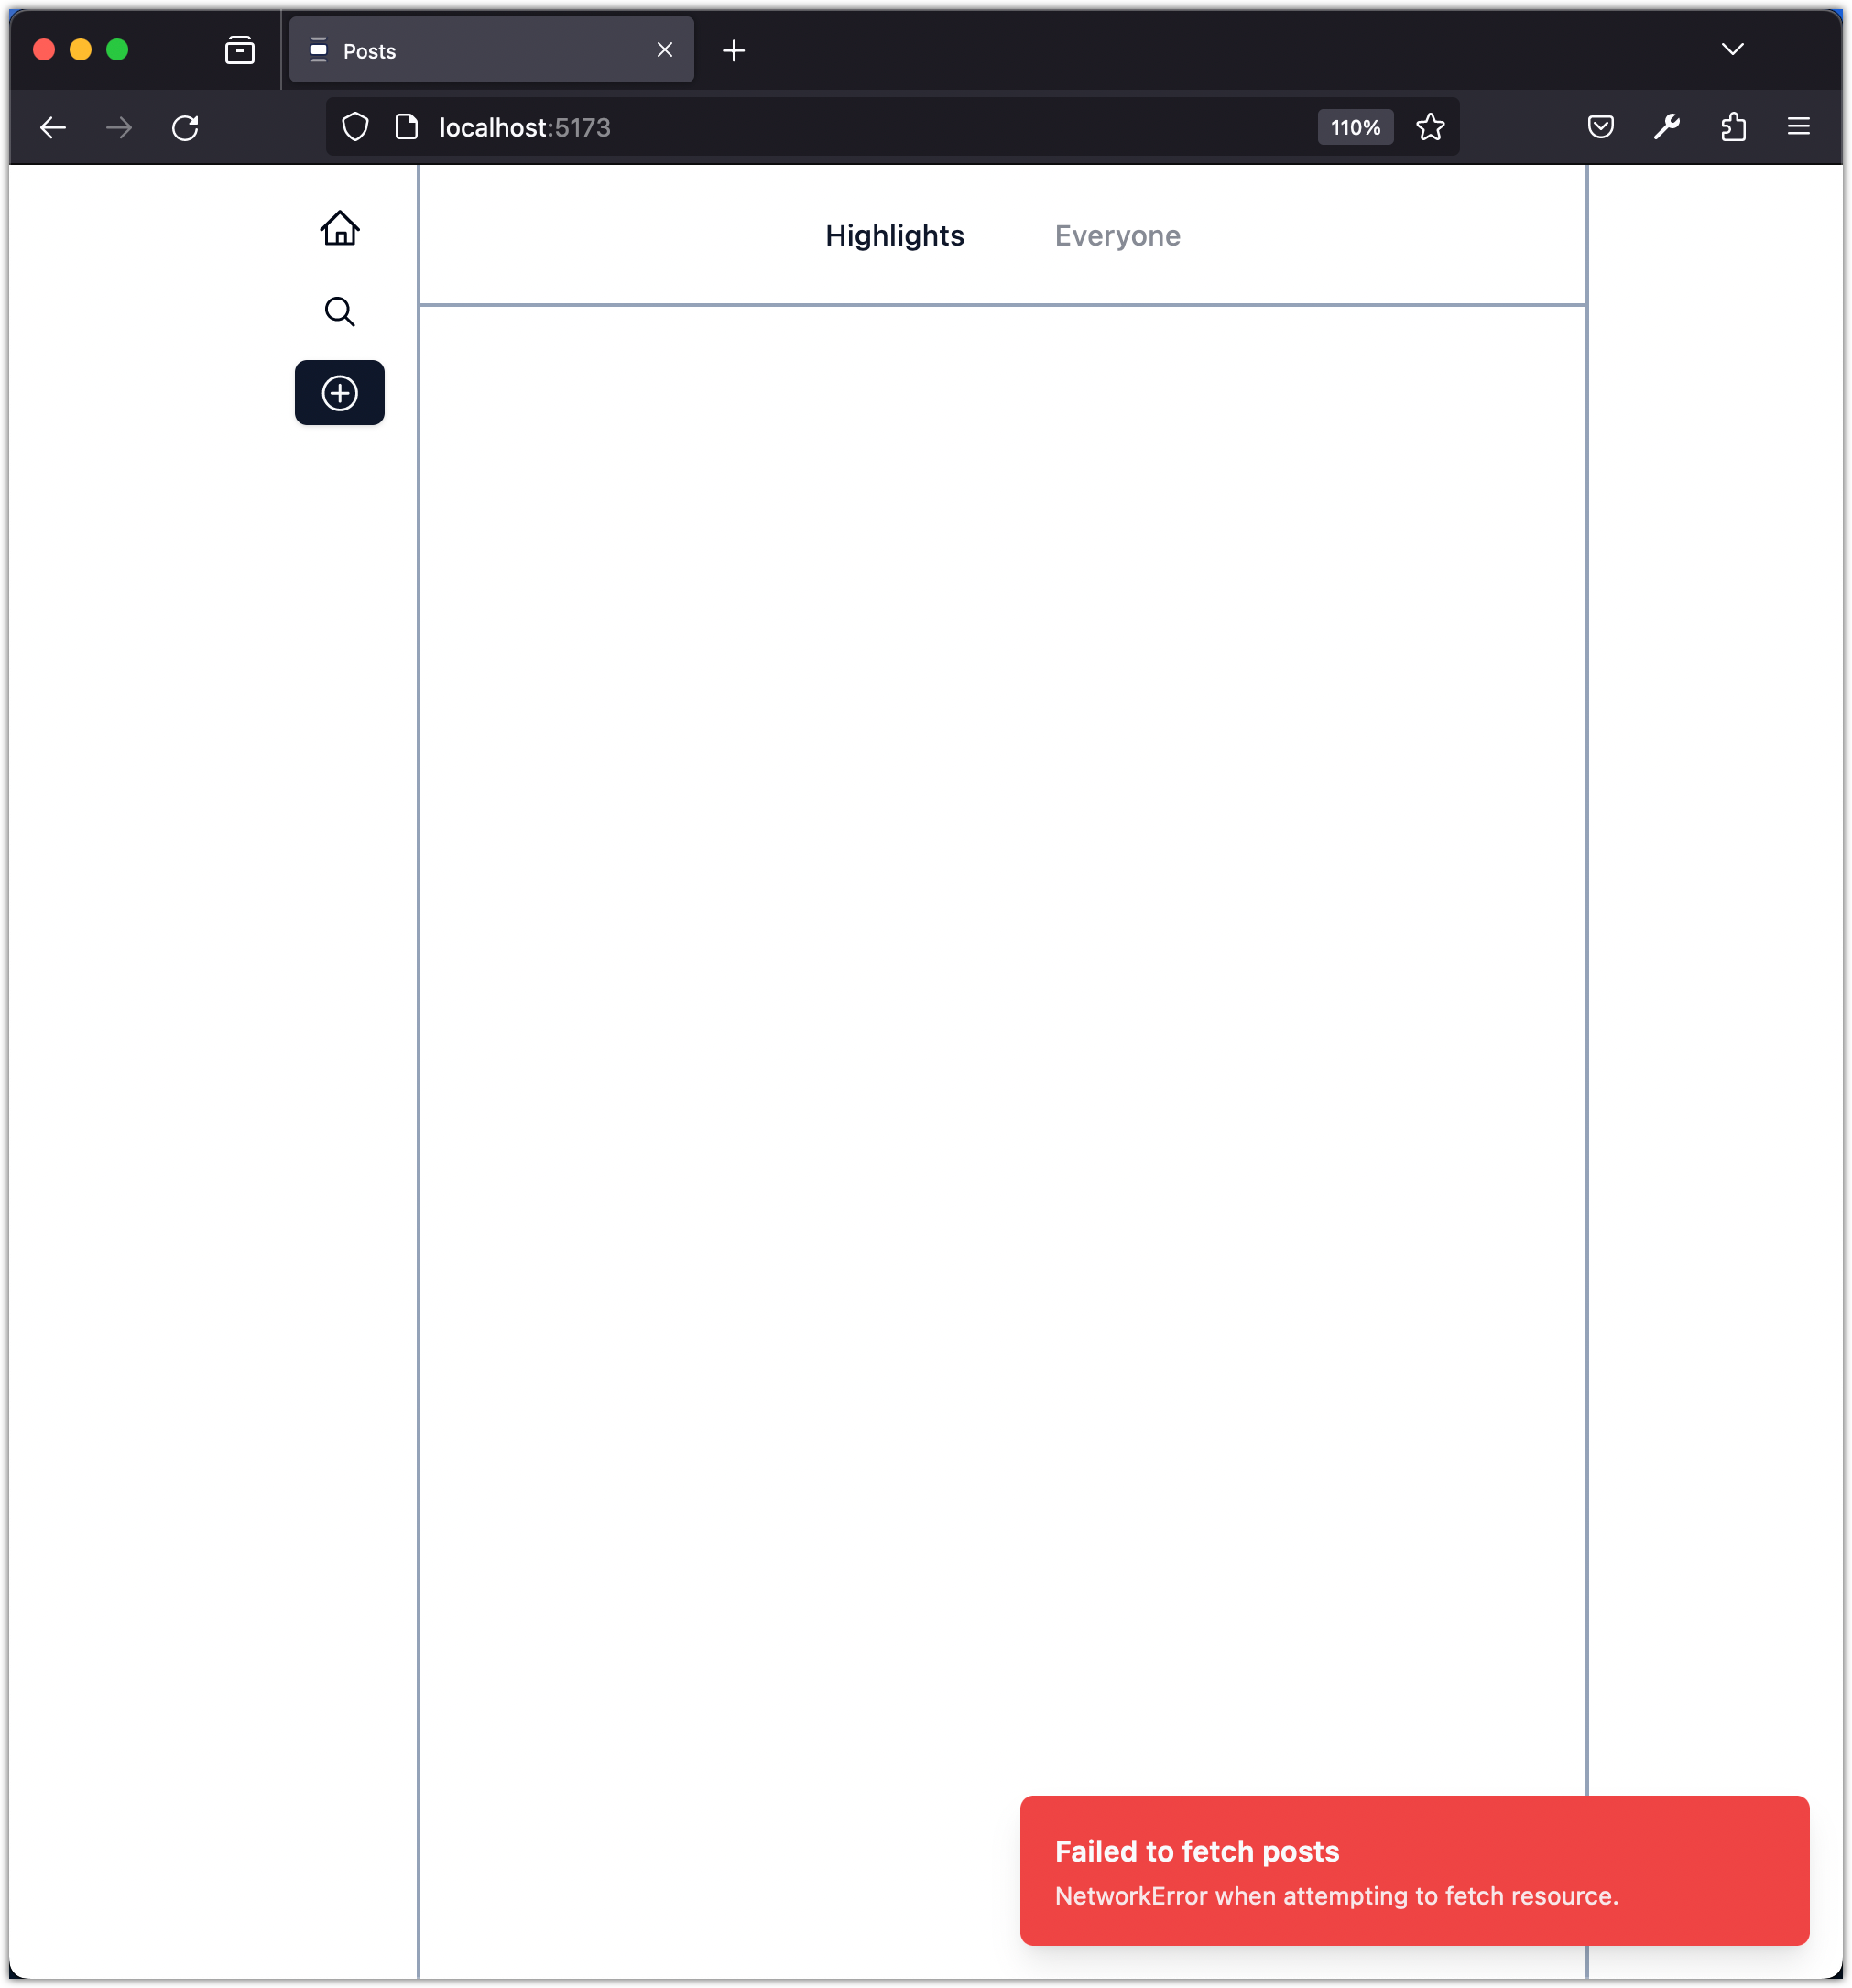
The loadPosts function now includes error handling logic. If an error occurs during the API request to fetch the posts, it will catch the error and display a toast notification with an appropriate error message.
This error handling ensures that the application provides feedback to the user in case of any issues while fetching the posts, improving the overall user experience.
Now refresh the frontend app and observe the toast message that informs the user about the issue with fetching posts.
Please commit your changes to version control:
git add .
git commit -m "Handle API Errors Gracefully on Frontend"
Step 7: Create Post on Frontend and Save it on Backend
Currently, we have this mock API on the frontend to create a post:
// Create a post
export const createPost = async (
  content: string,
  image?: string,
): Promise<Post> => {
  return new Promise((resolve) => {
    setTimeout(() => {
      const user = getAuthenticatedUser();
      const newPost: Post = {
        id: nanoid(),
        userId: user.id,
        content,
        image,
        timestamp: new Date().toISOString(),
        likeCount: 0,
        commentCount: 0,
      };
      db.posts.push(newPost);
      resolve(newPost);
    }, 200); // Simulate an API delay
  });
};
Update this function as follows:
// Create a post
export const createPost = async (
  content: string,
  image?: string,
): Promise<PostWithUserData> => {
  const user = getAuthenticatedUser();
  const token = getAuthenticatedUserToken();

  const API_URL = import.meta.env.VITE_API_URL;
  const response = await fetch(`${API_URL}/posts`, {
    method: "POST",
    headers: {
      "Content-Type": "application/json",
      Authorization: `Bearer ${token}`,
    },
    body: JSON.stringify({ content, image }),
  });

  const responseJson = await response.json();

  if (!response.ok) {
    throw new Error(
      `Error: ${response.status} - ${
        responseJson.message || response.statusText
      }`,
    );
  }

  return {
    ...responseJson.data,
    user: user,
  };
};
We must create a new function getAuthenticatedUserToken in the auth.ts file:
// Get the token from local storage
export const getAuthenticatedUserToken = (): string | null => {
  return localStorage.getItem('token');
};
The getAuthenticatedUserToken function is a helper function that retrieves the authentication token of the currently logged-in user from the browser's local storage. It returns the token as a string or null if no token is found. It assumes the token is stored in local storage.
We should update the getAuthenticatedUser too! Currently, it returns a hardcoded user:
// Hardcoded authenticated user data for Edsger Dijkstra
const authenticatedUser: User = {
  id: "u1",
  username: "edsger",
  displayName: "Edsger Dijkstra",
  avatar: "edsger-dijkstra.webp",
};

export const getAuthenticatedUser = (): User => {
  // For now, this simply returns the hardcoded user.
  // In the future, this can be replaced with actual authentication logic.
  return authenticatedUser;
}
We can decode the user information from the stored token. To help with this, we rely on a popular library, jwt-decode, which is a small and simple library to help you decode JWTs token which are Base64Url encoded. To install this library, make sure you change directly to the app folder first:
cd app
pnpm install jwt-decode
Aside: We utilized the jsonwebtoken library for our backend. This library is intended for Node.js environments and is commonly employed on the server side. However, it is not suitable for client-side applications such as our React app, primarily because of its size and reliance on Node.js-specific features. Conversely, the jwt-decode library is specifically designed for browser environments. It is worth noting that jwt-decode solely decodes the token and does not validate it. This is fine since the validation of the token's integrity should always be done on the server side.
Here is the updated auth.ts:
import { jwtDecode } from "jwt-decode";
import { User } from "./types";

// Get the user by decoding the token from local storage
export const getAuthenticatedUser = (): User => {
  const token = localStorage.getItem("token") as string;
  const decodedToken = jwtDecode<User>(token);
  return decodedToken;
};

// Get the token from local storage
export const getAuthenticatedUserToken = (): string | null => {
  return localStorage.getItem("token");
};
Now update the app/src/hooks/use-mutations-posts.tsx files as follows:
import { createPost, deletePost } from "@/lib/api";
import { useStore } from "@/lib/store";
import { useToast } from "@/components/ui/use-toast";

function useMutationPosts() {
  const { toast } = useToast();
  const removePost = useStore((state) => state.removePost);
  const addPost = useStore((state) => state.addPost);

  const deletePostById = async (postId: string) => {
    await deletePost(postId);
    removePost(postId);
  };

	const addNewPost = async (content: string, image?: string) => {
    try {
      const newPost = await createPost(content, image);
      addPost(newPost);
    } catch (error) {
      toast({
        variant: "destructive",
        title: "Failed to create the post",
        description:
          (error as Error).message ||
          "There was an error creating the post. Please try again later.",
      });
    }
  };

  return { deletePostById, addNewPost };
}

export default useMutationPosts;
Notice the deletePostById function will be updated later. We are focusing on addNesPost right now.
Let's update the addPost action in the store (app/src/lib/store.ts) by following these steps:
-
Update the
addPostdeclaration:type Action = { setPosts: (posts: PostWithUserData[]) => void; removePost: (id: string) => void; - addPost: (post: Post) => void; + addPost: (post: PostWithUserData) => void; }; -
Update the
addPostimplementation:addPost: (post) => { set({ posts: [post, ...get().posts] }); }, -
Update the import statements:
- import { Post, PostWithUserData } from "./types";
+ import { PostWithUserData } from "./types";
  import { create } from "zustand";
  import { immer } from "zustand/middleware/immer";
- import { getAuthenticatedUser } from "./auth";
While working on this task, let's also improve the AddPostDialog. Currently, the dialog looks like this:
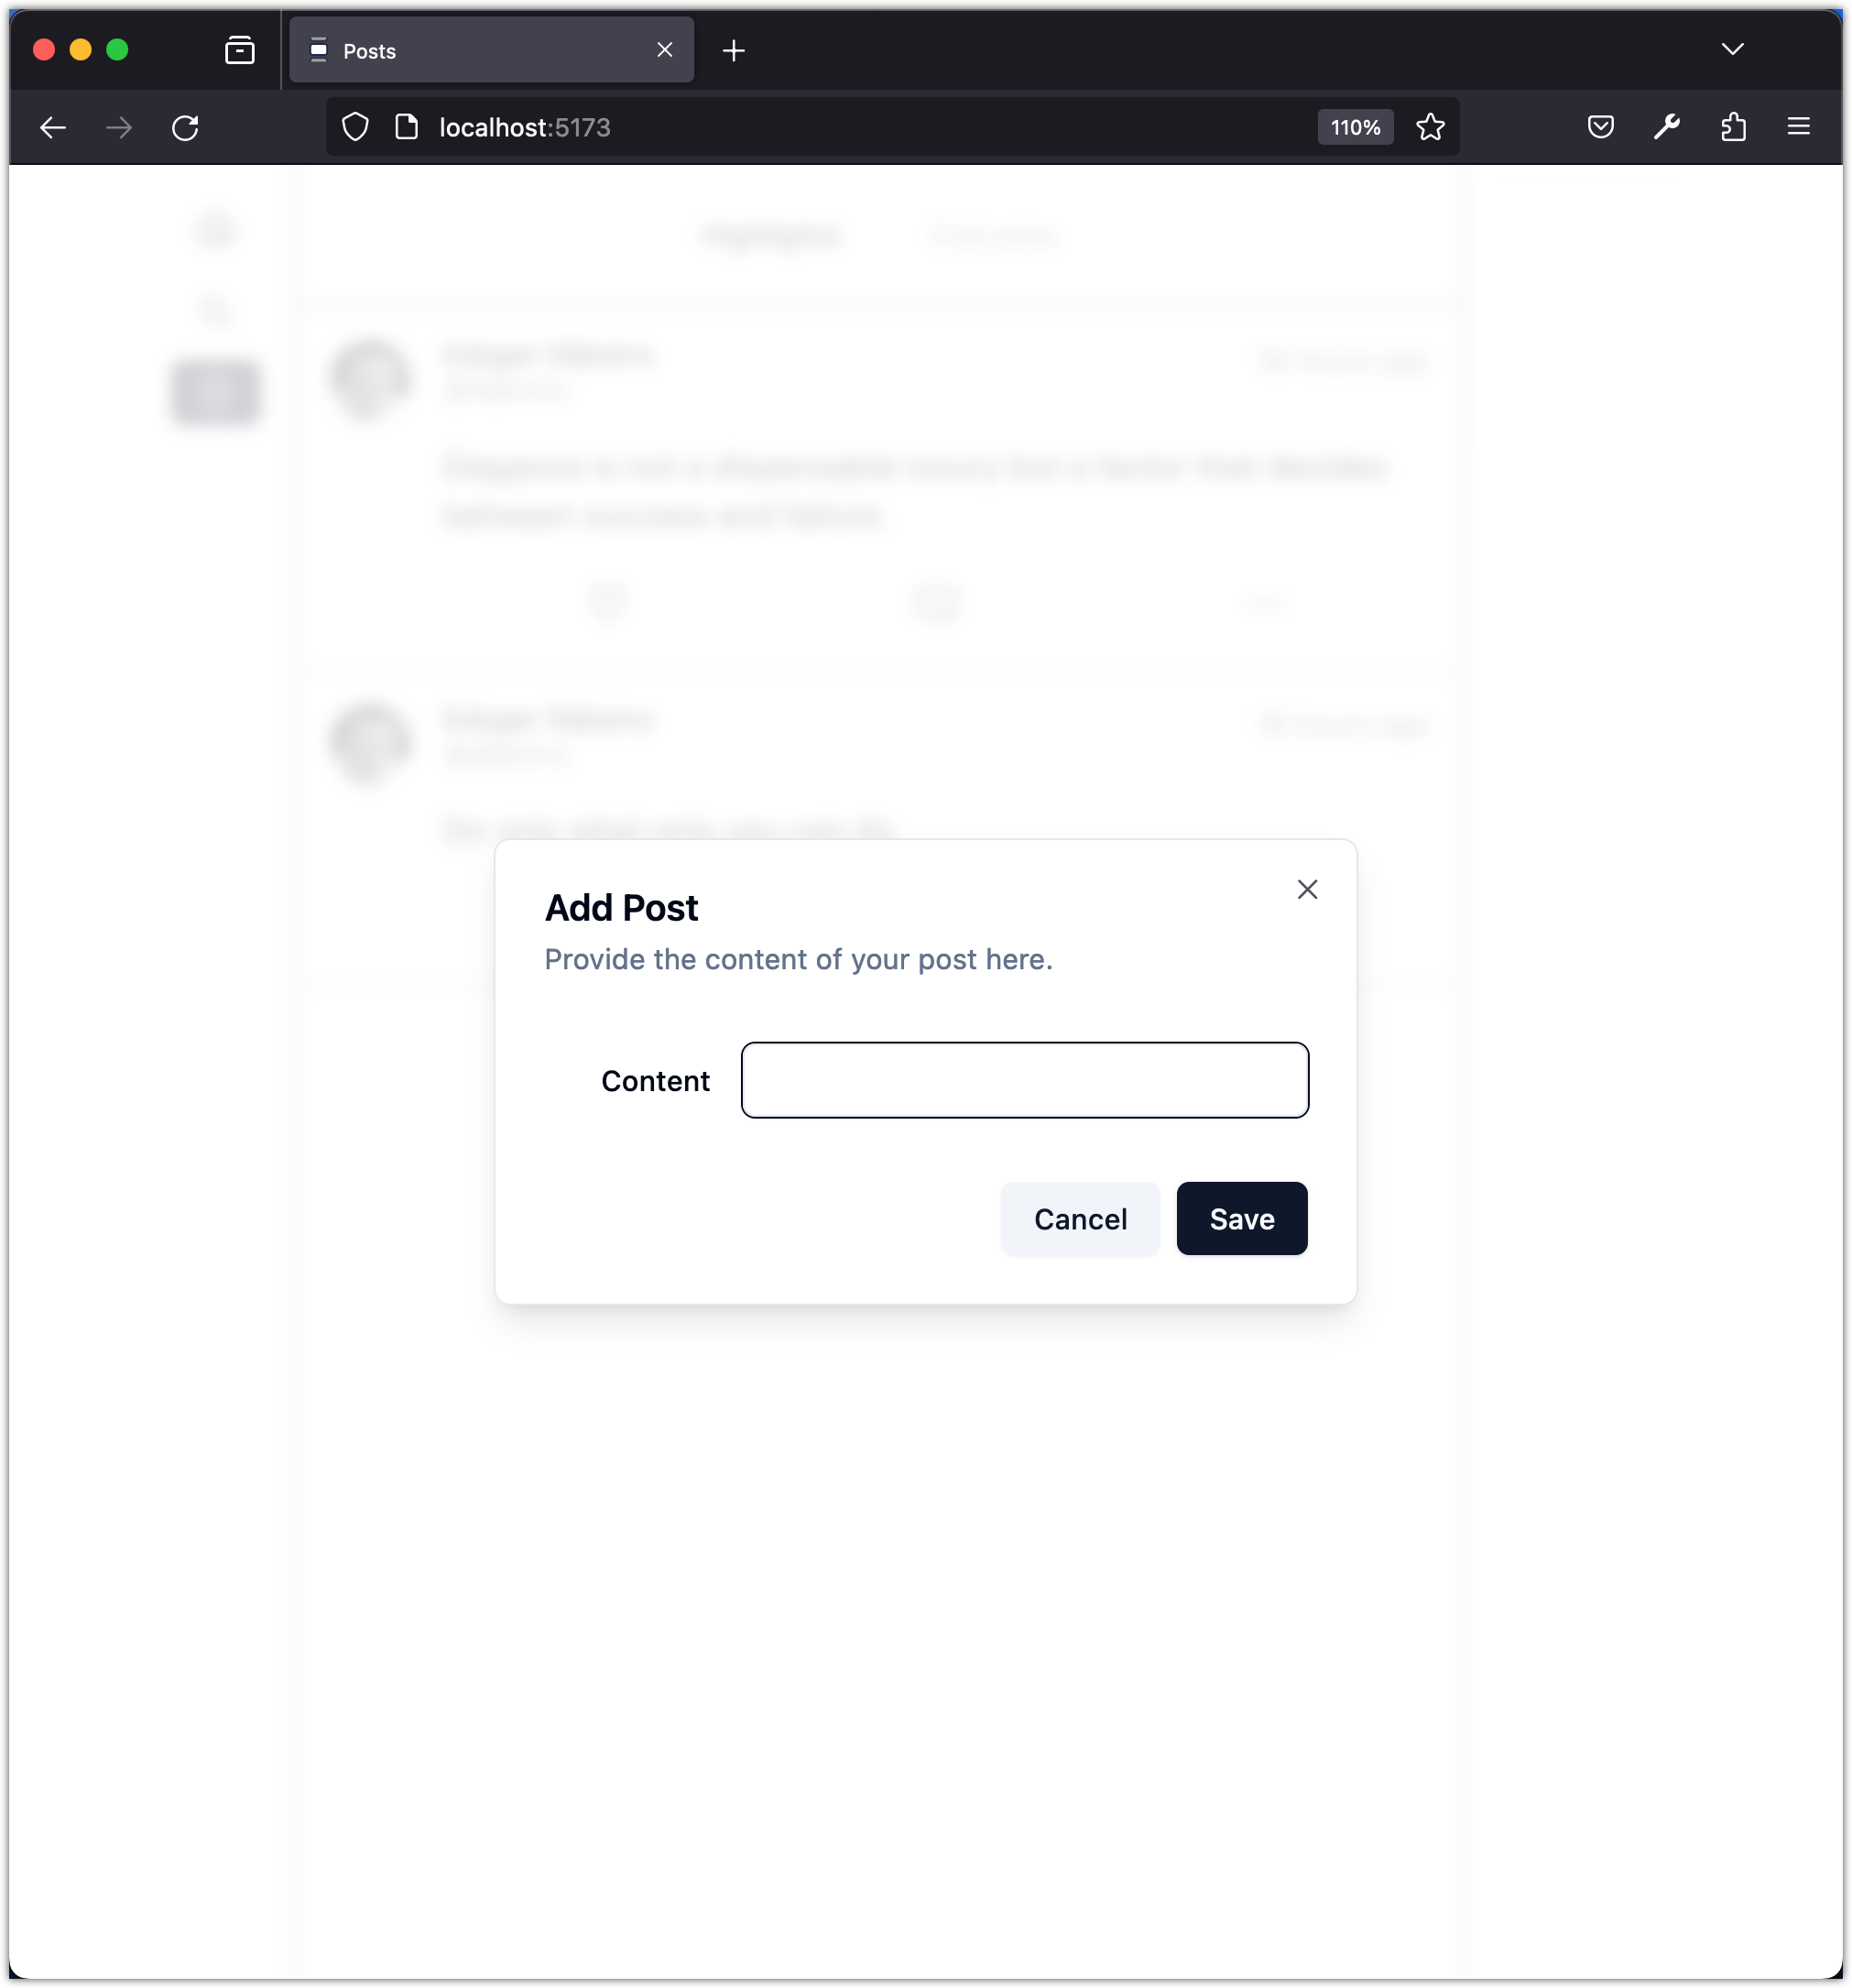
To provide more room for users to write their post content, let's swap the Input component with a Textarea component. Follow these steps:
-
Install the
Textareacomponent from shadcn/ui (make sure you run this in theappdirectory):pnpm dlx shadcn-ui@latest add textarea -
Swap the input component with the textarea:
- <Label htmlFor="title" className="text-right"> - Content - </Label> - <Input - id="content" - value={content} - className="col-span-3" - onChange={(e) => { - setContent(e.target.value); - }} - /> + <Textarea + id="content" + value={content} + className="col-span-3" + onChange={(e) => { + setContent(e.target.value); + }} + /> -
Update the import statement:
- import { Input } from "@/components/ui/input"; - import { Label } from "@/components/ui/label"; + import { Textarea } from "./ui/textarea"; -
Update the width of the dialog:
- <DialogContent className="sm:max-w-[425px]">
+ <DialogContent className="sm:max-w-[525px]">
Now the dialog should look like this:

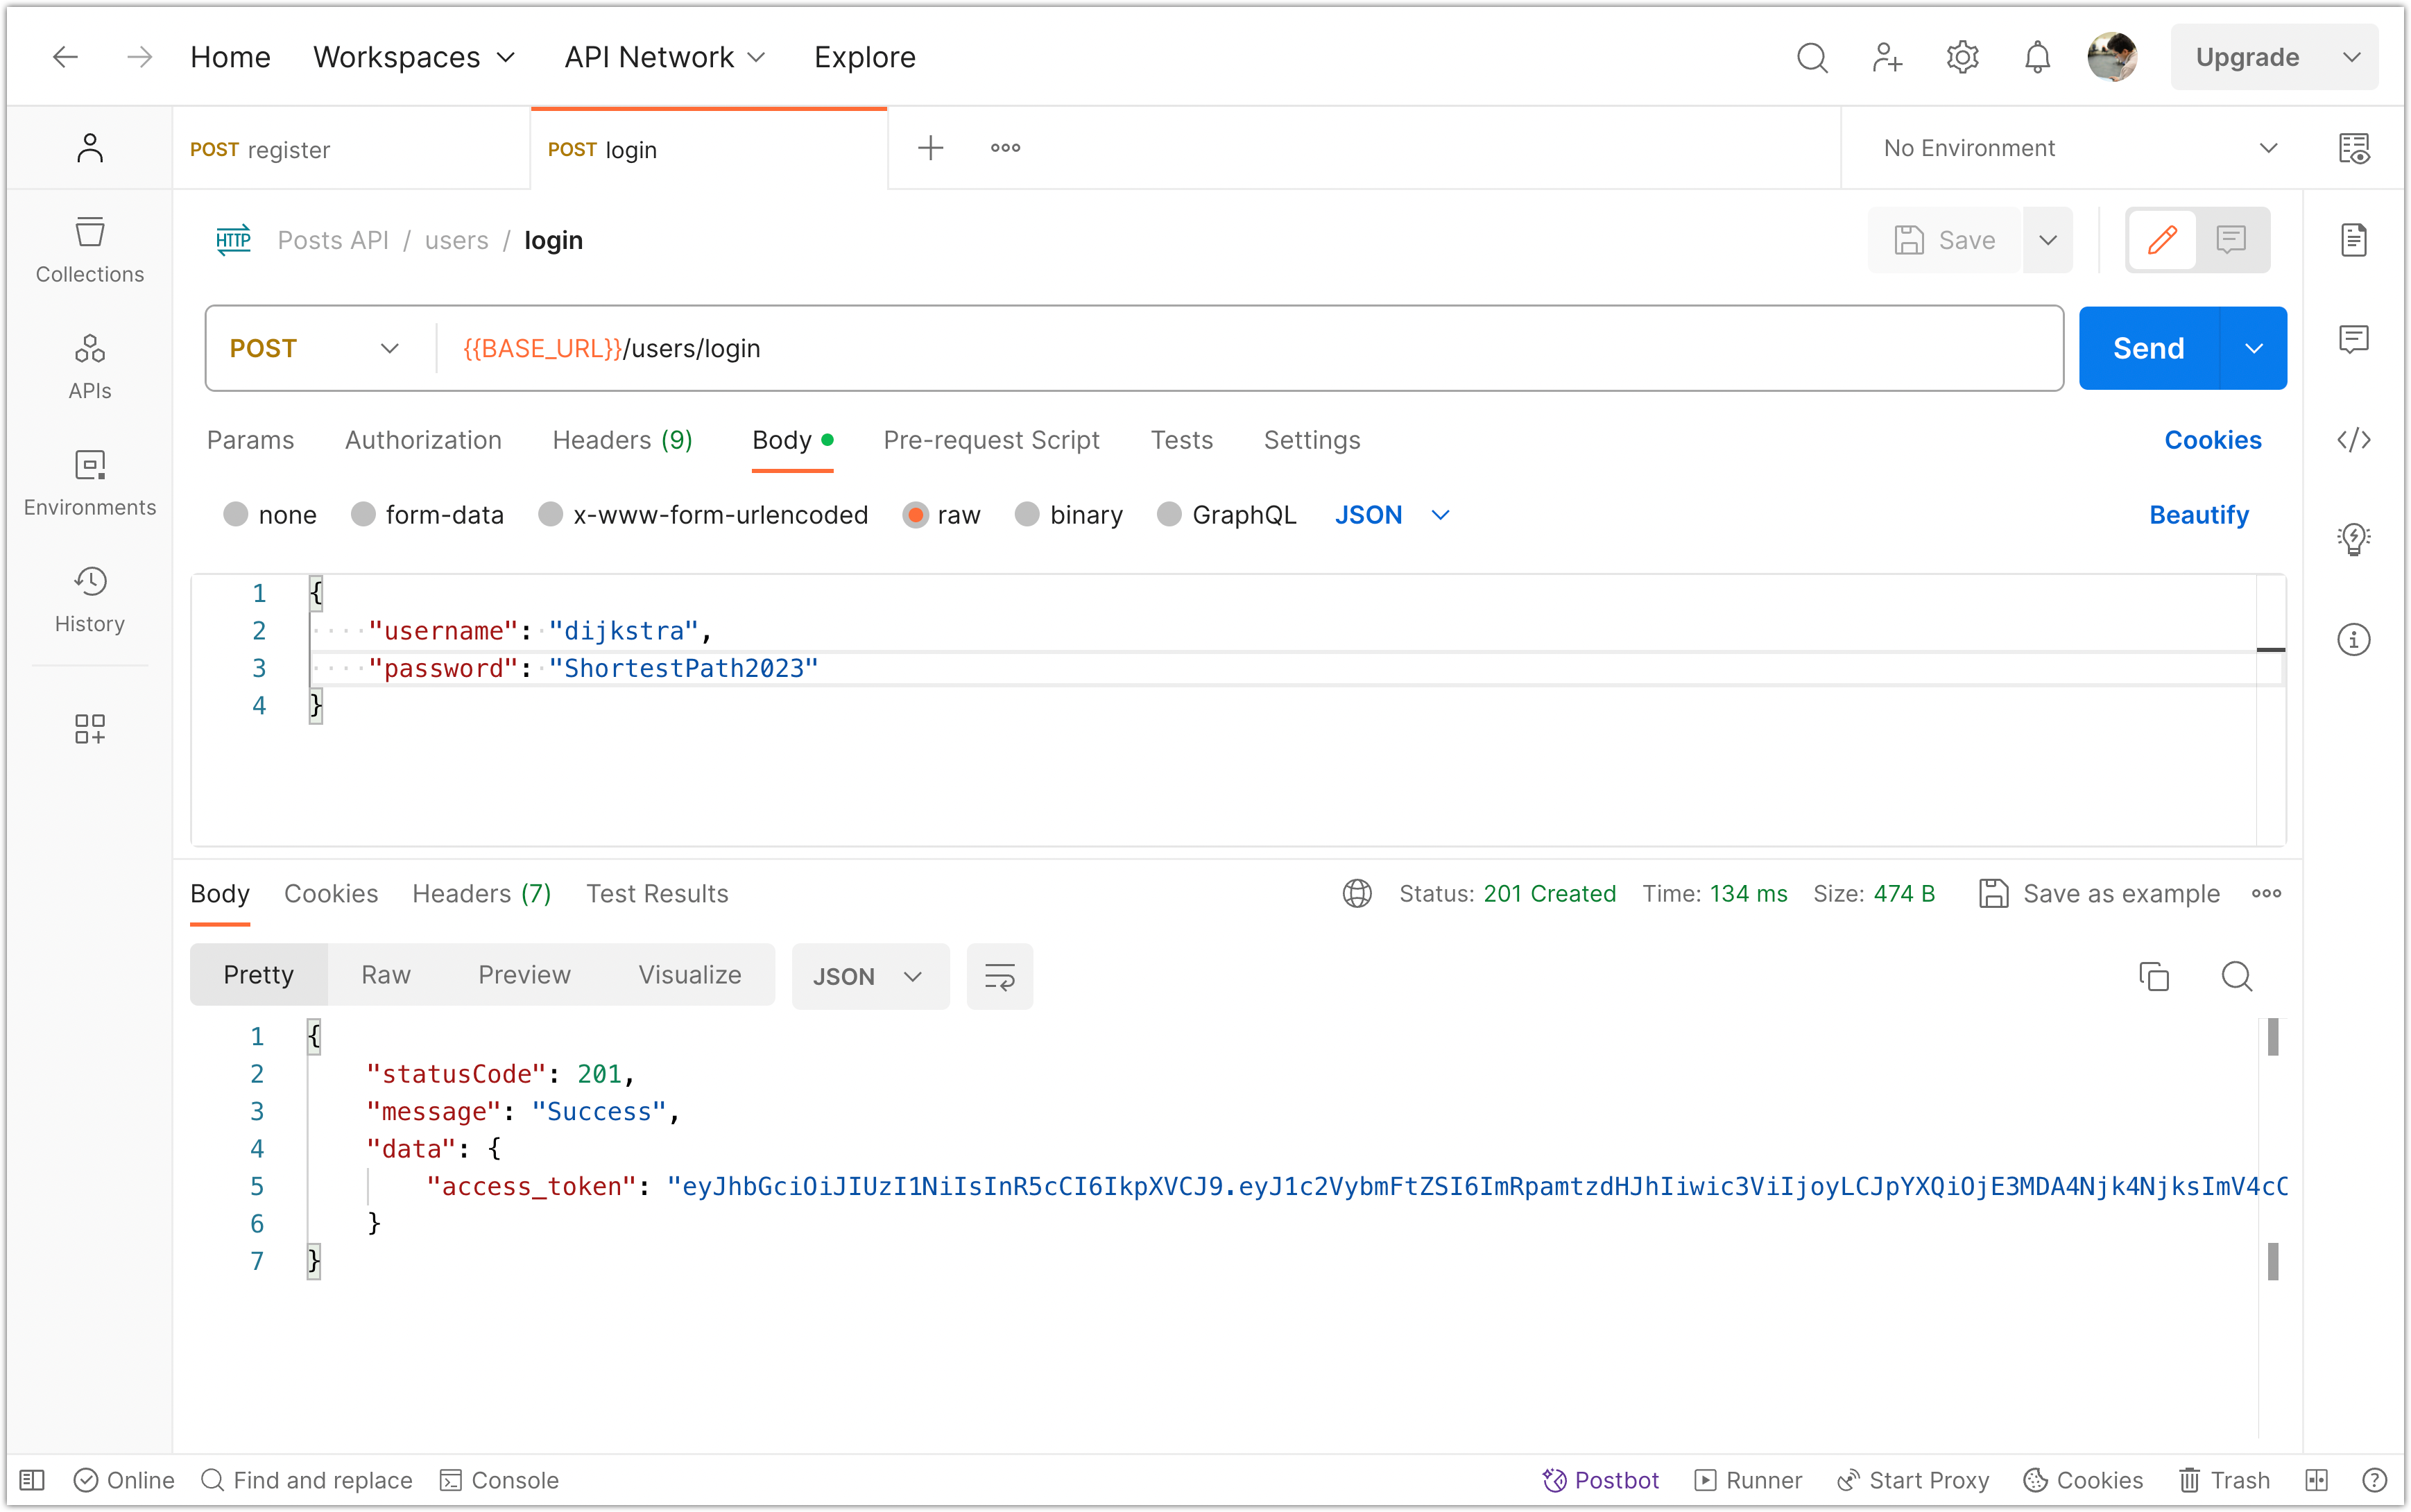
To test if the app is working, use Postman to log in with existing user credentials. Then, store the JWT (access_token) returned by the backend in a local storage variable (you have done this before with the AccuWeather API using an API Key).

Now, create a post and check if it works:
Use Postman to fetch the posts from the backend and make sure the new post is saved to the database:
Please commit your changes to version control:
git add .
git commit -m "Create Post on Frontend and Save it on Backend"
Step 8: Delete Post on Frontend and Backend
Let's update the deletePost operation in the app/src/lib/api.ts file:
// Delete post by id
export const deletePost = async (id: string): Promise<void> => {
  const token = getAuthenticatedUserToken();

  const API_URL = import.meta.env.VITE_API_URL;
  const response = await fetch(`${API_URL}/posts/${id}`, {
    method: "DELETE",
    headers: {
      Authorization: `Bearer ${token}`,
    },
  });
  const responseJson = await response.json();

  if (!response.ok) {
    throw new Error(
      `Error: ${response.status} - ${
        responseJson.message || response.statusText
      }`,
    );
  }
};
Now, update the deletePostById operation in the app/src/hooks/use-mutations-posts.tsx file:
const deletePostById = async (postId: string) => {
  try {
    await deletePost(postId);
    removePost(postId);
  } catch (error) {
    toast({
      variant: "destructive",
      title: "Failed to delete the post",
      description:
        (error as Error).message ||
        "There was an error deleting the post. Please try again later.",
    });
  }
};
And that should do it! Try deleting a post on the frontend to ensure that it works.
Use Postman to fetch the posts from the backend and make sure the deleted post is removed from the database:
Please commit your changes to version control:
git add .
git commit -m "Delete Post on Frontend and Backend"