Task 3: Linking JavaScript to HTML and Manipulating the DOM
In the previous task, we learned how to write JavaScript code and add it to an HTML page using the <script> tag. While this approach works for small scripts, it is not suitable for larger applications. In this section, we will learn how to link a separate JavaScript file to an HTML page.
Step 1: Linking a JavaScript File to an HTML File
Recall that in previous sections we had created a file named index.js in the root directory of our project. This file contains the JavaScript code to calculate sleep cycles:
const fallAsleepTime = new Date();
fallAsleepTime.setMinutes(fallAsleepTime.getMinutes() + 14);
console.log(
  "You will fall sleep at",
  fallAsleepTime.toLocaleTimeString("en-US", {
    timeStyle: "short",
  })
);

const wakeUpTime = new Date(fallAsleepTime);
const wakeUpTimes = [];
for (let i = 1; i <= 6; i++) {
  wakeUpTime.setMinutes(wakeUpTime.getMinutes() + 90);
  const wakeUpTimeString = wakeUpTime.toLocaleTimeString("en-US", {
    timeStyle: "short",
  });
  wakeUpTimes.push(wakeUpTimeString);
}

console.log("Wake-up times:", wakeUpTimes.join(", "));
Let’s simplify and wrap this code in a function called calcWakeUpTimes.
function calcWakeUpTimes() {
  const fallAsleepTime = new Date();
  fallAsleepTime.setMinutes(fallAsleepTime.getMinutes() + 14);

  const wakeUpTime = new Date(fallAsleepTime);
  const wakeUpTimes = [];
  for (let i = 1; i <= 6; i++) {
    wakeUpTime.setMinutes(wakeUpTime.getMinutes() + 90);
    const wakeUpTimeString = wakeUpTime.toLocaleTimeString("en-US", {
      timeStyle: "short",
    });
    wakeUpTimes.push(wakeUpTimeString);
  }

  console.log("Wake-up times:", wakeUpTimes.join(", "));
}

calcWakeUpTimes(); // call the function!
We will also create a global variable named calcBtn that references the #calc-btn button on the HTML page, similar to what we had done in the script tag in the previous section. Finally, we’ll assign the calcWakeUpTimes function to the onclick event of the calcBtn button. Here is the resulting code:
- calcWakeUpTimes();
+ const calcBtn = document.getElementById("calc-btn");
+ calcBtn.onclick = calcWakeUpTimes;
💡 Note the “diff snippet” above shows changes made to the code. The
-symbol indicates that a line was removed, while the+symbol indicates that a line was added.
In the example provided, the line calcWakeUpTimes(); was removed, and two lines were added: const calcBtn = document.getElementById("calc-btn"); and calcBtn.onclick = calcWakeUpTimes;. This means that the calcWakeUpTimes() function will no longer be called automatically, but will be executed when the calcBtn button is clicked.
To link the JavaScript file to the HTML file, we need to add a <script> tag to the HTML file's <head> or <body> section. This tag tells the browser to load the JavaScript file and execute its code.
Open the index.html file in VSCode and remove the JavaScript code from the <script> tag. Replace it with the following tag:
<script src="index.js"></script>
This tag tells the browser to load the index.js file from the same directory as the HTML file.
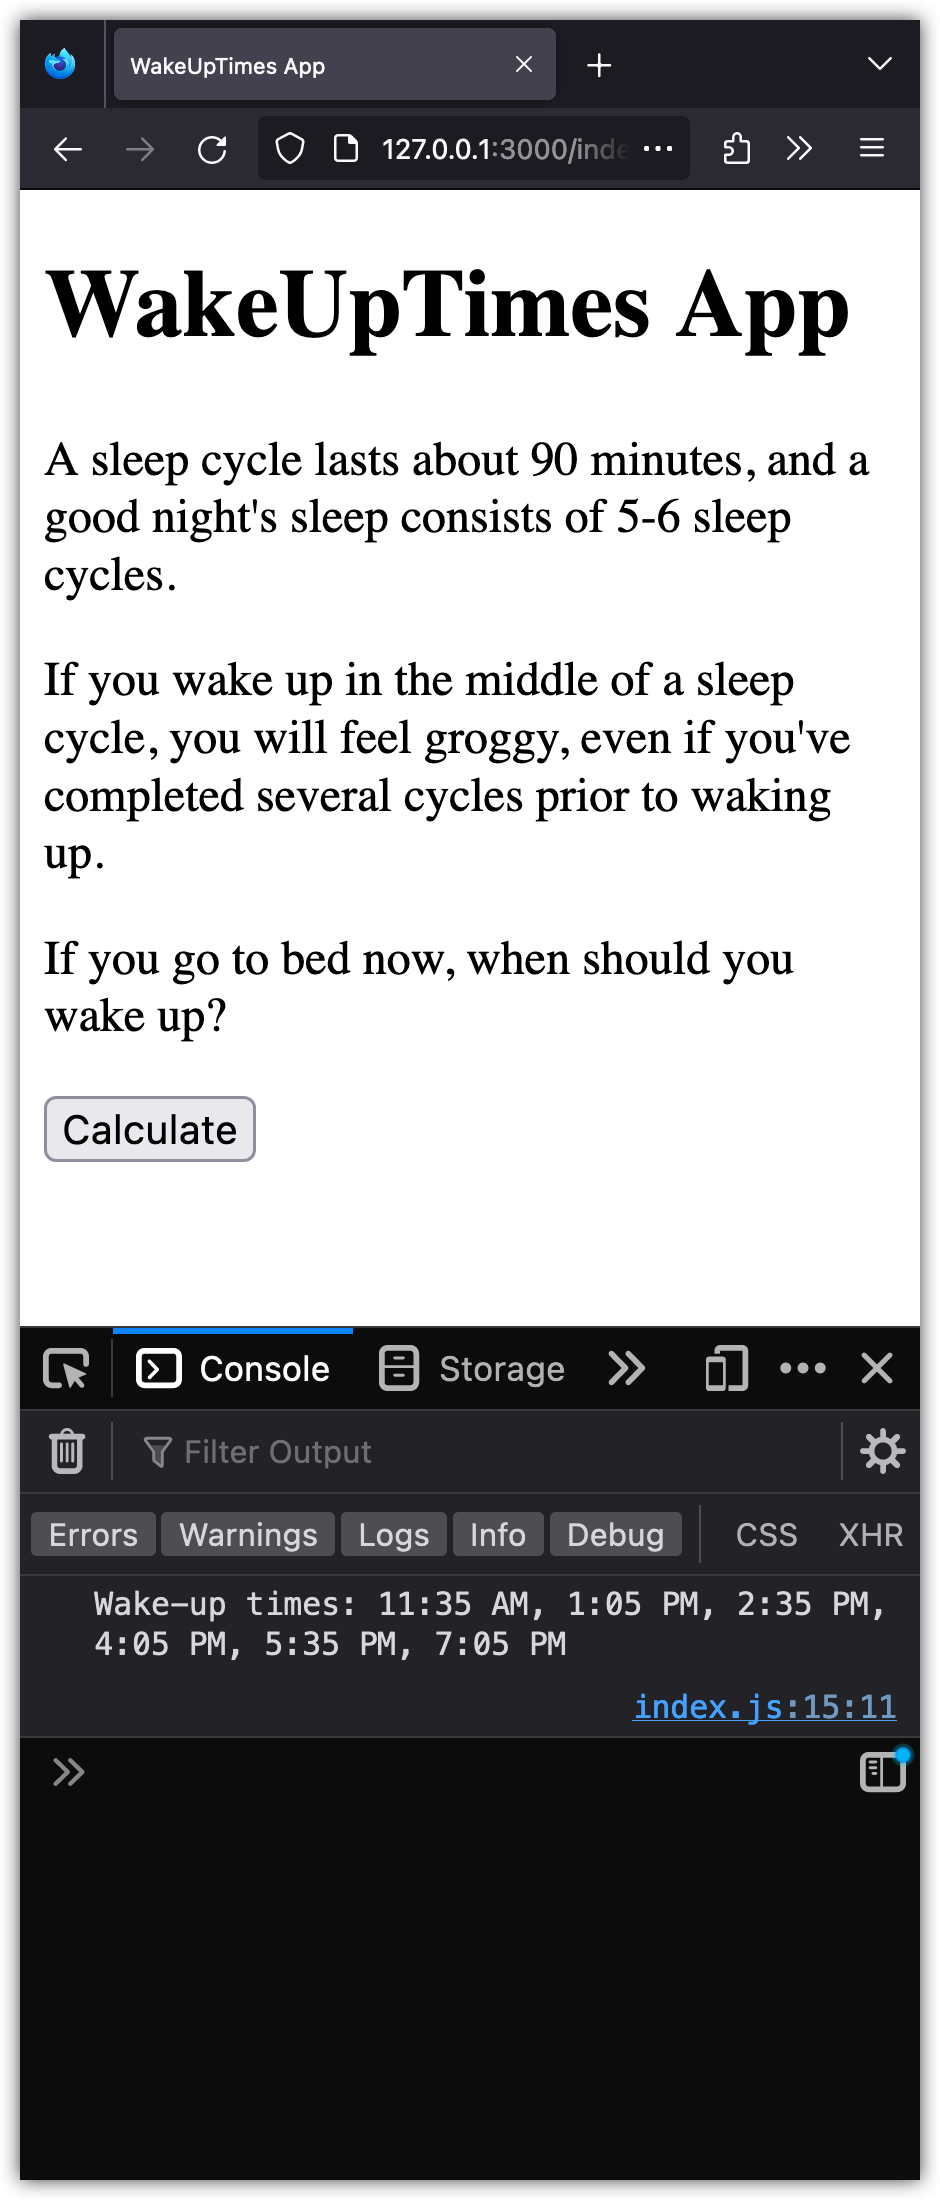
To test if our app works, open the index.html file in your web browser. Open the browser console and click the "Calculate" button. You should see the wake-up times appear in the console.
Congratulations! You have successfully linked a JavaScript file to an HTML file and executed its code. This approach allows us to write larger, more complex JavaScript applications and keep our code organized and modular.
Step 2: Use JavaScript for Manipulating the DOM
The Document Object Model (DOM) is a programming interface for web documents. It represents the structure of a document, such as HTML, in a tree format where each node is an object representing a part of the document. This model allows languages like JavaScript to change the document's structure, style, and content.
The document object, which we used in index.js to get hold of the #calc-btn, is an example of the DOM in JavaScript. In this section, we will use JavaScript to manipulate the DOM.
Let's update the index.html file first. We're adding a paragraph, several div elements, and another paragraph just after the button with id calc-btn and before the <script> tag. This is our target area for JavaScript to manipulate and update the sleep cycles dynamically.
<p>
  If you go to bed right now<sup>*</sup>, try to wake up at one of these times:
</p>
<div id="wakeup-hours-div" class="wakeup-hours">
  <div id="cycle-1" class="cycle">12:15 AM</div>
  <div id="cycle-2" class="cycle">1:45 AM</div>
  <div id="cycle-3" class="cycle">3:15 AM</div>
  <div id="cycle-4" class="cycle">4:45 AM</div>
  <div id="cycle-5" class="cycle">6:15 AM</div>
  <div id="cycle-6" class="cycle">7:45 AM</div>
</div>
<p>
  <sup>*</sup>It takes the average human fourteen minutes to fall asleep.
</p>
Note that in HTML, a div is a container element. It's used to group other HTML elements together and apply CSS styles to them or to manipulate them with JavaScript. div elements are block-level elements, meaning they take up the full width available and create a new line before and after the element.
Moreover, notice that in addition to id attributes, I have used class attributes on some of the elements. The class attribute is mostly used to point to a class in a style sheet (more on this later). However, it can also be used by JavaScript to access and manipulate DOM elements with the specific class name. The same class can be used multiple times in different elements.
Now, let's look at the JavaScript part. Here's the index.js file that calculates the sleep cycles and updates the webpage dynamically.
const wakeUpHoursDiv = document.getElementById("wakeup-hours-div");

function calcWakeUpTimes() {
  const fallAsleepTime = new Date();
  fallAsleepTime.setMinutes(fallAsleepTime.getMinutes() + 14);

  const wakeUpTime = new Date(fallAsleepTime);
  // const wakeUpTimes = [];
  wakeUpHoursDiv.innerHTML = "";
  for (let i = 1; i <= 6; i++) {
    wakeUpTime.setMinutes(wakeUpTime.getMinutes() + 90);
    const wakeUpTimeString = wakeUpTime.toLocaleTimeString("en-US", {
      timeStyle: "short",
    });
    // wakeUpTimes.push(wakeUpTimeString);
    const cycleDiv = document.createElement("div");
    cycleDiv.classList.add("cycle");
    cycleDiv.setAttribute("id", `cycle-${i}`);
    cycleDiv.textContent = wakeUpTimeString;
    wakeUpHoursDiv.appendChild(cycleDiv);
  }

  // console.log("Wake-up times:", wakeUpTimes.join(", "));
}

const calcBtn = document.getElementById("calc-btn");
calcBtn.onclick = calcWakeUpTimes;
Notice: To make it easier for you to track changes made, I’ve left some statements commented out. You can delete those.
The script above starts by getting a reference to the wakeup-hours-div. The calcWakeUpTimes function first calculates the time at which the user would fall asleep. Then, it empties the wakeup-hours-div and proceeds to calculate six sleep cycles. For each cycle, it creates a new div element, gives it the class cycle, sets its id to cycle-i, sets its content to the calculated wake-up time, and appends it to the wakeup-hours-div.
Open the index.html file in your browser and click on the "Calculate" button. The wake up times on the page should change as a result.
Congratulations! What we did above in JavaScript is known as DOM manipulation. We dynamically created HTML elements (divs), set their attributes, content, and appended them to a specific part of our webpage. This powerful capability is at the heart of many interactive web experiences.