Task 3: Build the Weather App
The next steps involve completing the placeholder functions in the starter code that will enable the user to make API calls and update the user interface.
Step 1: Clone the starter code
Clone the starter code:
git clone https://github.com/cs280fa23/weather-app -b starter
Notice the starter is a Vite app. You should install the dependencies by a pnpm install and then run the app in development by a pnpm dev command. Point your browser to http://localhost:5173/weather-app/:
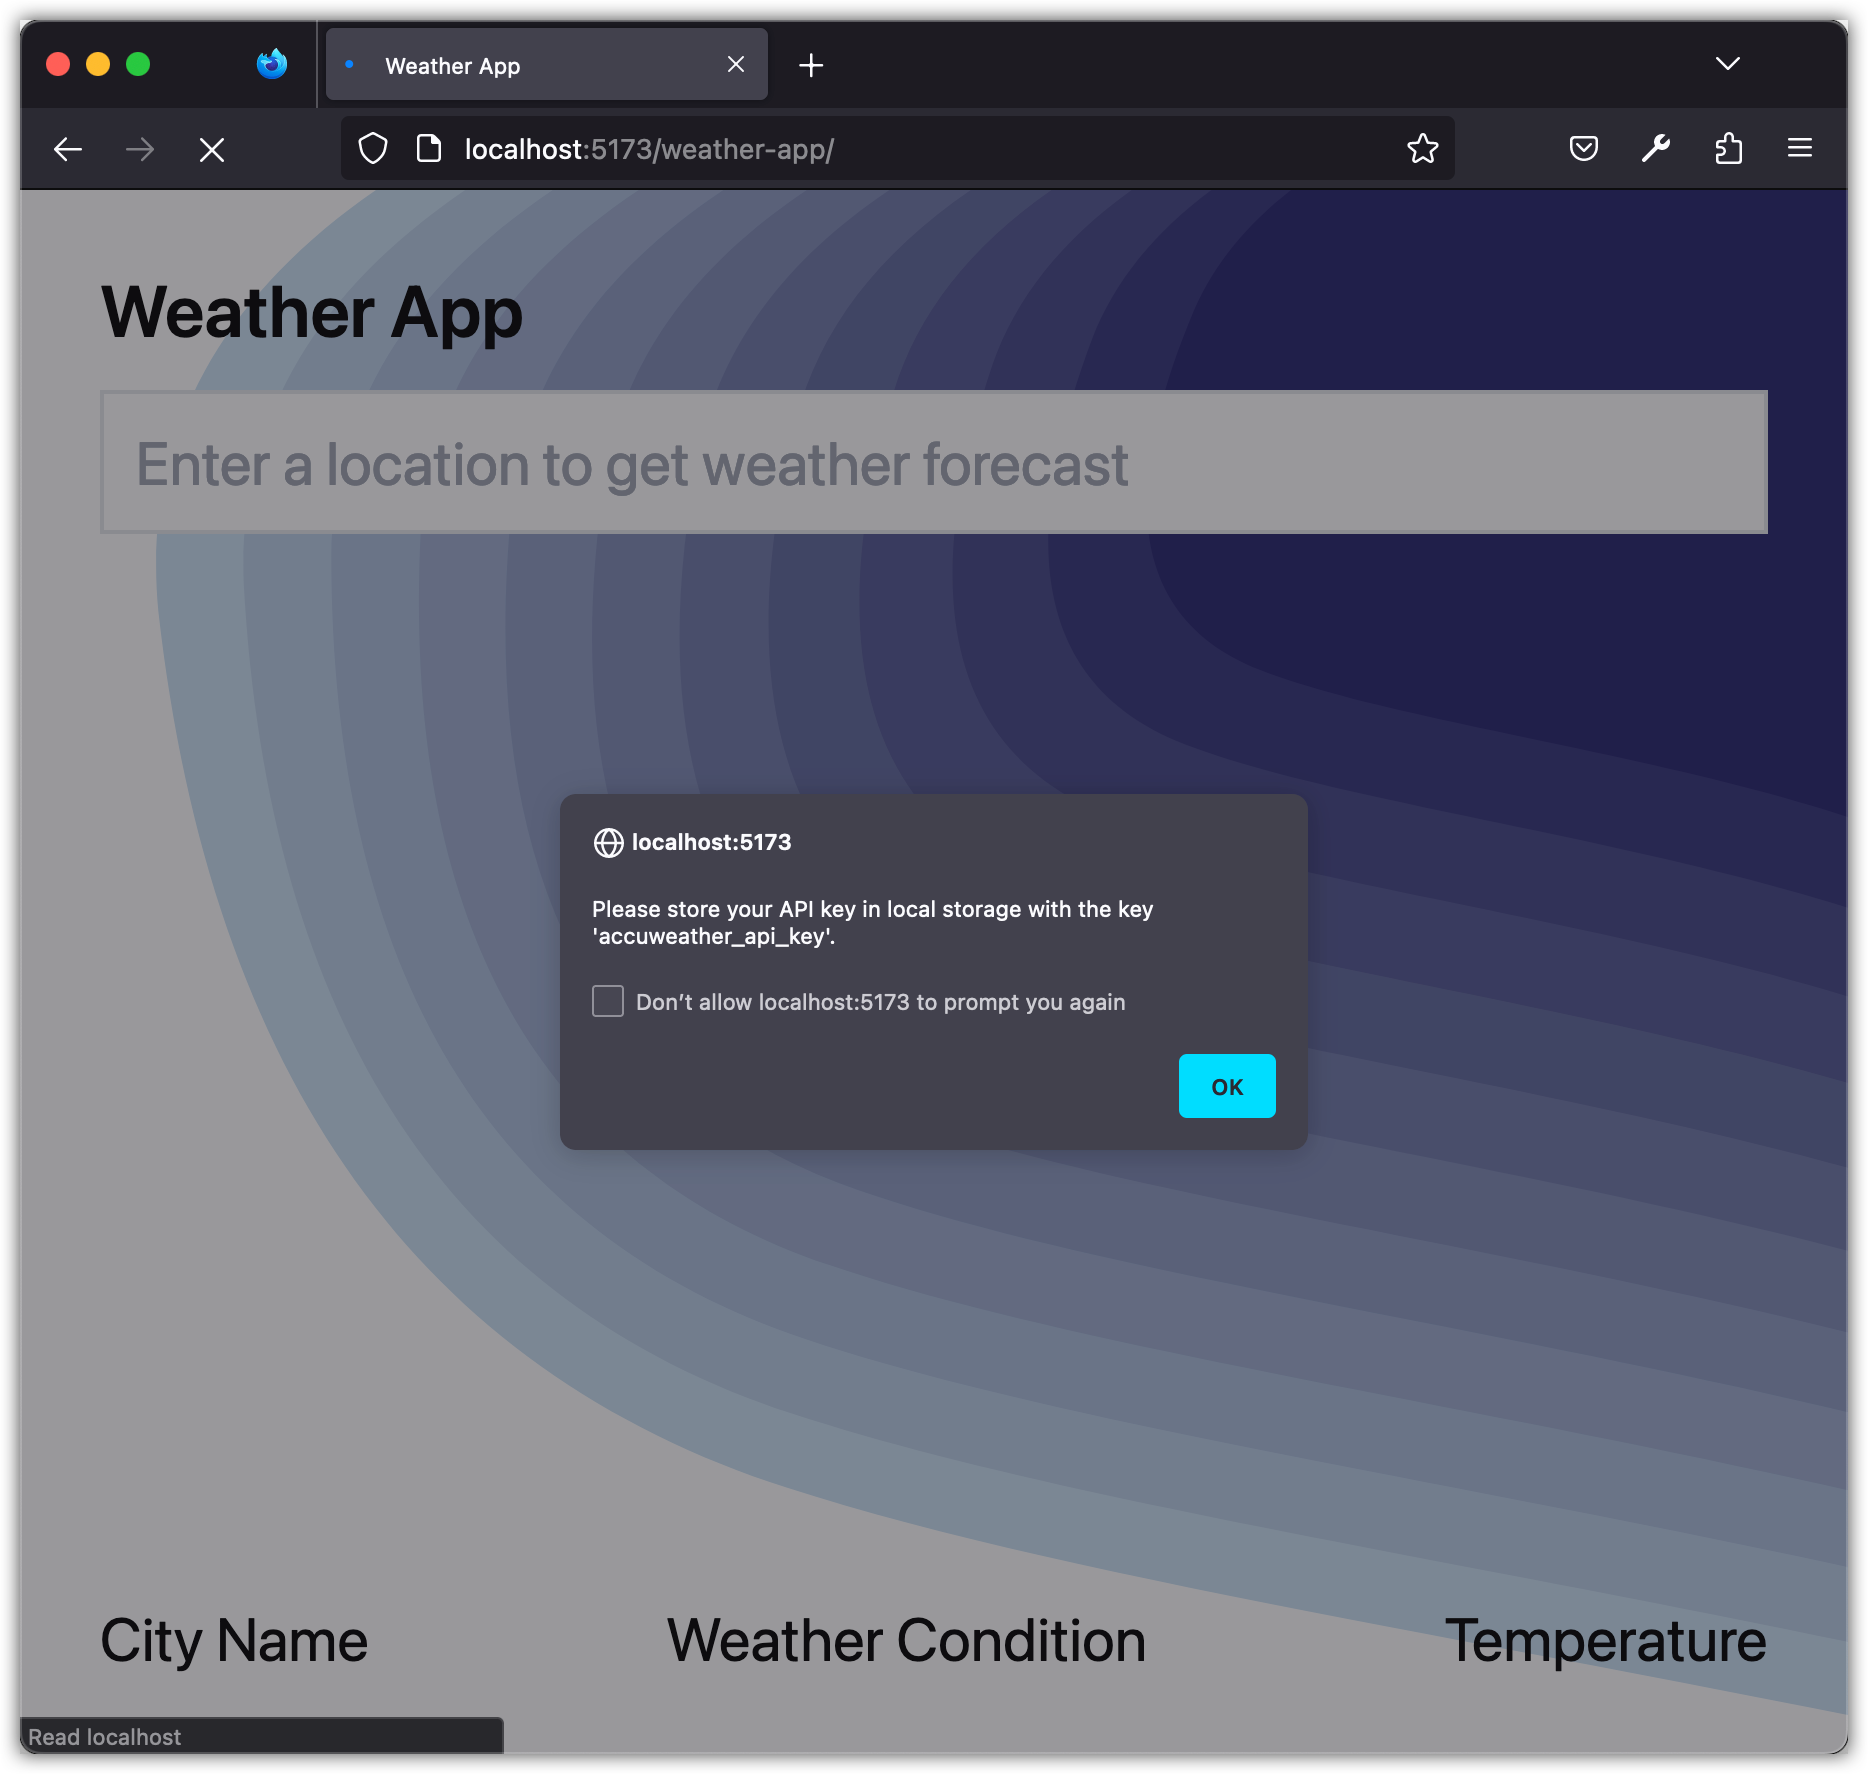
When you first run this weather application, the system will attempt to retrieve the AccuWeather API key from your browser's local storage. Local storage is a way for web applications to store key-value pairs in a web browser, allowing data to persist even after the browser tab has been closed.
If the application does not find an API key in local storage, you will be greeted with an alert window. This alert will instruct you to store your AccuWeather API key in local storage under the key 'accuweather_api_key'.
The reason we use local storage for the API key is to keep it secure and avoid hard-coding it directly into the JavaScript file. This practice ensures that the key remains private and is not exposed to anyone who might view the application's source code.
To store your API key in local storage and avoid seeing the alert in the future, you can use the following command in your browser's JavaScript console:
localStorage.setItem("accuweather_api_key", "YOUR_API_KEY");
Make sure to replace "YOUR_API_KEY" with your actual AccuWeather API key. After this step, you can refresh the application, and it should work seamlessly without showing the alert.
Remember: Treat your API key as a password. Do not share it with others, and avoid exposing it in public forums or repositories.
Step 2: Review Layout and Styling
As is customary in this course, the layout and styling have been provided. However, the app is not fully functional, as most of the required JavaScript code is missing.
Open the style.css file:
@import 'tailwindcss/base';
@import 'tailwindcss/components';
@import 'tailwindcss/utilities';

body {
  background: url(/background.svg) no-repeat center center fixed;
  -webkit-background-size: cover;
  -moz-background-size: cover;
  -o-background-size: cover;
  background-size: cover;
}
This minimal styling loads the background image (public/background.svg). The Gradient Topography image available at https://coolbackgrounds.io/ was downloaded and renamed as background.svg.
Open the index.html file and note the layout:
<div class="flex flex-col justify-between h-screen p-10 text-3xl">
  <header class="flex flex-col w-full gap-5">
    <h1 class="text-4xl font-semibold">Weather App</h1>
    <form id="search">
      <input
        id="city"
        name="city"
        class="w-full p-4 border-2"
        type="text"
        placeholder="Enter a location to get weather forecast"
      />
    </form>
  </header>
  <footer class="flex justify-between">
    <div id="name" class="">City Name</div>
    <div id="condition" class="">Weather Condition</div>
    <div id="temperature" class="">Temperature</div>
  </footer>
</div>
Step 3: Review starter code
Open the src/main.js file. Let's break down the starter code for our Weather App to understand its core components.
1. Imports and Constants:
import "../style.css";
This line imports the CSS styling for our web application, making it look aesthetically pleasing.
const BASE_URL = "https://dataservice.accuweather.com";
Here, we're defining a constant BASE_URL which is the base endpoint for all our AccuWeather API requests. It's the starting point to which we'll append specific paths for different data.
2. Retrieving the API Key:
let API_KEY = localStorage.getItem("accuweather_api_key");
We try to get the AccuWeather API key from the browser's local storage. If it's there, great! If not, the API_KEY will be null.
3. Checking the API Key:
if (!API_KEY) {
  alert(
    "Please store your API key in local storage with the key 'accuweather_api_key'.",
  );
} else {
  const search = document.getElementById("search");
  search.addEventListener("submit", getWeatherForecast);
}
If the API key is not found (!API_KEY), an alert is shown to the user to instruct them about storing their API key. If the key is present, an event listener is attached to the "search" form which listens for the "submit" event.
4. Handling Form Submission:
function getWeatherForecast(event) {
  event.preventDefault();
  const city = document.getElementById("city").value.trim();
  document.getElementById("city").value = "";
  getLocationKey(city);
}
When the form is submitted, this function is triggered. It prevents the default form submission action (which would reload the page) using event.preventDefault(). It then retrieves the entered city name, trims any whitespace, and calls the getLocationKey function with the city name.
5. Getting the Location Key:
function getLocationKey(city) {
  // TODO get the "location key" for the given `city`!
  //  then call getCurrentCondition to retrieve weather forecast for it!
  console.log(city);
}
This function is a placeholder for you to complete. You'll fetch the location key for the given city using the AccuWeather API. Once you retrieve the location key, you'll call the getCurrentCondition function.
6. Getting Current Weather Condition:
function getCurrentCondition(location) {
  // TODO get the "current condition" based on the `location` argument!
  //  then call updateUI to update the UI!
}
Another placeholder function. Here, you're expected to use the AccuWeather API again, but this time to get the current weather condition for the provided location. After getting the weather data, you'll call the updateUI function.
7. Updating the UI:
function updateUI(location, forecast) {
  // TODO update the following based on `location` and `forecast` arguments!
  document.getElementById("name").innerText = "City Name";
  document.getElementById("condition").innerText = "Weather Condition";
  document.getElementById("temperature").innerText = "Temperature";
}
The final placeholder function. Here, you'll take the provided location and forecast data and update the webpage's user interface to show the weather details for the selected city.
To summarize, this starter code provides the foundation for building a weather app using the AccuWeather API. Your task will be to complete the placeholder functions, making API calls and updating the UI accordingly.
Step 4: Implement getLocationKey
We need to implement getLocationKey and getCurrentCondition functions that call the AccuWeather API, similar to what we did in Postman. In JavaScript, we can use the Fetch Web API to make HTTP requests.
The Fetch API provides a JavaScript interface for making HTTP requests. The simplest syntax looks like this:
fetch('/some/api/endpoint/')
  .then(response => response.json())
  .then(data => console.log(data))
  .catch(err => console.log(err))
Calling fetch() returns a Promise. We can then “wait” for the promise to resolve. Once resolved, the response will be available within the promise's then() method. Using fetch() is an example of retrieving resources asynchronously across the network.
We will explore JavaScript's asynchronous behavior in the near future.
- Resources
- MDN web docs Fetch API.
- MDN web docs Using Fetch.
- Flavio's article on The Fetch API.
Open main.js and update the implementation of getLocationKey:
function getLocationKey(city) {
  fetch(`${BASE_URL}/locations/v1/cities/search?apikey=${API_KEY}&q=${city}`)
    .then(response => response.json())
    .then(data => {
      const location = data[0];
      console.log(location);
    })
    .catch(err => console.log(err));
}
This function makes an API request (HTTP GET request) using the fetch API.
The resulting data variable is an array of objects, where each object corresponds to a city or location that matched the city argument. For simplicity, we take the first location (i.e., data[0]) as our search result.
Try the application by entering Baltimore as the city.
Revisit the implementation of getLocationKey and change the console log statement to a function call to getCurrentCondition to set the scene for the next step.
-   console.log(location);
+   getCurrentCondition(location);
Step 5: Implement getCurrentCondition
Let's implement the getCurrentCondition function:
function getCurrentCondition(location) {
  fetch(`${BASE_URL}/currentconditions/v1/${location.Key}?apikey=${API_KEY}`)
    .then((response) => response.json())
    .then((data) => {
      const forecast = data[0];
      console.log(forecast);
    })
    .catch((err) => console.log(err));
}
The data variable will be an array that contains one object. That object includes the weather forecast for the given location.
Try the application by entering Baltimore as the city.
Revisit the implementation of getCurrentCondition and change the console log statement to a function call to updateUI to set the scene for the next step.
-   console.log(forecast);
+   updateUI(location, forecast);
Step 6: Implement updateUI
Let's update the updateUI function:
function updateUI(location, forecast) {
document.getElementById("name").innerText = location.LocalizedName;
document.getElementById("condition").innerText = forecast.WeatherText;
document.getElementById("temperature").innerHTML = `${forecast.Temperature.Imperial.Value} ℉`;
}
Notice the last line of code sets the inner html of an HTML element with the ID "temperature" to a string that includes the value of the temperature in Fahrenheit and the Fahrenheit symbol (°F). The temperature value is accessed from the Temperature object within the forecast object, and the Imperial.Value property specifies the temperature value in Fahrenheit. The ℉ is the HTML entity for the Fahrenheit symbol, which is added to the end of the string to indicate the unit of measurement.
Try the application by entering Baltimore as the city.